Showing posts with label meatless. Show all posts

Friday, April 18, 2014

Indian-Spiced Vegetables and Chickpeas with Raisins


I'm not really sure what made me save this e-mail from the Splendid Table, except I liked that it sounded easy yet exotic, and that I'm always looking for new meatless dishes. I wasn't expecting the sum of the dish to be so much more than its parts, however. It's a simple idea - just roasted veggies tossed with chickpeas, raisins, garam masala, lemon and some parsley. But wow, was it full of flavor!

As an added bonus, this dish makes cauliflower actually taste good, a feat I never suspected was possible (being a staunch cauliflower hater as a matter of course). I liked this dish so much, I am making it again in a few days.

Indian-Spiced Vegetables and Chickpeas with Raisins (Serves 4)
From Meatless All Day by Dina Cheney

28 ounces baby red potatoes, quartered
1/2 cup olive oil, divided
2 teaspoons coarse salt, divided
5 grinds black pepper
1 pound carrots, peeled and cut into 2- x 1/2-inch matchsticks
1 small head cauliflower, cut into 1-inch florets
1/2 cup raisins or currants
One 15-ounce can chickpeas, rinsed and drained
1/2 cup finely chopped fresh flat-leaf parsley or cilantro leaves
1 tablespoon fresh-squeezed, strained lemon juice
1 teaspoon garam masala (without salt)
About 2 cups plain yogurt, for serving

1. Place two oven racks in the top two-thirds of the oven. Place a rimmed baking sheet on the top rack and heat the oven to 400°F. Once the oven is hot, carefully remove the hot pan. Using tongs, toss the potatoes well with half of the oil, 1/2 teaspoon salt, and all of the pepper. Roast until the potatoes are tender and golden brown and crispy in many parts, about 50 minutes, tossing halfway through.

2. On another rimmed baking sheet, toss the carrots, 2 tablespoons oil, and 1/2 teaspoon salt; spread on one side of the pan and roast for 15 minutes (put this pan on the lower oven rack); remove the baking sheet from the oven and use a spatula to flip over the carrots. Onto the empty half of the baking sheet, use tongs to toss the cauliflower florets, the remaining 2 tablespoons oil, and 1/2 teaspoon salt. Keep the carrots and cauliflower separate as best as possible. Return the pan to the oven and roast the carrots and cauliflower until both are tender when poked with a fork and golden brown in a few spots, about another 20 minutes.

3. Meanwhile, place the raisins in a small bowl and cover with 1/2 cup of boiling or very hot water. Let sit until the raisins are tender, about 30 minutes, then drain.

4. Pour the potatoes, carrots, and cauliflower (with their oil) into a large bowl, then add the drained raisins, drained chickpeas, parsley, lemon juice, garam masala, and the remaining 1/2 teaspoon salt. Toss well with tongs. Divide among the serving plates and add a dollop of yogurt alongside each portion

Monday, February 11, 2013

Cuban Black Beans and Rice

When it comes to cheap meals, beans and rice is a favorite around here. We usually do a Cilantro-Lime Rice and Cafe Rio Black Beans, which are amazing by the way, but take a little bit more effort than my pregnant self was quite willing to muster up tonight.

For this Meatless Monday, I opted to try an easy-looking Cuban Black Beans with Rice. I was pleased to find that the recipe was not only quick (ready in about 30 minutes), but came out looking almost exactly like the picture. I used brown rice instead of white, and instead of radishes, I topped ours with a dollop of plain Greek yogurt. 

This meal was a good reminder to me that sometimes the simple things in life are the most satisfying. I want to be sure to remember this recipe the next time I'm in need of a dead simple and delicious dinner.

Cuban Black Beans and Rice

1  cup brown rice
1  tablespoon  olive oil
1  onion, chopped
1  bell pepper, cut into 1/4-inch pieces
2  cloves  garlic, chopped
kosher salt and black pepper
1  teaspoon  ground cumin
2  15.5-ounce  cans black beans, rinsed
1  teaspoon  dried oregano
1  tablespoon  red wine vinegar
4  radishes, cut into 1/2-inch pieces (I used a dollop of plain Greek yogurt as a garnish)
1/4  cup  fresh cilantro 

Directions

Cook the rice according to the package directions.

Meanwhile, heat the oil in a saucepan over medium-high heat. Add the onion, bell pepper, garlic, 1 teaspoon salt, and ¼ teaspoon pepper and cook, stirring occasionally, until softened, 5 to 7 minutes.

Stir in the cumin and cook for 1 minute. Add the beans, oregano, and 1 cup water. Simmer, covered, for 10 minutes.

Add the vinegar. Smash some of the beans with a potato masher to thicken. Serve over the rice. Top with the radishes and cilantro. Makes 4 servings.

Thursday, August 9, 2012

The Best Black Bean Tacos

Summer is starting to reward us with wonderful things. Like a variety of tomatoes:


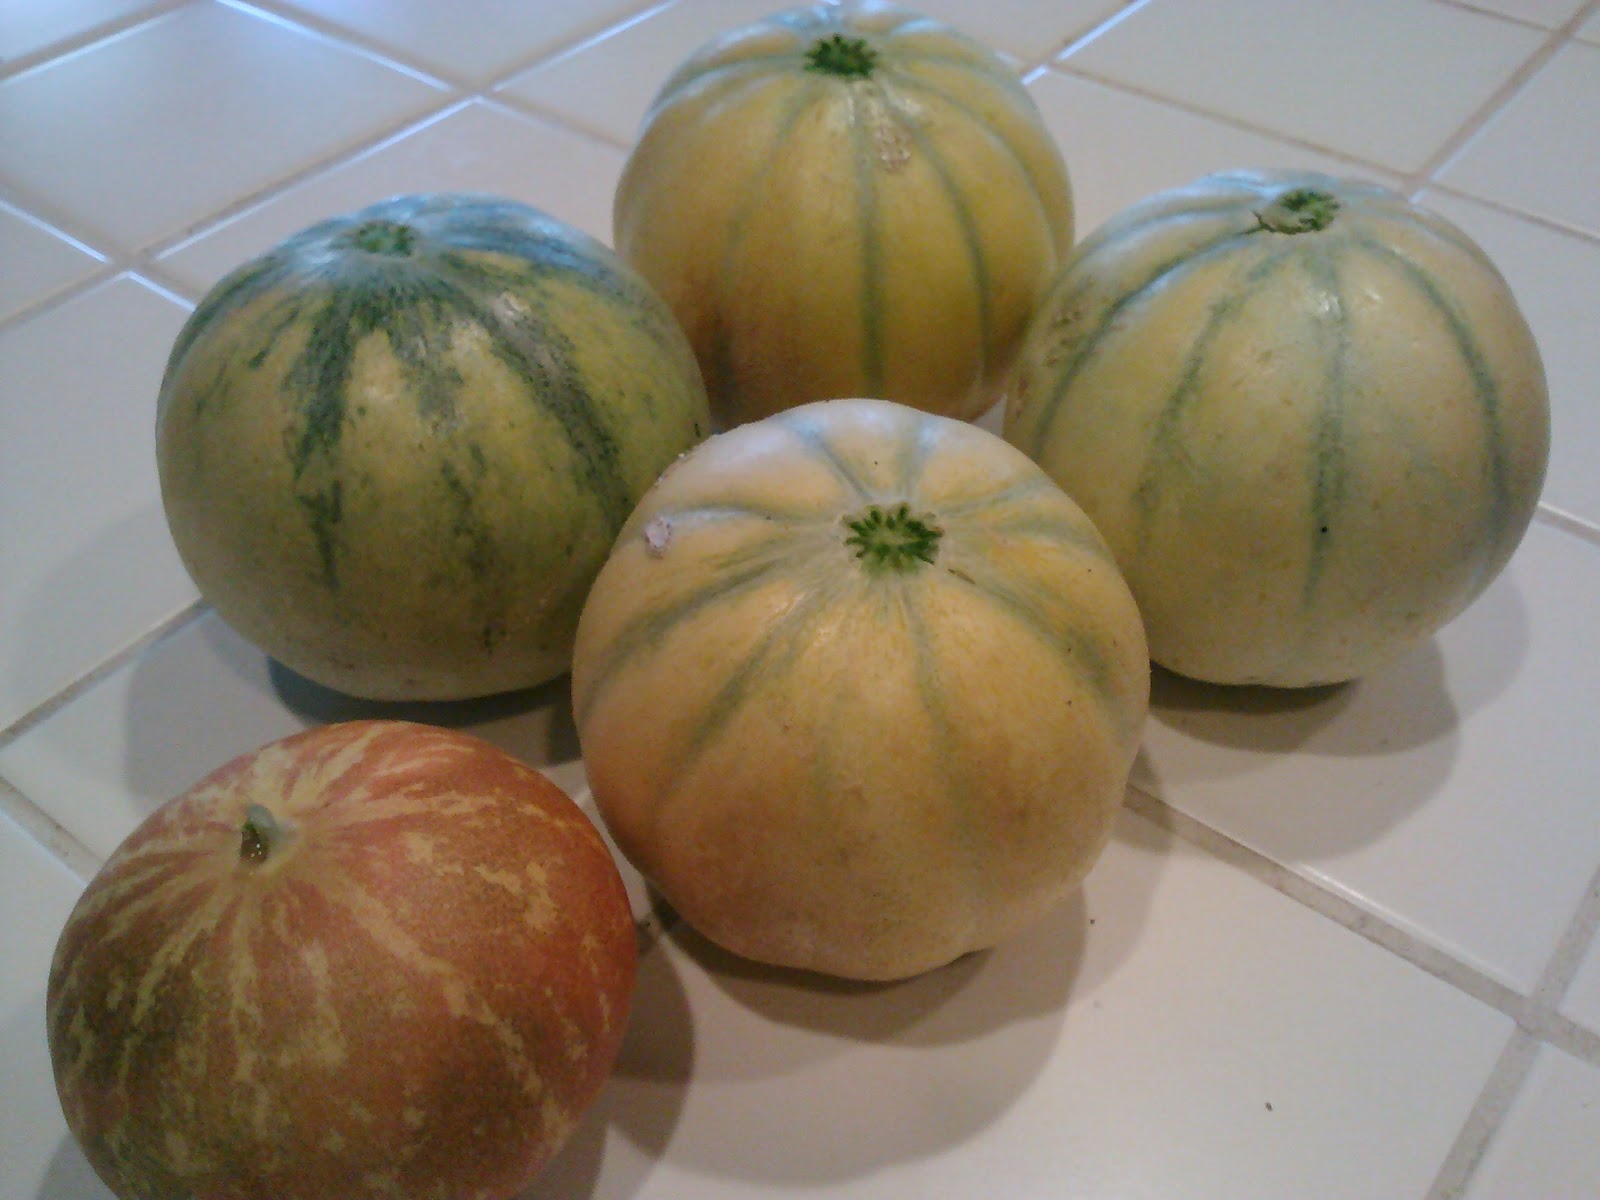
And melons, yes, melons! Tiger and Charentais, to be exact:


And finally, a wonderful recipe that I got from the book The Family Dinner: Great Ways to Connect with your Kids One Meal at a Time. While I don't have kids myself yet, I love the idea of meals as a form of community. This book had lots of environmentally-friendly, fuss-free recipe ideas as well.

Always on the lookout for new ways to go meatless, I knew I needed to make "Gary's T-Night Tacos", a dish one dad makes every Tuesday for his family. (I am also kind of fascinated by the idea of always eating the same meal on a certain night of the week. It wasn't a tradition in my own family, but it sounds like it could be a lifesaver for busy moms.)

I just LOVED the straight-forward black bean filling, which was quick to make, slightly sweet, but savory at the same time. I couldn't get enough for it, and counted down the minutes till lunch the next day when I could re-heat the leftovers and enjoy them all over again. Bless you Gary, whoever and wherever you are!

Gary’s T-Night Tacos
From The Family Night Dinner

For the Tacos:
Canola oil
2 medium onions, coarsely chopped
2 15-ounce cans of black beans, lightly drained (or 4 1/2 cups home-cooked beans)
2 tablespoons chili powder
2 tablespoons cumin
1 tablespoon tamari soy sauce
2 tablespoons maple syrup
12 corn tortillas

For the Toppings:
1 1/2 cups cheese
1 cup sour cream or Greek yogurt
Chopped avocado
Chopped tomatoes
Chopped lettuce
Salsa

TO MAKE 12 TACOS
Heat a large nonstick pan over medium-high heat and drizzle the bottom with canola oil. Sauté the onions until they start to soften, then add the beans, spices, tamari, and maple syrup. Reduce the heat to medium low and let everything gently cook for 10 minutes.

Meanwhile, wrap the tortillas in foil and warm for 10 minutes in a 250-degree oven.

Serve the tortillas with bowls of beans and toppings on the side.

Thursday, April 12, 2012

Mexican Tortilla Casserole


I made this Mexican Tortilla Casserole last night, thanks to my weekly recipe e-mail from The Splendid Table. It was easy to make, flexible, delicious, filling, good enough for company and simple enough for a Monday night supper. What made me love it even more was the fact that it was extremely economical and meatless to boot. When you find a recipe that has it all, it's only nice to share.


I didn't find the dish to be a typical casserole; it reminded me more of enchiladas, with the layers of tortilla, cheese, veggies, beans and tomato sauce. I made mine in a springform pan. I served wedges of this "Mexican Pie" ( a better name, I thought) with tomato salsa and sour cream, and the three males for whom I was cooking absolutely loved it. Their hearty appetites wiped away any hope of leftovers I may have had while preparing this dish, but I felt grateful that they enjoyed it so much, and complimented by the empty dish.

Mexican Tortilla CasseroleFrom The Mom 100 Cookbook: 100 Recipes Every Mom Needs in Her Back Pocket by Katie Workman; Serves 4 to 6

"Essentially a lasagna with tortillas standing in for noodles, this is one of those dishes that can miraculously be on the table in short order, made from things you most likely have in your pantry and fridge. If you don't like, or you don't have, one of the ingredients, skip it. Or, if you have something else that you think might be appealing all layered in (like slivered bell peppers to sauté with the onions, kale, chopped, cooked broccoli -- whatever the people in your home will eat), then fling it on in."

Nonstick cooking spray
1 tablespoon olive, vegetable, or canola oil
1 onion, chopped
1 teaspoon ground cumin
1-1/2 teaspoons chili powder
1 teaspoon minced garlic
1 can (14 ounces) chopped tomatoes, drained, with 1/3 cup juice reserved
1/4 cup tomato paste
2 cans (15.5 ounces each) white, black, or kidney beans (or a mixture of any two), rinsed and drained
Kosher or coarse salt and freshly ground black pepper
1 can (15 ounces) sweet corn kernels, drained, or 1-1/2 cups frozen corn, thawed
3 cups coarsely chopped spinach
4 medium-size (8-inch) flour tortillas
2 cups (8 ounces) shredded Monterey Jack or cheddar cheese
Chopped fresh cilantro (optional), for garnish
Sour cream (optional), for serving
Salsa (optional), for serving

1. Preheat the oven to 400F. Spray a 9-inch round cake pan, springform pan, or baking dish with nonstick cooking spray.

2. Heat the oil in a large skillet over medium heat. Add the onion, cumin, chili powder, and garlic and cook until you can smell the spices and the onion is softened, about 3 minutes. Stir in the tomatoes with the 1/3 cup of reserved juice and the tomato paste, then stir in the beans. Season with salt and pepper to taste. Let the bean mixture simmer until everything is hot, about 3 minutes. Add the corn and spinach and stir until the spinach has wilted and everything is well blended and hot, about 3 minutes. Taste for seasoning, adding more salt and/or pepper as necessary.

3. Place 1 tortilla in the prepared cake pan. Spread one fourth of the bean and vegetable mixture evenly over the tortilla, then sprinkle 1/2 cup of the shredded cheese evenly over the top. Repeat with 3 more layers, ending with the last quarter of the bean mixture and then the last 1/2 cup of shredded cheese.

4. Bake the tortilla casserole until it is hot throughout and the top is lightly browned, about 20 minutes. Let the casserole sit for about 5 minutes, then cut it into wedges using a sharp knife and serve it with a spatula or better yet a pie server. Sprinkle the top with cilantro, if desired, and serve with sour cream and/or salsa on the side, if you like.

Cooking Tip: You can make the tortilla casserole a day ahead of time, cover it with plastic wrap or aluminum foil, and put it in the fridge overnight; just take it out and let it sit at room temperature for about 20 minutes while the oven preheats to 400F. Bake the casserole uncovered. You can also reheat the cooked casserole at 350F for 15 to 20 minutes, until warm.

Tuesday, March 20, 2012

The Flavors of Asia Cooking Class

Mai Pham with her cooking assistant, shown
behind her cookbook and signature sauces


I joined the Sacramento Natural Foods Co-op this year, after admiring from afar for a long time and even taking a few outstanding classes there in the past. (Like this one on Pie Making, and another on Raised Bed Gardening.)

This week I got to attend a cooking class on the Flavors of Asia taught by Mai Pham, an expert in Vietnamese and Thai cuisine. Mai teaches at the Culinary Institute of America in Napa, owns many restaurants all over the country, has published a cookbook, makes her own line of sauces, and is a bit of a local celebrity. She has been on Martha Stewart and kicked off her class by showing us a segment she did on the Food Network to give us a feel for the cuisine of Southeast Asia.

Mai was very professional and pleasant, and even brought her 86-year-old, very spry-looking father to the class with her. Her grandmother, she confided, lived to be 105 years old and credited her longevity to a vegetarian diet and lots of coconut milk, which the Vietnamese associate with high immunity levels.

Mai also stressed the importance of moderation in all things, confessing that she has to work hard to keep balanced. For example, if she wants to eat ice cream for dessert, her family will eat a simple, light dinner such as stir-fried vegetables and brown rice before indulging.

Mai demonstrated and let us sample several dishes during the course of the class, as well as teaching some basic techniques like assembling and rolling salad rolls, and cutting herbs and vegetables gently to avoid bruising. She showed us how to make:

* Salad Rolls with Shrimp and Pork, with a Peanut Hoisin Sauce

* Yellow Curry with Tofu and Eggplant

* Singapore Noodles Topped with Stir-Fried Asian Greens

* Caramel Pork with Egg and Daikon

My favorite dishes were the Yellow Curry and Singapore Noodles, but I enjoyed them all. Before heading home, I hopped around the corner to the Co-Op to pick up a jar of Lemongrass Kitchen brand Yellow Curry Sauce, a concentrated base which makes 3-4 batches of curry. I can't wait to try my hand at this at home!

Here is Mai Pham's recipe for the Yellow Curry with Tofu and Eggplant. It's crazy good; I've never liked a vegetarian curry so much! It also taught me one thing I've done wrong in the past - adding raw vegetables to my curry has added too much water and diluted the flavor, so that I never felt that my curries at home matched up with the restaurant versions. Blanching the vegetables ahead of time solves this problem. Also, she explained that frying the tofu ahead of time so that it gets a "skin" allows it to absorb sauces better. This recipe would be perfect for summertime, when eggplant, tomatoes, green beans and zucchini are all in season.

1/4 c. Lemongrass Kitchen Thai Yellow Curry Sauce
1.5 c. coconut milk
1/2 lb. firm tofu, pan-seared or lightly fried, cut into 2/3x2"x1/12" pieces
2 c. eggplant, Japanese preferably, halved lengthwise then cut into 1/2 " half moon pieces
3 Roma tomatoes, cut into 8 wedges
1/2 c. green beans, 1" lengths, blanched
1/2 c. zucchini, bite sized pieces, blanched
2 tsp. Thai chilies, cut on the diagonal into thin slices (optional)
1/2 c. frozen peas
10 Thai basil leaves (optional)

1. In a saucepan, combine LGK Thai Curry Sauce Concentrate with coconut milk and cook over medium heat until mixture comes to a low boil.
2. Add tofu, eggplant and tomatoes and cook for 5 minutes.
3. Add remaining ingredients and simmer until all vegetables start to soften, another 2-3 minutes.

Tuesday, December 6, 2011

Vegetable Korma


I follow the Meatless Monday campaign on Facebook, and this week they posted a question that got me thinking. "What's your favorite meatless comfort food?" My first thought was homemade macaroni and cheese... and then I couldn't think of another one!

Later, it struck me that a good Indian vegetable curry is right up there for me. The whole experience is pleasurable, from the sizzling onion/ginger/garlic triumvirate at the start, then roasting the spices until they reach the peak of their fragrance, and at last sitting down to a steaming bowl of creamy, spicy sauced vegetables over basmati rice.

I altered this great recipe for Vegetable Korma (originally from allrecipes.com) by adding chickpeas, substituting half-and-half for the cream, and omitting the ground cashews. (Where am I going to get ground cashews? I don't have a spice grinder or food processor, so I can't really grind them myself. ) Also, I'm a big fan of blooming the spices before adding the liquid ingredients; I think it really brings out those flavors.

So here it is, my meatless comfort food for these cold nights we're having. Who says food can't be comforting and good for you at the same time?

Vegetable Korma
Adapted from Allrecipes.com

1 T. olive oil
1 small onion, diced
1 tsp. minced fresh ginger
4 cloves garlic
minced2 potatoes, cut into small cubes
4 carrots, cubed
1/4 tsp. red pepper flakes
1 (8 oz) can tomato sauce
1 1/2 tsp. salt
1 1/2 T. curry powder
1 c. frozen green peas
1 can chickpeas, rinsed and drained
1/2 red AND green bell pepper, cubed
1 c. half-and-half
1 bunch fresh cilantro, chopped

Heat the oil in a skillet over medium heat. Stir in the onion and cook until tender. Add the ginger, garlic, curry powder and salt, and cook about 1 minute. Now add your potatoes, carrots, red pepper flakes and tomato sauce. Cook and stir for 10 minutes, or until potatoes are tender.
Stir in your frozen peas, chickpeas, bell peppers, half and half, and a handful of chopped cilantro. Reduce heat to low, cover, and simmer for 10-20 minutes, or until all vegetables are tender. Garnish with more cilantro and serve over brown basmati rice. Makes 6-8 servings.

Sunday, October 9, 2011

Pan-Fried Butternut Squash, Fried Sage and Pine Nuts

There's a slight chill in the morning air. Autumn has finally arrived in Northern California, bringing high temperatures of 70's to 80's. Suddenly I find myself craving kale and butternut squash, soups and stews.

I bought a butternut squash at a farmer's market this week, because it simply seemed like the thing to do. As I contemplated the possibilities, I decided I wanted something heartier than butternut squash soup, although I also have a good recipe for that classic autumn dish as well.
I thought of one of my favorite dishes at a certain Italian restaurant, a tender ravioli filled with butternut squash in a creamy sauce with fried sage.

Not being ambitious enough to hand roll my own pasta, I settled upon a recipe that used farfalle but the same classic flavors of squash and sage, along with pine nuts for a crunch. We used sage from our yard, which is happily thriving now that it can sink its roots into actual earth, and two small Walla Walla onions still hanging in there from the garden.

The final product was addictive - sweet, salty, herbaceous, it had all of my favorite elements from the more complicated ravioli dish, but with a fraction of the effort. I declare it the perfect hearty supper for a cool fall night.

Pasta Pan-Fried with Butternut Squash, Fried Sage, and Pine Nuts

From The Kitchn

1 medium butternut squash
1 small sweet onion, peeled and diced
3 cloves garlic, minced
Olive oil
Salt and pepper
1/2 cup fresh sage leaves
1 pound farfalle pasta
3/4 cup pine nuts, toasted
4 ounces high quality Parmesan, shredded or shaved (about a cup total)

Heat the oven to 375°. Cut the butternut squash in half and scoop out the strings and seeds the middle cavity. Flip the squash halves upside down and peel them. (Note: The raw squash rind can irritate your hands. If they start to itch or tingle, wear gloves.) Cut the squash into 1-inch cubes. Toss with the onion, garlic, a drizzle of olive oil and salt and pepper. Mince about half of the fresh sage leaves and also toss with the squash.

Spread the squash mixture in a thin layer on a large baking sheet and roast for about 40 minutes or until the squash is soft.

Heat salted pasta water to boiling and cook the farfalle until al dente. Drain and set aside. As the squash finishes roasting, heat about two tablespoons of olive oil in a large high-sided sauté pan. The oil is ready when it pops and sputters. (Don't let it start smoking.) Drop in the rest of the sage leaves and fry for about a minute, or until they begin to just shrivel up.

Remove with a slotted spoon and salt lightly. Crush with the back of a spoon. Add half the pasta to the pan, along with half the roasted squash mixture. Crumble in half the sage. Cook, stirring frequently, for five minutes or until the pasta is heated through and getting crispy on some of the edges. Add the pine nuts and cook for another minute. Stir in half the cheese and serve. Serves 4 generously.

(Repeat the last step with the rest of the ingredients. We split it into two because none of our pans are big enough to accommodate the entire recipe. It's very important that you not crowd the pan too much - you want the pasta to really pan-fry, not just steam up.)

Thursday, August 18, 2011

My First Slow Food Book Club Meeting

How do you feel about the idea of doing something that scares you in order to promote personal growth? I kind of hate that concept... But sometimes I'm glad I did the scary thing afterwards. This week, I did something that was scary to me, or at least intimidating. Pushing aside memories of being painfully shy and introverted and inarticulate, I went to a Slow Food Book Club meeting.

This was my first time ever going to a Slow Food event, or participating in a book club. The meeting was held in a 101-year-old home in downtown Sacramento, where our host for the evening lives. She owns 3000+ cookbooks and was incredibly gracious and knowledgeable about all things culinary.

This meeting was a potluck, and the food was something to behold. With all the foodies in attendance, perhaps this was to be expected, but it surpassed my expectations. Quinoa and Caprese salads, pizza with homegrown tomatoes, a fantastic cheese platter with chutney and crackers, and a Smitten Kitchen recipe for blondies were some of the dreamy offerings.


The book we discussed (which is being held up in the picture above) was written by local Davis dweller Spring Warren, who pledges to grow her own food for a year and make her diet 75% homegrown. The title is Quarter Acre Farm: How I Kept the Patio, Lost the Lawn, and Fed My Family For a Year, and it was a highly enjoyable read: funny, entertaining, informative, and never condescending to the rest of us humble folk who only dabble in gardening. There are also plenty of tasty sounding recipes.

Before going to the book club, I was afraid that others might show up with home-cured wild boar sausage and scoff at me for buying my orzo pasta at a grocery store instead of making it from scratch. In truth, all of the Slow Food friends I met were very down to earth, incredibly generous, and delightfully passionate about good food and restoring our connection to the food chain. And that's something I can absolutely get behind.

Here's the recipe for the dish I made, pictured in the bottom left corner of the photo above. It's a unique, easy-to-make alternative to a pasta salad, and perfect for bringing to a potluck or picnic. I used green onions from the garden, cut out the capers (it's plenty salty already with the kalamata olives), and used sun-dried tomato feta. Here's to doing something scary and being pleasantly surprised.

Orzo Salad with Feta, Olives and Bell Peppers
From Epicurious

12 ounces orzo (rice-shaped pasta)
2 tablespoons plus 1/2 cup olive oil
1 1/2 cups crumbled seasoned feta cheese (such as basil and tomato; about 6 ounces)
1 cup chopped red bell pepper
1 cup chopped yellow bell pepper
3/4 cup pitted Kalamata olives
4 green onions, chopped

3 tablespoons fresh lemon juice
1 tablespoon white wine vinegar
1 tablespoon minced garlic
1 1/2 teaspoons dried oregano
1 teaspoon Dijon mustard
1 teaspoon ground cumin
3 tablespoons pine nuts, toasted

Cook orzo in large pot of boiling salted water until tender but still firm to bite. Drain. Rinse with cold water; drain well. Transfer to large bowl. Toss with 2 tablespoons olive oil. Add crumbled feta cheese, chopped bell peppers, Kalamata olives, green onions and capers.

Combine lemon juice, vinegar, garlic, oregano, mustard and cumin in small bowl. Gradually whisk in remaining 1/2 cup olive oil. Season dressing to taste with salt and pepper.

Add dressing to orzo mixture and toss to blend. Season to taste with salt and pepper. (Can be prepared 6 hours ahead. Cover and refrigerate.)

Garnish salad with pine nuts; serve.

Thursday, August 4, 2011

Oven-Baked Ratatouille


I remember one particular meal when I was living in France. The elderly lady with whom we did our home stay prepared a simple meal of baked fish with a wonderfully flavorful sauce of some kind. I had never tasted it in America and begged her for the recipe. Like many Parisians, my host knew a shortcut or two, and after some coaxing, she revealed the - gasp - jar her sauce had come from. It was nothing more than store-bought ratatouille, which I now know to be a famous Provencal vegetable stew and a great way to use up summer garden produce.

The version I made at home this week in an effort to recreate that moment comes from the popular Chocolate and Zucchini blog, the author of which lives in Montmartre, one of my favorite parts of Paris. It was a great use not only for our homegrown herbs, tomatoes, zucchini and farmer's market eggplant, but a fantastic excuse to use my Le Creuset. We served it over couscous for a light, flavorful dinner.
Ratatouille Confite au Four
- 2 onions
- 2 cloves garlic
- 1 eggplant (if you want to make the traditional ratatouille from Nice, hold the eggplant)
- 1 zucchini
- 2 green peppers
- 8 small tomatoes
- 2 sprigs fresh rosemary
- 3 sprigs fresh thyme
-1 T. chopped basil
- olive oil
- salt, pepper
Preheat the oven to 350°F.
Peel and slice the onion and garlic. Rinse the remaining vegetables, trim and slice them. Rinse the herbs. Combine everything in an oven-proof dish. Season with salt and pepper, and drizzle with olive oil (about two tablespoons). Toss a little more to ensure even coating.
Cover the dish with foil and bake for 45 minutes. At this point the vegetables should be cooked but not colored, and there should be cooking juices at the bottom of the pan.
Remove the foil and bake for another 30 to 45 minutes, keeping an eye on the progress, until the cooking juices have evaporated and the vegetables have taken on a nice roasted aspect.
Remove the sprigs of herb, and serve immediately, or at room temperature, or cold. It gets even better the next day and the day after that.

Monday, April 18, 2011

Ravioli with Pea Shoot Pesto

Photo courtesy of Sunset magazine

Confession #1: I have never made my own pesto before.

Confession #2: I was a little late in getting my peas started this spring. Since they're all in a container and probably will never have the space to grow into full-blown sugar snap-pea producing machines before the hot weather hits Sacramento... I figured why not use them up with this recipe for pea shoot pesto?

The recipe is a great one for spring, as it uses young pea shoots (which can be grown or found at farmer's markets) and mint (I actually used freshly picked parsley), which is more likely to be available at this time of year, when basil is probably just a tiny transplant in your herb garden.

As for the pesto, it was as easy as figuring out how to adhere the food processor attachment to my blender. It came out simply delicious, rich and indulgent. I spooned it over spinach cheese tortellini and swooned.

Confession #3: I have garlic breath now.


Ravioli with Snap Peas, Pea Shoots, and Minty Pea Shoot Pesto
From Sunset magazine


1 small garlic clove
4 ounces parmesan cheese, cut into chunks
1 1/2 qts. lightly packed tender pea shoots*, separated into 4- to 5-in. pieces, divided
1/2 cup mint leaves
1/2 cup extra-virgin olive oil
1 pound fresh cheese ravioli
2 cups sugar snap peas

1. Whirl garlic in a food processor to mince. Add cheese and whirl until grated. Add 2 cups pea shoots, the mint, and oil; pulse until coarsely puréed. Scrape into a small bowl and press plastic wrap against pesto.

2. Cook ravioli as package directs, adding snap peas during last 2 minutes. Drain; return to pot. Whisk pesto, then gently toss three-quarters of it with pasta. Add remaining pea shoots and toss gently. Serve immediately, with remaining pesto if you like (or save it for a sandwich).

*Find at farmers' markets or Asian markets.

Wednesday, January 26, 2011

The Best Vegetable Chili

Photo courtesy of Cooking Light

Is there a vegetarian dish more cliche than vegetarian chili? It seems like an easy enough task to make a good vegetarian chili - just throw together some beans, some spices, some vegetables. Or so it appeared... Yet for a good long while, my husband and I have cooked our way through recipe after recipe for meatless chili and failed to find a version that both of us could tolerate, much less enjoy. One chili nearly choked us with an ancho chile overdose; another included imitation "ground meat" and was truly awful: bland with a stomach-turning texture.

When I saw the high ratings and positive reviews for this recipe from Cooking Light, I saw a light at the end of the bad chili tunnel. We made this for company and ended up scraping the bowl clean - it was fantastic! The flavors melded so well together that we didn't even miss the meat. It comes together in a jiffy as well. We will surely be using this recipe again and again.

Chunky Vegetable Chili

  • 1 tablespoon vegetable oil
  • 2 cups chopped onion
  • 1/2 cup chopped yellow bell pepper
  • 1/2 cup chopped green bell pepper
  • 2 garlic cloves, minced
  • 1 tablespoon brown sugar
  • 1 1/2 tablespoons chili powder
  • 1 teaspoon ground cumin
  • 1 teaspoon dried oregano
  • 1/2 teaspoon salt
  • 1/2 teaspoon black pepper
  • 2 (16-ounce) cans stewed tomatoes, undrained
  • 2 (15-ounce) cans black beans, rinsed and drained
  • 1 (15-ounce) can kidney beans, rinsed and drained
  • 1 (15-ounce) can pinto beans, rinsed and drained

Preparation

Heat the oil in a Dutch oven over medium-high heat. Add onion, bell peppers, and garlic; sauté 5 minutes or until tender. Add sugar and remaining ingredients, and bring to a boil. Reduce heat, and simmer 30 minutes.

Monday, November 15, 2010

Pie Making Class and Quiche!

My husband (also known as The Best Husband Ever) bought me a dream come true for our anniversary: A class on pie-making with local food celebrity Kira O'Donnell of Real Pies. She formerly worked at Chez Panisse in Berkeley and her pies are divine. I couldn't wait to see what she was like in real life and pick up some pointers on how to perfect my own pies. Pie is, after all, my favorite food in the world.

The class was held at a room adjoining the Sacramento Natural Foods Co-op:
While we waited for the class to start, we met new friends and snacked on olives, hummus, baba ganoush and crackers...
And checked out the set up, while trying to figure out which one was Kira herself.
Turns out she's the surprisingly down-to-earth, unpretentious and nice blond. We started by discussing how to make crust, the foundation of any pie.

Kira gave us some simple tips, such as cooking pie on a pre-heated pizza stone to achieve a flaky bottom crust; keeping everything cold, even if you have to dip your own hands in ice water; and letting the dough rest at least 1 hour before working with it, or even overnight. She uses an all-butter pastry herself but was surprisingly not picky about the type of pan, flour, recipe, etc.
Her sample dough was generously dotted with chunks of butter and very sturdy yet pliable.
She made a sample pie with strawberry rhubarb filling she had frozen in July. How gorgeous those colors were,
and then look how cute her stars are!
The best part was sampling 3 varieties of her pies, starting with a vegetarian quiche. I am serious about this quiche. It is deadly good. At first I was like, "Alright, let's get this quiche over with so we can get to the sweet stuff." The quiche turned out to be my favorite.
Apple Blackberry Galette - delicious and warm, flaky and cozy.
Chocolate Cream pie, not too sweet. The crust was made from homemade cookie crumbs. (Overachiever.) :-)
I don't want to give away all of Kira's secrets, but I will share her killer recipe for quiche. I hope you enjoy it as much as I did!

Vegetarian Quiche

Partially pre-baked pie shell (375 for 8-10 minutes until light brown)
1 c. grated cheese of your choice (Swiss, cheddar, Jack)
1/3 c. crumbled goat cheese (opt)
1/2 red bell pepper, julienned and sauteed until soft
1 bunch spinach, washed/chopped and sauteed until soft
1 head broccoli, separated into small clumps and blanched until just tender
1/2 small yellow onion, sauteed until soft
6-7 mushrooms, sliced and sauteed until soft
3 eggs
1 c. low-fat milk or soy milk
2 tsp. Dijon mustard
Pinch salt
Pinch herbs de Provence

Preheat the oven to 350.

Put the partially pre-baked pie shell on a sheet pan. Press grated cheese and goat cheese on bottom of shell. Add all cooked veggies on top of cheese, distributing evenly. In a bowl, whisk together eggs, milk, mustard, and spices. Pour the milk mixture carefully over the veggies, then place the quiche in the oven. Bake until the custard is completely firm. (Jiggle it slightly - if it seems liquidy in the center, it's not done yet!) It may take over an hour. Don't worry if the top browns. It will taste great! Serve 4 hungry people, with an accompaniment such as soup or salad.

Friday, November 5, 2010

Lunch - Sans Meat?

Hello, friends! Question for you: What do you eat for lunch on Meatless Monday? Got any good vegetarian recipes? I’ve been grappling with this question for a couple of months and here are some easy suggestions, geared towards people who have to eat at work (as opposed to stay home and whip up a piping hot meal).

- You could try a chilled salad like tabbouleh. Another good one I tried recently was a simple mixture of quinoa, pesto, sun-dried tomatoes, and feta cheese.

- You could make a sandwich with sprouts, cucumbers, tomatoes, mixed greens and hummus (here’s a recipe for homemade hummus).

- Another great sandwich: roasted bell pepper with cream cheese (or goat cheese), topped with arugula.

- I love soup in the winter - try vegetable, butternut squash or mushroom barley.

- Leftovers, leftovers, leftovers (assuming they’re meatless!). Vegetable curries work great re-heated in the microwave. Sometimes they flavors are even better the second day!

- And last, but certainly not least, peanut butter and jam sandwiches on whole grain bread. A childhood classic that still hits the spot.

Friday, October 29, 2010

Mushroom Barley Soup

Photo courtesy of Real Simple


Looking for a way to warm yourself as the weather becomes increasingly chilly? Here’s a hearty soup that is simple and inexpensive to prepare (no meat!) It freezes pretty well too.

One nice thing about making your own soup is that you can control how much salt you add. Regular canned soups can be astronomically high in sodium. Even if you don’t have high blood pressure, sodium causes bloating and nobody wants that. This particular soup also incorporates whole grains (barley, often available in bulk in grocery stores). I love to make a batch of homemade soup at the beginning of the week and eat it for lunch each day; or eat it for a couple days and freeze the rest for later, thus preventing “leftover burn out”.

Mushroom Barley Soup

1 cup barley
1 1/2 tablespoons olive oil
2 medium yellow onions, diced
kosher salt and black pepper
1 large carrot, diced
2 celery stalks, diced
20 ounces button mushrooms, sliced
5 cups low-sodium vegetable or chicken broth
2 bay leaves
2 teaspoons fresh thyme leaves (about 8 sprigs)
sliced sourdough or other country bread, toasted (optional)

Directions

In a medium-size pan, bring the barley and 4 cups of water to a boil. Cover, reduce heat to medium-low, and simmer until tender, 30 to 35 minutes.

Meanwhile, heat the oil in a large pot over medium-low heat. Add the onions, ½ teaspoon salt, and ¼ teaspoon pepper. Cover and cook until the onions have softened, 5 to 7 minutes.

Add the carrot and celery and cook, covered, for 6 minutes more.

Add the mushrooms, increase heat to medium-high, and cook, covered, until they release their juices, about 4 minutes.

Add the broth, bay leaves, and thyme and simmer, uncovered, for 10 minutes.

Stir in the cooked barley; remove and discard the bay leaves. If desired, season with additional salt and pepper and serve with the sourdough toast.

Wednesday, October 13, 2010

Alton Brown's Vegetable Soup

I have already explained my love for food celebrity Alton Brown in the past (specifically, back when I went a little biscuit crazy). This week found me singing his praises yet again when I tasted the following recipe for vegetable soup. My whole family was shocked at how much flavor can be found in a pot of just vegetables in broth, essentially, perked up with a squeeze of lemon at the end.

This recipe makes a lot, and is fantastic for lunch leftover purposes. This soup actually tasted better on the second day, and kept well for several days in the fridge. Long live Alton!


4 tablespoons olive oil
2 cups chopped leeks, white part only (from approximately 3 medium leeks)
2 tablespoons finely minced garlic
Kosher salt
2 cups carrots, peeled and chopped into rounds (approximately 2 medium)
2 cups peeled and diced potatoes2 cups fresh green beans, broken or cut into 3/4-inch pieces
2 quarts chicken or vegetable broth
4 cups peeled, seeded, and chopped tomatoes
2 ears corn, kernels removed
1/2 teaspoon freshly ground black pepper
1/4 cup packed, chopped fresh parsley leaves
1 to 2 teaspoons freshly squeezed lemon juice

Heat the olive oil in large, heavy-bottomed stockpot over medium-low heat. Once hot, add the leeks, garlic, and a pinch of salt and sweat until they begin to soften, approximately 7 to 8 minutes. Add the carrots, potatoes and green beans and continue to cook for 4 to 5 more minutes, stirring occasionally.
Add the stock, increase the heat to high, and bring to a simmer. Once simmering, add the tomatoes, corn kernels, and pepper. Reduce the heat to low, cover, and cook until the vegetables are fork tender, approximately 25 to 30 minutes. Remove from heat and add the parsley and lemon juice. Season, to taste, with kosher salt. Serve immediately.

Monday, October 11, 2010

Hello, Homemade Hummus!


The reign of the mighty Ranch dressing is a thing of the past for many health-conscious eaters, who are seeking out less fattening and more nourishing alternative ways to dress up veggies. I am a particularly huge fan of hummus, particularly this roasted red pepper version by Sabra.

Thus, my eyes bulged when I spied a simple recipe for said favorite condiment in the latest issue of Cooking Light. I already had tahini on hand from that one time we made falafel from scratch, and the rest I had on hand in my pantry. I found it difficult to mimic the perfectly smooth texture of commercially prepared hummus with a home food processor, but the product tasted great so I didn't mind terribly.

Break out the bell peppers, tomatoes, carrots, and cucumbers, or spread hummus on a sandwich, and you'll find the Mediterranean diet to be quite enjoyable.

Roasted Red Pepper Hummus
Courtesy of Cooking Light

1/3 cup tahini (sesame seed paste)
1/4 cup water
1/4 cup chopped bottled roasted red bell peppers, rinsed and drained
2 tablespoons fresh lemon juice
1/4 teaspoon salt
1 garlic clove, minced
1 (15 1/2-ounce) can chickpeas, rinsed and drained

Preparation:

1. Place all ingredients in a food processor; process until smooth.

Wednesday, October 6, 2010

Goat Cheese Pizza with Arugula

I love pizza. I am thrilled that pizza comes in all varieties these days. I made this version last week when my friend Allison was visiting and it was a huge hit. It features goat cheese in place of the more traditional mozzarella. Because products made from goat's milk are easier digested by the lactose intolerant, I can enjoy this pizza with no regrets. Unless I have more than two slices and can't fit into my pants. I might regret that.

You can start with store-bought pizza crust, or use this recipe which boasts a gorgeous flavor and wonderful texture. Smooth some pesto sauce over your dough, layer with thin slices of ripe tomato and coins of herbed goat cheese, then sprinkle with fresh garlic. When it comes out of the oven, a handful of peppery arugula greens adds the finishing touch. It's a beautiful thing! Don't be afraid to try something new - this one won't disappoint you.

Goat Cheese Pizza and Arugula

1 unbaked pizza crust
6 tablespoons prepared pesto sauce
3 Roma tomatoes, thinly sliced
1 (8 ounce) package seasoned goat cheese
2 cloves garlic, peeled and thinly sliced
1 cup fresh arugula
1 teaspoon olive oil (optional)

Directions

1. Preheat oven according to pizza package instructions. (If using homemade, crank it up to 500F to get as close to an authentic oven as you can in a home oven.)
2. Dab pesto onto the center of the pizza base, and spread toward the outer edges. Cut the goat cheese into thin coins, and spread or crumble across the pizza. Arrange tomato slices over goat cheese. Sprinkle with garlic. Brush the crust edges lightly with olive oil if desired.
3. Place pizza directly on preheated oven rack. Bake for 10 to 12 minutes, or until the crust edges are golden.
4. After taking pizza out of the oven, allow to cool for a few minutes so that the cheese has time to set. After a couple of minutes, cover the pizza with a few handfuls of arugula. Cut, serve, and enjoy!

Tuesday, October 5, 2010

Lentil Soup


When studied abroad in France, my roommate and I lived with a little old lady in an apartment just down the street from the Bastille. Every night, we ate a traditional French dinner prepared by our host, usually consisting of an entree of some kind, a salad dressed with homemade vinaigrette, a selection from a cheese plate, and usually fruit for dessert.

There was only one dish she prepared that I didn't care for, a casserole of ham and lentils. I have tried to like lentils over the years to no avail, which is a shame because they are dietary superstars, being rich in many vitamins (especially folate and iron), fiber, and protein.

This week, I found a recipe for lentils that was actually really delicious - and there's nothing fancy, complicated or expensive about it. It's just a simple soup with a few common vegetables and herbs, spiked with vinegar at the end to bring out the flavors.


Lentil Soup

From Allrecipes.com


1 onion, chopped

1/4 cup olive oil

2 carrots, diced

2 stalks celery, chopped

2 cloves garlic, minced

1 teaspoon dried oregano

1 bay leaf

1 teaspoon dried basil

1 (14.5 ounce) can crushed tomatoes

2 cups dry lentils

8 cups water

1/2 cup spinach, rinsed and thinly sliced

2 tablespoons red wine vinegar

kosher salt to taste

ground black pepper to taste

Directions:

In a large soup pot, heat oil over medium heat. Add onions, carrots, and celery; cook and stir until onion is tender. Stir in garlic, bay leaf, oregano, and basil; cook for 2 minutes.

Stir in lentils, and add water and tomatoes. Bring to a boil. Reduce heat, and simmer for at least 1 hour. When ready to serve stir in spinach, and cook until it wilts. Stir in vinegar, and season to taste with salt and pepper, and more vinegar if desired.

Wednesday, August 25, 2010

Vegetable Chickpea Curry

Photo courtesy of Cooking Light

It is a truth universally acknowledged that a slow cooker is a working (wo)man’s best friend. However, many slow cooker recipes yield a boring chunk of meat that has been cooked in its own fat for several hours. Or maybe small chunks of cooked meat. In a sauce. There's nothing wrong with comfort food. Yet sometimes you want more than a hunk of meat for dinner, especially if you (like me) observe Meatless Monday or are attempting to lower your overall consumption of meat.

So off I went, scouring the Internet for a good meatless slow cooker recipe. Cooking Light came through for me once again, and I found this amazing recipe. The texture of the vegetables comes out perfectly done, not mushy at all, and the flavors are vibrant. Serve with brown basmati rice and a squeeze of lemon, and you’ve got yourself a tasty meatless dinner, packed with protein, fiber and of course, excellent flavor.
Vegetable Chickpea Curry

Yield: 6 servings (serving size: 1 1/3 cups vegetable mixture and 1 lemon wedge)

Ingredients

1 tablespoon olive oil

1 1/2 cups chopped onion

1 cup (1/4-inch-thick) slices carrot

1 tablespoon curry powder

1 teaspoon brown sugar

1 teaspoon grated peeled fresh ginger

2 garlic cloves, minced

1 serrano chile, seeded and minced

3 cups cooked chickpeas (garbanzo beans)

1 1/2 cups cubed peeled baking potato

1 cup diced green bell pepper

1 cup (1-inch) cut green beans

1/2 teaspoon salt

1/4 teaspoon black pepper

1/8 teaspoon ground red pepper

1 (14.5-ounce) can diced tomatoes, undrained

1 (14-ounce) can vegetable broth

3 cups fresh baby spinach

1 cup light coconut milk

6 lemon wedges

Preparation

Heat oil in a large nonstick skillet over medium heat. Add onion and carrot; cover and cook 5 minutes or until tender. Add curry powder, sugar, ginger, garlic, and chile; cook 1 minute, stirring constantly.

Place onion mixture in a 5-quart electric slow cooker. Stir in chickpeas and next 8 ingredients (through broth). Cover and cook on HIGH 6 hours or until vegetables are tender. Add spinach and coconut milk; stir until spinach wilts. Serve with lemon wedges.

Monday, July 5, 2010

Indian Potatoes with Peas


Lately I have been craving Indian food. While it's not the cheapest thing to eat out (my favorite lunch buffet is $13.99 - ouch!!!), it can be fairly economical to make at home once you stock up on the basic spices found in the Indian pantry. Because many people in India are vegetarian, there are many tasty meatless dishes to choose from as well. Here is an easy, quick recipe if you're new to Indian food. Serve over basmati rice.

Indian Potatoes with Peas

1 onion, chopped

1/4 cup vegetable oil

1 tsp. garlic

1 tsp. ginger

1 pound potatoes, peeled and cubed

1/2 bag of frozen peas
1 teaspoon salt

1 teaspoon garam masala

1 teaspoon ground turmeric

1 teaspoon ground cumin

1 teaspoon coriander

3 medium tomatoes, chopped


Directions:
1. Lightly brown onion in oil in a medium size skillet until golden.
2. Stir in spices. Add potatoes and cook 10 minutes stirring occasionally.
3. Add tomatoes and peas, cover pan and cook until potatoes are soft, about 10 minutes.