Showing posts with label dessert. Show all posts

Sunday, March 16, 2014

Pineapple Upside-Down Cake - Revisited


 I attended a family reunion for my dad's side this weekend. My assignment was to make this lovely Pineapple Upside-Down Cake in Cast Iron Skillet. The recipe originally came from my Grandma through my aunt, and I have blogged about it before, but it came out SO much better this time around (as you can see). I like to think my photography skills are ever so slightly improved, and I edited the recipe to make it more clear.

I HIGHLY recommend using the Trader Joe's Vanilla Cake mix mentioned in the note. I'm not normally a Trader Joe's person, but this mix was amazing. It actually has flecks of vanilla bean (!!!) and no chemical junk in the ingredients. It made me wonder why Duncan Hines can't do something as simple and tasty with their mixes. But I digress! This cake is classic and fantastic- try it!

Pineapple Upside-Down Cake (in Cast Iron Skillet)

Trader Joe’s has a good vanilla cake mix that works as a substitute for the dry ingredients. Just mix  1/4 cup pineapple juice in with 3/4 cup milk in place of the 1 cup of milk it calls for.

Cake:
1 cup butter
1 1/2 cups white sugar
5 eggs 1 tsp. vanilla
3 cups flour
2 teaspoons baking powder
¼ teaspoon salt
One can pineapple slices in juice
Buttermilk (or sour milk made with lemon juice and milk works fine) plus juice from drained pineapple to make 1 1/4 cup liquid
Maraschino cherries, halved (optional)
Chopped nuts (optional)

Topping:
½ cup butter
1 cup brown sugar

Cake:
Cream white sugar and butter together. Add eggs and vanilla, beat until smooth. In a separate bowl, sift together dry ingredients. Alternate adding the buttermilk/pineapple juice mixture and the dry ingredients to the creamed mixture until mixed without lumps.

Topping:
Put ½ cup butter and 1 cup brown sugar in a cast iron skillet. Heat on stove top over medium heat until bubbling. Then reduce heat while bubbling softly and thickening slightly, about 3 minutes total. Don’t burn the sugar/butter mixture. Turn off and lay drained pineapple slices decoratively on top. (Add cherries or nuts if desired.) Pour batter over slices. Bake at 350 for about 35-40 minutes until done. Let cake rest for 10 minutes and invert cake. Leave upside down for a minute or so. Lift pan.

Monday, May 13, 2013

Chocolate Oreo Pie


Chocolate? Store-bought cookies? This recipe is clearly not the norm for me, but sometimes you do what you gotta do for your mom on Mother's Day. And frankly, everyone in the family loved this pie, so I need to write down the recipe because it has a high likelihood of being requested again next year!

Note: This pie is a lot like those lazy pudding pies people used to make back in 90's, only in this version, everything is homemade... Except the Oreos, because I'm ambitious, but not THAT ambitious! 

Chocolate Oreo Pie

Crust:
24 Oreo cookies, finely crushed
1/4 c. butter, melted

Crush Oreos in food processor until finely ground. Add melted butter and press into a pie pan.

Filling:
1 1/3 c. sugar
1/2 c. cocoa powder (I used dark)
6 T. cornstarch
1/2 tsp. salt
3 1/3 c. milk
4 T. butter, cut into cubes
2 tsp. vanilla

Combine dry ingredients in a medium-large saucepan and gradually whisk in milk. Bring to a slow boil, and whisk constantly one minute. Remove from heat, and whisk in butter and vanilla until smooth. Pour filling into crust and chill at least 4 hours. When completely cool, top with:

Topping:
1 pint sweetened whipped cream
12 Oreo cookies, crushed but still a little chunky

Spread whipped cream over the top of the pie and sprinkle the chunky Oreo crumbs evenly over the top. Press down lightly on the crumbs to set them, then chill pie until ready to serve.

Monday, February 18, 2013

The Best New York Cheesecake


 New York Cheesecake

 Confession: I'm not much of a cheesecake fan. It always seemed too dense, too rich, liable to sit in my stomach like a brick for about a day. When a Cheesecake Factory opened up locally, I tried a slice once or twice, but overall, remained unimpressed. 

Then, recently, I stumbled upon a recipe for New York Cheesecake from Ruth Reichl, and my interest was piqued. As a big fan of the food writer and former editor of Gourmet magazine, I knew if anybody could share a good recipe for cheesecake, it was this long-time New Yorker. 

I was not disappointed. Cream cheese made without gum was expensive, so I only did 1 part of that to 2 parts of traditional cream cheese. Someday I'll splurge and make the whole thing with that creamy, crumbly, heavenly substance, but even a little natural, gum-free cream cheese made a huge difference.

I served my cheesecake at a New York-themed book club party and everyone voted it the best cheesecake ever, from the crispy-sweet crust to the creamy, smooth, double-layered filling. We devoured it happily and quickly. Thanks, Ruth! I knew you wouldn't let me down!


New York Cheesecake
Recipe by Ruth Reichl
Serves 12-16

For the crust
1½ cups chocolate wafer or graham cracker crumbs (about 6 ounces)
½ cup melted butter
¼ cup sugar
pinch salt

For the filling
1½ pounds cream cheese, preferably without gum, at room temperature
1 cup sugar
4 eggs
1½ teaspoons vanilla extract or vanilla paste

For the topping
2 cups sour cream
2 tablespoons sugar
1 teaspoon vanilla extract or vanilla paste

Bake the crust: Preheat oven to 350 degrees. Mix the cookie crumbs with the sugar and the melted butter and press into bottom and sides of a 9-inch springform pan. Put into the freezer for 15 minutes (it will keep here, covered, for a couple of months). Bake for 10 minutes, just to crisp the crust. Turn the oven down to 325 degrees, and set the springform pan in a larger pan to catch any drips.

Make and bake the filling: Beat the cream cheese, sugar, eggs, and vanilla until smooth. Pour into crust and bake 50 minutes, or until the cheese is set on the edges, but still a bit wobbly in the middle. (Depending on your oven, this can take up to an hour or more; just be patient and check every 5 minutes or so.) Remove from the oven (leave oven on) and cool for about 10 minutes on a wire rack.

Top and bake again: Stir together the sour cream, sugar and vanilla and spread over cooled cake. Return to oven for 12 minutes until glossy. Topping will set as the cake cools.

Chill: Cool completely, cover, and chill in the refrigerator at least 8 hours.

Tuesday, October 2, 2012

Apple Custard Cake


Here's what I did with those neat apples I picked myself at Apple Hill: I made Apple Custard Cake. I got this recipe from an amazing blog by a girl named Brandi, better known as The Person Responsible For The Best Dessert I Ate Last Year at Seattle's Delancey.  She's an amazing chef, and she actually shares recipes for her creations on her blog. It's a beautiful thing! This particular recipe is basically from Dorie Greenspan's Around My French Table- tweaked a little.

Who doesn't want a simple apple cake this time of year, especially one that looks as gorgeous as this, with those tantalizing chunks of apple? I subbed about a teaspoon of real vanilla for the vanilla bean. I also don't own a food scale  and I am including my conversions as parenthetical notes. Feel free to drizzle with caramel sauce and top with whipped cream.

APPLE CUSTARD CAKE
From Look I Made That

3.75 oz AP flour (between 3/4 and 1 c.)
3/4 tsp baking powder
1/4 tsp kosher salt
1 lb 2 oz chopped apples (I used 4-5 apples)
2 large eggs, room temperature
6 oz sugar (3/4 c.)
1/2 vanilla bean
3 TBSP apple cider
4 oz unsalted butter, melted (1 cube)
unrefined sugar for sprinkling

- Preheat the oven to 350 degrees. Generously butter an 8-inch springform cake pan and line it with parchment paper. Sprinkle unrefined sugar on the sides of the pan and tap it around.

- Whisk the flour, baking powder, and salt together in small bowl.

- In a medium bowl, beat the eggs with a whisk until they’re foamy. Rub the vanilla bean seeds into the sugar and add to the eggs. Whisk until well blended. Whisk in the apple cider. Whisk in half the flour and when it is incorporated, add half the melted butter, followed by the rest of the flour and the remaining butter, mixing gently after each addition so that you have a smooth, rather thick batter. Switch to a rubber spatula and fold in the apples, turning the fruit so that it’s coated with batter. Scrape the mix into the pan and poke it around a little with the spatula so that it’s even. Sprinkle the top of the cake with unrefined sugar.

- Slide the pan into the oven and bake for 50 to 60 minutes, or until the top of the cake is golden brown and a knife inserted deep into the center comes out clean. Transfer to a cooling rack and let rest for 30 minutes.

- Carefully run a blunt knife around the edges of the cake and remove the sides of the springform pan. Allow the cake to cool until it is just slightly warm or at room temperature. If you want to remove the cake from the bottom of the springform pan, wait until the cake is almost cooled, then run a long spatula between the cake and the pan, cover the top of the cake with a piece of parchment, and invert it onto a rack. Carefully remove the bottom of the pan and turn the cake over onto a serving dish.

- Eat with a generous dusting of Maldon sea salt. And caramel and whipped cream if you’ve got it.

Thursday, July 26, 2012

"Apple" Zucchini Crisp

Ah, the eternal summer battle: Man vs. Zucchini. A friend let us come harvest their community garden with them this week, and we left with bags of produce, including lots of zucchini. And then I started wondering if it was really possible (as I had heard) to use a little kitchen alchemy to transform zucchini into filling for an  apple pie or apple crisp. It just didn't seem possible, but I still wanted to take a stab at it. Pie seems fussy at the moment, so I went the way of the apple crisp.

I wanted my zucchini to look as much like apples as possible, so I peeled mine and cut the seeds out of the middle. Later, I would realize the importance of this step (which wasn't mentioned in the recipe).


Add lemon juice and simmer the mixture to soften up the zucchini. Next, you add spices like you would with apple pie filling.


Cover the filling with your crisp topping ...


and bake until browned on top, bubbly underneath.


Well, it looks pretty darn convincing, don't you think? But don't eat it when it's hot - the flavors haven't fully melded and it is still easily recognizable as zucchini at this point. Neither my husband nor I cared for it hot.


My advice is to wait until it's cool and top it with vanilla ice cream. It isn't exactly a dead ringer for apples, but...it's still pretty good, considering the fact that it's a vegetable. And at this time of year, you could do worse with your leftover zucchini.

Personal Notes: I used whole wheat flour and halved the recipe, baking it in an 8x8 square pan.

"Apple" Zucchini Crisp

8 cups cubed peeled zucchini
3/4 cup lemon juice
1/2 to 3/4 cup sugar
2 teaspoons ground cinnamon
1 teaspoon ground nutmeg

TOPPING:
1-1/3 cups packed brown sugar
1 cup old-fashioned oats
1 cup all-purpose flour
2/3 cup cold butter, cubed

In a bowl, combine the zucchini, lemon juice, sugar, cinnamon and nutmeg; mix well. Pour into a greased 13-in. x 9-in. baking dish.

For topping, combine brown sugar, oats and flour in a bowl; cut in butter until crumbly. Sprinkle over the zucchini mixture. Bake at 375 for 45-50 minutes or until bubbly and the zucchini is tender. Yield: 12-15 servings.

Thursday, July 5, 2012

Marionberry Pie: From Farm to Plate

This is a story about a pie. It began last month, with a trip to a local berry patch.


I discovered that the berry farm grew a wonderful seedless blackberry called a Marionberry.


And they just happened to be ripe and ready to be picked that week:

And so it was that I drove home with several baskets of Marionberries (and some late raspberries, for good measure).

Yesterday being the Fourth of July, I retrieved my berries from the freezer and got started on a festive holiday pie.

First, I tossed the berries with 1 c. sugar, 1 tsp. lemon zest, 1 tsp. lemon juice, and 1/4 c. tapioca. I simmered the mixture in a pot for about 5 minutes until slightly thickened. This will make a nice filling that won't get the bottom pie crust soggy. After removing from the heat, I spiked the filling with 1 tsp. vanilla (really good stuff I got in a modest, out of the way kitchen shop in New Orleans). Then I let it cool completely.


After pre-heating the oven to 375F, I put my bottom crust in the pie pan and filled it with my berry filling, then laid the top crust over that. I brushed the top crust with egg white and sprinkled it with coarse sugar.


Next, I baked it for 50 minutes, until the top was golden brown and the filling was bubbling.

I let it cool completely (important, to avoid a runny filling, and it takes about 6 hours to do so) before serving it that night....

With a scoop of vanilla ice cream! It was the best summer pie I've made yet.

Monday, May 28, 2012

Sour Cherry Pie


Something exciting happened at my house in the past week: my first harvest from the garden. I got lots of snap peas and English peas, plus buttercrunch lettuce and Nantes carrots (shown above). These are a French heirloom carrot that do well in heavier clay soils because they stay short and compact.

I also made a sour cherry pie, which I haven't made since I took a college cooking class and dubbed this pie the Platonic Ideal of a Cherry Pie. You can make cherry pie with the sweet cherries we find here in California, but it is a very different thing from this pie. You have to find sour cherries, which I found at Whole Foods in the frozen aisle. They don't sell them fresh out here because sour cherry trees grow where the weather gets much colder than in our temperate climate.

But the search for sour cherries, even if frozen, is totally worth the trouble. This pie has that complex sweet/art classic cherry pie flavor, but a homemade pie texture that makes all of those glooey Hostess Cherry Pies I ate as a child hang their heads in shame (or would if pies had heads).

I use tapioca instead of cornstarch because I L-O-V-E the texture of tapioca in pies, but you are welcome to follow the recipe as is. I use the Perfect Pie Crust recipe posted here, brush the lattice top with egg white and sprinkle with coarse sugar before baking. Serve with vanilla ice cream and you'll be in heaven.


Sour Cherry Pie

1 recipe Perfect Pie Crust
3 1/3 c. fresh or frozen sour cherries
1 c. sugar
1/4 c. + 1 T. Thickgel OR cornstarch
1 1/3 c. water or juice from cherries
1/4 tsp. almond extract
1 T. + 1 tsp. fresh lemon juice

Rinse and pit fresh cherries or thaw frozen cherries. Combine sugar and thickening agent in a large pot with water or juice from cherries. If desired, add almond extract. Stir mixture and cook over medium heat until mixture thickens and begins to bubble. Add lemon juice and boil 1 minute, stirring constantly. Fold in cherries. Cool before filling prepared pie crust. Bake at 400 degrees for 20 minutes, then reduce heat to 350 degrees for 30-40 minutes until golden brown on top and the filling is bubbling. Cool on a wire rack before cutting.

Saturday, May 26, 2012

Real Strawberry Shortcake

 Last year, I read a delightful memoir called Little Heathens: Hard Times and High Spirits on an Iowa Farm During the Great Depression. The author, Mildred Armstrong Kalish, relates lots of wonderful stories and makes you feel like you're sitting down for a chat with your own grandmother. Mildred's youth was filled to the brim with danger, inconvenience, hard work, strict and cheerless relatives, wonder, and simple pleasures.

Her book also delivers straight-forward, unadorned recipes for simple and delicious farm food, like how to prepare morel mushrooms or bake an applesauce cake. I made a copy of one recipe in particular, so as to be sure to make it the following spring. You see, I had never actually made a genuine strawberry shortcake until tonight- at least not the shortcake part. My mom's version of this American classic was a lower-fat version that substituted angel food cake and Cool Whip, but for some reason retained the same name.

I just fell in love with the real thing after making Mildred's recipe, which was a sort of subtly sweet biscuit with a crunchy top and heartiness that makes angel food cake pale in comparison. I hope that you will enjoy this dish too, while strawberries are still at their very best. Here are the instructions, in the author's own words. (For my personal notes, I made the dough with butter and almond milk.)


Mildred's Strawberry Shortcake

First, pick, wash, and hull two quarts of dead-ripe strawberries.

Sprinkle half a cup of sugar over the berries and set them aside while you make the dough.

In a bowl place two cups of flour, two tablespoons of sugar, one teaspoon of salt and one tablespoon of baking powder. (Grandma swore by Calumet!)

Cut in half a cup of white lard, butter, or Crisco. Use that gadget that looks a bit like a stirrup made of wires; it was designed for cutting shortening into flour. The mixture should look like very coarse cornmeal.

Add one beaten egg to two thirds cup of whole milk. Now add this to the flour in the bowl all at once and stir with a fork until the mixture is just barely moistened. This is the crucial instruction for flaky shortcake. You will ruin the whole thing if you mix thoroughly.

Using a fork, openly spread this dough into a greased eight-by-eight inch pan. Bake for sixteen minutes in a 450 degree oven until nicely browned. Remove from the oven, cool in the pan for about ten minutes and, with a fork, carefully split the shortcake horizontally.

Divide the strawberries between the layer and over the top. Slosh with great gobs of not-too-stiffly-beaten whipped cream and enjoy.

Monday, January 30, 2012

Between Dreams and Reality


I just came back from a stress-free weekend visiting family in Southern California. It was sunny and 75 degrees outside. I wore a skirt and sandals to the beach. There were strawberries in the farmer's market - both local and seasonal. Is it any wonder my entire being was screaming "No!" at the idea of coming back to the reality of work and several months before spring?

These whole wheat chocolate chip cookies helped ease me back into real life, without slapping me in the face too harshly. They are comforting enough to harken to that dreamy land of suspended reality, yet they have enough nutrients to fit into the real world where calories count and fiber is a necessary part of life.

They taste great, a little nutty from the whole grains, a little bitter, a little salty, and just enough sweetness to keep you reaching for one more. Chocolate Chip Cookies that are 100% whole grain? It's a perfect balance of escapism and what your body really needs. (Need pictures? Check out these.)

Whole-Wheat Chocolate Chip Cookies
Based on a recipe from Kim Boyce's Good to the Grain

3 cups whole wheat flour (I used whole wheat pastry flour)
1 ½ tsp. baking powder
1 tsp. baking soda
1 tsp. kosher salt
2 sticks (8 oz.) unsalted butter, softened
1 cup lightly packed dark brown sugar
1 cup sugar
2 large eggs
1 tsp. vanilla extract
8 oz. bittersweet chocolate, roughly chopped into ¼- and ½-inch pieces, or bittersweet chips (I used Scharffen Berger bittersweet chocolate chunks - perfect!)

Position racks in the upper and lower thirds of the oven, and preheat to 350°F. Line two baking sheets with parchment. (If you have no parchment, you can butter the sheets.)

Combine the flour, baking powder, baking soda, and salt in a medium bowl, and whisk to blend.
Put the butter and sugars in the bowl of a stand mixer fitted with the paddle attachment. With the mixer on low speed, mix just until the butter and sugars are blended, about 2 minutes.

Scrape down the sides of the bowl with a spatula. Add the eggs one at a time, beating well after each addition. Beat in the vanilla. Add the flour mixture to the bowl, and blend on low speed until the flour is just incorporated. Scrape down the sides and bottom of the bowl. Add the chocolate, stirring in with a wooden spoon. Refrigerate the dough until cold, about 30 minutes.

Scoop mounds of dough about 3 tablespoons in size onto the baking sheets, leaving about 3 inches between each cookie. (I made smaller cookies; about 1 inch balls of dough.)

Bake the cookies for 16 to 20 minutes (check after 12 minutes). Transfer the cookies, still on parchment, to a rack to cool. Repeat with remaining dough.

Yield: about 20 big cookies or 36 smaller cookies

Thursday, October 13, 2011

Jam Filled Oatmeal Bars

I am never without extra jam on hand. My pantry is currently stocked with strawberry raspberry, strawberry rhubarb, fig strawberry, apricot vanilla, and sugar plum jam, not to mention way too much orange marmalade that I really need to start using up... But that's an idea for another day's blog post.

Tonight I brought these utterly simple bars to a church activity and they were a big hit. With whole wheat flour and rolled oats, they aren't overly sweet, but pleasantly satisfying, chewy and moist. One could almost justify these bars as an acceptable breakfast food on the go. And they are an excellent way to use that extra jam you might have in the fridge or pantry. Enjoy!


Jam-Filled Oatmeal Bars

½ cup all-purpose flour

½ cup whole wheat

1 cup rolled oats

1/2 cup butter, softened

1/3 cup brown sugar firmly packed

1/4 t baking powder

1/8 t salt

3/4 cup jam (I used strawberry rhubarb)

Preheat oven 375 degrees, and in a large bowl mix everything together but the jam.

Measure two cups of the mixture and press into the bottom of an 8 inch square baking dish coated with cooking spray. Using a large spoon, distribute jam evenly over the mixture in the dish.

Take remaining mixture and sprinkle on top of the jam and press down lightly.

Bake 25 minutes. Remove from oven and allow to cool in dish for at least 20 minutes before serving.

Tuesday, September 20, 2011

Apple Pie Filling

Was it all the late-spring rain we got in Nor Cal this year? Was it the compost and mulch I added to the fruit tree area? Whatever the reason, we got a bumper crop of all our fruits this year. I never did find out what type of apple we are growing, but I did learn a lesson in how to tell when fruit is ripe.

The green apples above were decidedly under-ripe, which I discovered when I tried to bake with them. The only thing they were good for was thickening jam. After this early basket picked in August, I waited until September to pick the rest of the apples, when the fruit began to drop naturally from the tree and the apples had acquired a yellow blush.

Another thing I have learned this year is to plan in summer for what you want to be eating in winter. With so many apples, it seemed like a great plan to make some apple pie filling for our holiday pies. When that time comes around, it will be easy (as pie) to take one out of the freezer, defrost it, and plop it in a homemade pie crust for a delicious contribution to the dessert table.

I divided the following recipe by a third, but I wish I had made more. As we licked the spoon and pan clean, we concluded that it tastes exactly like the McDonald's apple pie filling, that nostalgic childhood taste of cinnamon and nutmeg that you can't help but love. It was so good, I can't wait for November!

Apple Pie Filling

18 cups thinly sliced apples

3 tablespoons lemon juice

4 1/2 cups white sugar

1 cup cornstarch

2 teaspoons ground cinnamon

1 teaspoon salt

1/4 teaspoon ground nutmeg

10 cups water


In a large bowl, toss apples with lemon juice and set aside. Pour water into a Dutch oven over medium heat. Combine sugar, cornstarch, cinnamon, salt and nutmeg. Add to water, stir well, and bring to a boil. Boil for 2 minutes, stirring constantly.


Add apples and return to a boil. Reduce heat, cover and simmer until apples are tender, about 6 to 8 minutes. Cool for 30 minutes.


Ladle into 5 freezer containers, leaving 1/2 inch headspace. Cool at room temperature no longer than 1 1/2 hours.


Seal and freeze. Can be stored for up to 12 months

Thursday, July 14, 2011

Chez Panisse's Nectarine Blackberry Galette


I would love to eat at Chez Panisse in Berkeley someday; it is one of my life goals. I read a book several years ago called "Alice Waters and Chez Panisse" by Thomas McNamee, a delightful recollection of the rollicking 70's Berkeley atmosphere and how Chez Panisse was created at that time. The book also chronicles how the restaurant has evolved over time under the guidance of Alice Waters, the perfectionist/artist/pioneer of California cuisine.

Sprinkled throughout the book are recipes for dishes served at Chez Panisse, and there is one page I have turned to over and over again. It's a simple, flexible recipe for a fruit galette by pastry chef Lindsey Shere.

This galette is phenomenal with almost any kind of stone fruit. I have used peaches, nectarines, plums, even apples in winter; you can also use some berries in a combination with other fruit, although you may find it too juicy if you were to use all berries. This week, I used nectarines from the farmer's market and plump wild blackberries I picked.

The crust for the galette is ideal - flaky, buttery, both crisp and soft, flecked with coarse sugar and filled with meltingly soft, sweet fruit. Baking it on a pizza stone does make a difference, so I recommend buying one if you don't already have one in your kitchen. Here's the recipe, which is very casual and more of a tutorial in Lindsey's own words:

Lindsey's Fruit Galette

Peaches, nectarines, and plums are great for this. It's easily translated to apples and pears, too. One of the great things about a galette is you can make it any size you want. If you want something for two people, you can make a little one.

You start with a pate brisee, of whatever size you need for what you're making. The one I use, for 6-8 servings, is a cup of flour, six tablespoons of butter, a quarter teaspoon of salt, and a quarter cup of cold water. You just put it together like pie crust, very quickly. I usually chill it then for a little while to let the flour relax a bit.

I roll it out really thin, as thin as possible, into a big circle. I usually bake it on a pizza pan, but it could be on a flat cookie sheet. If you've got a pizza stone, putting the pan on that would be an ideal way to bake it, because you want to get heat to the bottom of it very quickly.

So you roll out a big circle and lay it on the pan. then I usually make a mixture of equal parts of sugar and flour. For this size I'd use about 2 tablespoons of each and spread that over the bottom of the galette, out to about 2 inches from the edge. It's there to sit under the fruit and thicken the juices. Sometimes I add macaroon crumbs, or even a thin layer of almond paste.

If I were using peaches or plums or nectarines of pluots, I would use about a quart of sliced fruit. You can either arrange the fruit in a fancy design on the dough or just scrumble it about. Peaches I peel usually, but not plums or nectarines.

Now this is the part where you have to make a judgement. i sprinkle the top with sugar - more if it's something like peaches. You can sprinkle it reasonably heavily, because those things because much more tart when you cook them.

When you've sprinkled the fruit with sugar, fold the edges of the dough up over the fruit. You can pleat them in or father them in. Then I brush those folded-over edges of dough with water , pretty heavily, and then I sprinkle just the edges really heavily with coarse sugar, so there's a thorough coating on it.

It goes into the oven to bake at 400 degrees for 45-50 minutes. The thing you want to be sure of ts that the fruit is thoroughly cooked, and that it's boiling in the center of the galette, because that will cook the flour on the bottom.

When it's done, immediately slide it onto a rack to cool, so that the bottom doesn't get soggy. In the first 5 minutes or so, while the juices are still bubbling, I use a pastry brush to pick up those juices and glaze any of the fruit that looks dry. After that, the juices disappear into the flour, so you've got to be quick. And that's it.

Wednesday, July 6, 2011

Simple Roasted Apricots with Honey Marscapone

This is the best use for fresh apricots I have had! I literally licked my plate when I was done. Thank you to Joy the Baker for this recipe! It was my first time using marscapone, which was incredibly thick and rich with the texture of butter. I recommend using 2 apricots per person.

Simple Roasted Apricots with Honey Marscapone

4 apricots, halved and pits removed

2 tablespoons granulated sugar

1/2 cup marscarpone cheese

1 teaspoon honey

1 teaspoon chopped mint

1 teaspoon chopped lemon balm (optional)

Preheat broiler. Place sugar in a shallow bowl. Dip apricot halves in sugar and place in a oven safe dish (I used a cast iron pan).

Place dish under the broiler and bake for 3 to 4 minutes. Keep an eye on the apricots, and carefully rotate the pan as necessary. Sugar will melt, boil and begin to brown. Remove from the oven and allow to cool slightly.

In a small bowl, mix honey into mascarpone cheese. Place slightly cooled apricots on a plate. Top with a dollop of mascarpone mixture, and a sprinkling of fresh mint and lemon balm. Serve. These apricots are best served just after they’re baked.

Sunday, May 22, 2011

White-Chocolate-Dipped Stawberries with Citrus Sugar


I have altered the recipe below slightly. One change of note was that the original recipe calls for "good-quality chocolate". For some reason, I find it vaguely insulting to a recipe reader when it commands one to use "good-quality" of anything. I imagine some sort of Julia Child-like cook wagging a finger at me and reprimanding, "You uncivilized brute - drop that bar of Alpine White I know you were thinking of using in this distinguished recipe which is FAR too good to include a Nestle product!" I will put more trust in you than that. I will assume that you can discern the value of good white chocolate.

That said, at first glance I wasn't sure that I'd care for this recipe because let's face it - if I had the choice of whatever Sheri's Berry I wanted, it's got to be dark chocolate all the way. Still, the idea of citrus sugar intrigued me, and that's what convinced me to try this method. The first bite of my "test strawberry" was surprising - the fragrance and bright flavor of the citrus sugar was an excellent match for the mild white chocolate and the sweet berry. I never thought I would love a white strawberry as much as I did a dark one, but this is one delicious recipe, and perfect for spring.


White Chocolate Dipped Strawberries with Citrus Sugar
From Bon Appetit

2 T. sugar
1/2 tsp finely grated orange peel
1/2 tsp. finely grated lemon peel
6 oz. white chocolate, chopped
16 large ripe strawberries (washed and patted completely dry)

Line baking sheet with waxed paper. Using fingertips, mix sugar and citrus peels in a small bowl until sugar is moist. Stir chocolate in a small bowl set over a saucepan of barely simmering water until melted and smooth. Remove from over water.

Holding 1 strawberry by stem end, dip 2/3 of berry into chocolate; shake excess back into bowl. Turn berry dipped end up and sprinkle with citrus sugar. Place on prepared sheet. Repeat with remaining berries, chocolate, and sugar. Chill until chocolate sets, about 30 minutes.

Monday, May 16, 2011

Dorie Greenspan for Dummies

Lately, I have been wondering who this elfin-like Dorie Greenspan is, why she's so skinny despite being a veritable baking goddess, and why everyone is worshiping her these days. Who does she think she is, living in glamorous places like France and New York and tempting us with food like this:

And this:
And heaven help me, this!

Well, I still don't know why she's so skinny, but tonight, I decided to take a stab at her incredibly simple-sounding recipe for No-Bake White Chocolate Pie. One bite, and I declared, "That woman knows what she's doing." The creamy, fluffy pie filling was sweet-tart, with a subtle thin layer of banana and a crunchy (store-bought) Oreo crust. Simple, quick, delicious. It would appear that the cult of Dorie has a new inductee today.


No-Bake White Chocolate Pie
by Dorie Greenspan

4 oz. white chocolate (preferably imported), finely chopped
1/2 lb. cream cheese, at room temperature
1/4 cup sugar
1 tsp vanilla extract
1/3 cup sour cream
1/2 cup heavy cream, chilled
1 banana, thinly sliced
One ready-made graham-cracker crust (9 inches)

1. Warm the chocolate in a bowl set over a pot of lightly simmering water. Remove from heat when only partially melted; stir to melt completely.

2. Beat the cream cheese, sugar, and vanilla until smooth. Beat in the chocolate, then the sour cream. Whip the heavy cream until firm; gently fold into chocolate filling.

3. Put the banana slices on the crust, top with the filling, and chill at least 2 hours. If you’d like, sprinkle with grated dark chocolate before serving.

Sunday, May 15, 2011

Alice Waters' Cherry Clafoutis

We never seem to get sour cherries in my neck of the states, but sweet cherries are being sold like crazy in streetside stands and markets everywhere this time of year. I bought a big bag yesterday that were cheap and looked nice, but it turned out they weren't too sweet, so I decided to bake with them.

For help, I turned to Alice Waters, the queen of regional fruit desserts. Decidedly French in spirit if not nationality, Waters' desserts are consistently subtle, light, and almost always feature the very best in fresh fruit.

Well, my fruit wasn't the very best, but when used in a cherry clafoutis, you could hardly tell. This traditional French dessert is sometimes very custardy and rich, but this version is more of a light cake topping over baked sweet cherries. The reserved cherry juice is thickened into a sweet-tart syrup that only heightens the flavor.

WARNING: If you are averse to the idea of perfuming your entire kitchen and the surrounding areas with the heavenly scent of cherry, almond, and lemon, this might not be the dish for you. However, if you are a fan of aroma therapy, by all means make this cherry clafoutis. The smell is to die for, not to mention the taste.


Cherry Clafoutis
From Chez Panisse Cafe Cookbook by Alice Waters


1 lb. sweet cherries, washed and pitted (I halved mine)
2 tsp. fresh lemon juice
1/4 tsp. grated lemon zest
A pinch ground cinnamon
1/3 c. sugar (or more, depending on the sweetness of the cherries)
2 eggs, separated
3 T. sugar
2 T. flour
1 tsp. vanilla extract
1/4 tsp. almond extract
1/3 c. cream
A pinch salt
Powdered sugar

Preheat the oven to 350F. Lightly butter a baking pan large enough to hold the cherries loosely in a single layer. Prepare the cherries and arrange them in the pan. Sprinkle with the lemon juice, zest, cinnamon, and sugar. Bake until the fruit is tender, about 15 minutes, stirring once or twice.

Raise the oven temperature to 375F. butter another dish large enough to hold the cherries in a single layer (I used a medium rectangular Pyrex). Drain the cooked cherries, reserving their juice in a small saucepan. Arrange the cherries in the bottom of your baking dish. Beat together the egg yolks and sugar until well blended. Beat in the flour, vanilla, almond extract, and cream.

Beat the egg white with a pinch of salt until they form soft peaks. Stir a little of the whites into the batter, and then carefully fold in the rest. Pour the batter over the fruit in the baking dish, letting a little fruit show through the top.

Bake in the upper third of the oven for about 20 minutes, until the batter has puffed and browned. While the clafoutis is baking, reduce the fruit juices to a thin syrup. When the clafoutis is done, dust it with powdered sugar and serve warm with a drizzle of the syrup.

Sunday, May 1, 2011

Lemon Bar Trifle & Recipe for a Perfect Birthday

Let us consider the ingredients of a perfect birthday celebration for one's spouse.

Step one: If your spouse can't get enough Mexican food, find a fantastic taco stand and take them there for lunch.
Squeeze the lime over the meat, then devour the freshly made tacos with relish.
Step two: Take your spouse somewhere exciting and exotic for dinner. Maybe eat some tapas and the best salad you ever had (dates in my salad? A wonderful idea! Who knew?) and pretend that you are on the streets of Barcelona together.
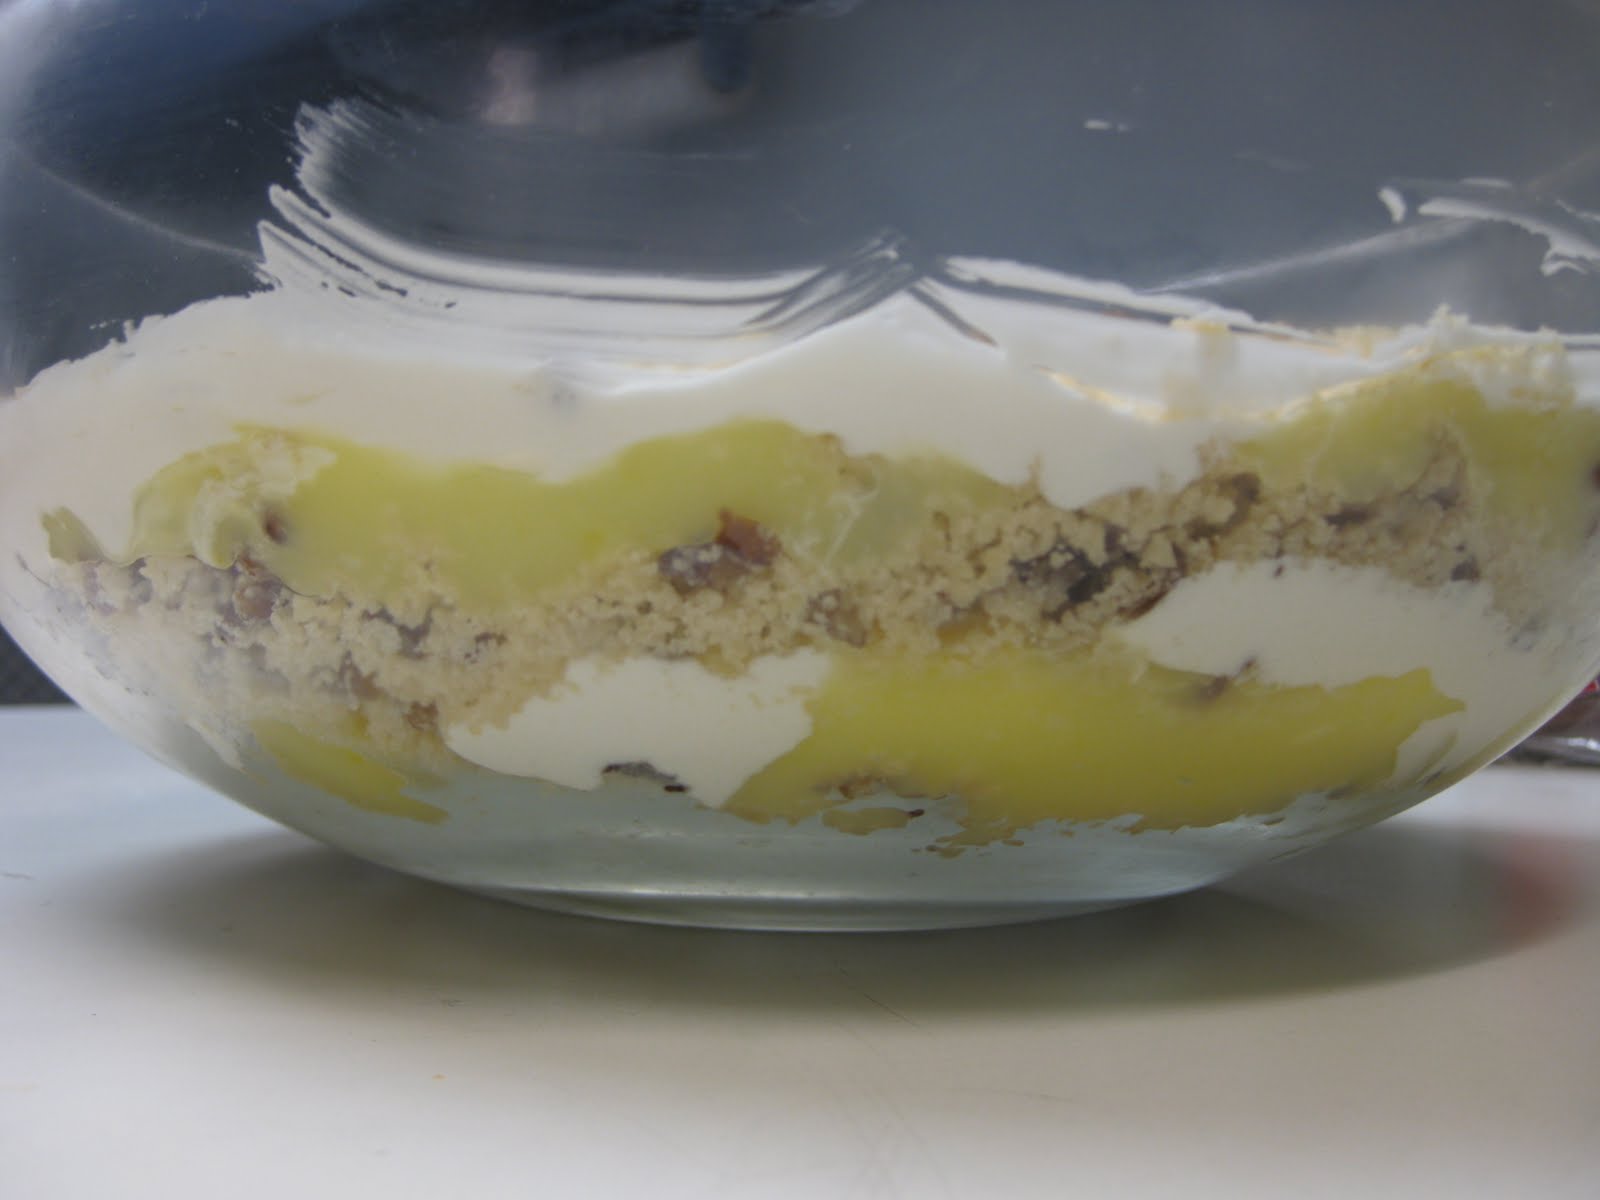
Step three: A wonderful dessert is requisite, and if your spouse loves lemon, how about a Lemon Bar Trifle with fresh lemon curd, pecan shortbread crumbs and white creaminess?

Step 4: When the whole family gets together to celebrate, make sure there are at least 3 kinds of pies to satisfy all appetites. The smile on your spouse's face will be all the reward you need.

There's the recipe I used for a happy birthday this time around. It was a winner. So was the Lemon Bar Trifle recipe, so here it is:


Lemon Bar Trifle


2 c. flour
1 c. pecans, chopped
1 c. butter, melted
1 1/2 c. sugar
1/4 c. cornstarch
1/4 c. flour
1 3/4 c. cold water
3 egg yolks, beaten
2/3 c. lemon juice
2 T. butter
4 tsp. lemon peel, grated
1 8-oz cream cheese, softened
3 C. powdered sugar
1 8-oz. container frozen whipped topping, thawed

In a small bowl, combine flour and pecans; stir in melted butter. Press into an ungreased 9x13 inch baking dish. Bake at 350 for 18-20 minutes or until light golden brown. Cool on a wire rack.

In a small heavy saucepan, combine the sugar, cornstarch, and flour. Stir in water until smooth. cook and stir over medium-high heat until thickened and bubbly. Reduce heat; cook and stir 2 minutes longer. Remove from heat. Stir a small amount of hot mixture into egg yolks; return all egg yolks to the pan, stirring constantly. Bring to a gentle boil; cook and stir 2 minutes longer. Remove from the heat. Gently stir in the lemon juice, butter, and lemon peel. transfer to a large bowl. Cool to room temperature without stirring. Cover surface with waxed paper; refrigerate until chilled.

In a large bowl, beat cream cheese and powdered sugar until smooth. Fold in whipped topping. Crumble the baked pecan mixture; set aside 1/2 c. for topping. Just before serving, in a 3-quart trifle bowl, layer 1 C. each pecan mixture, lemon mixture, and cream cheese mixture. Repeat layers 2 more times. Sprinkle with reserved pecan mixture. Refrigerate leftovers. Makes 9 servings.

Monday, April 18, 2011

A Healthier Strawberry Rhubarb Crisp

There seem to be two camps when it comes to rhubarb: the anti-rhubarbites and the rhubarb fanatics. As for me, I worship the pie plant as an unparalleled rite of spring.

Around the same time each year, the little strawberry stand down the street from my parents' house opens for business, proffering their ruby gems that outshine anything found in the grocery stores. I can’t imagine any better welcome to spring than the tart firmness of rhubarb mingled with sweet soft berries in a warm crisp.

The strawberry-rhubarb recipe I have often relied upon, tempting though it was, seemed a little heavy this year. It called for two layers of white flour-based crisp, and the filling called for a mind-boggling amount of white sugar. I have been trying to reduce my sugar and refined carb intake where possible, and was sure that I could come up with a more healthy version that I would still enjoy.

A homey dish like a fruit crisp lends itself well to whole grain flours, and I felt that whole wheat and oat flours worked marvelously for the topping. For the filling, I replaced the white sugar with a little honey, some lemon zest to brighten the flavors, and some vanilla for fragrance. I added a little cornstarch for thickening, but not enough to make the texture gloppy. The resulting crisp was delightful. Instead of masking the natural flavors of the fruit with an excess sweetness, the flavors shone through. If you're a rhubarb lover, I hope you enjoy the season as much as I am right now!


A Healthier Strawberry-Rhubarb Crisp


Topping:

½ cup whole wheat flour
1/3 cup oat flour
2/3 cup packed brown sugar
1/2 cup rolled oats
1/2 teaspoon ground cinnamon
¼ tsp. kosher salt
5 T. unsalted butter

Filling:

4 stalks rhubarb, trimmed and cut into 1/2 inch slices
1 pint strawberries, trimmed and quartered
2 T. honey
1 tablespoons cornstarch
1 teaspoon lemon or orange zest
1 tsp. vanilla extract

1. Preheat the oven to 375°.

2. In a medium bowl, combine the flours, brown sugar, oats, cinnamon and kosher salt. Cut in the 5 tablespoons chilled, diced butter using a pastry blender (or, if you don’t have one, rub the butter in with your fingers). Place the mixture in the refrigerator.

3. Grease a 9×9-inch pan. Set aside.

4. In another medium bowl, combine the rhubarb, strawberries, honey, cornstarch, zest, and vanilla. Spoon the mixture into the buttered dish or dishes. Blanket the strawberry-rhubarb mixture with the chilled topping. Bake for 40 minutes or until bubbling underneath and brown on top.

Wednesday, February 23, 2011

Peach Blackberry Crisp

I realize that this is the fourth recipe for some form of fruit crisp on my blog. I think that makes it quite clear where my dessert loyalties lie. This version comes from Alice Waters' cookbook called The Art of Simple Food.

If you're wondering why I made this seasonally summer recipe in late February, there are two reasons. First, I am eagerly anticipating spring and summer. We're almost to March - soon asparagus and even strawberries will start appearing, and I can hardly wait. In the meantime, I needed something to tide me over. I looked in my freezer and saw that I still had peaches from a CSA box we received last summer, as well as wild blackberries we had picked and frozen. This recipe struck me as a perfect way to use clean out the fridge as we start a new growing season.

Note: You could also use 4 pound of peaches, or substitute nectarines; use raspberries or blueberries instead of blackberries; and so on.


Peach Blackberry Crisp


3 pounds ripe peaches, peeled and cut into 1/3 inch slices plus 1 cup blackberries (about 7 cups of fruit)

Toss with:

1 T. sugar (if needed)
1 1/2 T. flour

Pile the fruit into a medium baking dish and top with Crisp Topping (recipe below). Bake in a 375 oven for 40-55 minutes (rotate once while cooking for even browning) or until the crisp topping is golden brown and the fruit is bubbling in the dish.


Crisp Topping

Toast in a 375 oven for 6 minutes:
2/3 c. nuts (walnuts, almonds or pecans)

Let cool, then chop coarse.
Put the chopped nuts in a bowl and add:

1 1/4 cups flour
6 T. brown sugar
1 1/2 T. white sugar
1/4 tsp salt (leave out if using salted butter)
1/4 tsp. cinnamon (optional)

Mix well, then add:

12 T. (1 1/2 stick) butter, cut into small pieces

Work the butter into the flour mixture with a pastry blender or your fingers until the mixture comes together and has a crumbly, but not sandy, texture. Chill until ready to use. Crisp topping can be made ahead and refrigerated a week or so, or frozen for 2 months.

Tuesday, February 15, 2011

When Life Gives You Lemons, Make Lemon Curd


I have a new mantra for you. When life gives you lemons, make lemon curd. A longtime favorite in England, lemon curd has in recent years begun popping up in everything from gourmet cupcakes to restaurant breakfast menus. When a friend gave us a bag of lemons, I researched making my own lemon curd at home and found that it's not to difficult - especially when you have Alton Brown to guide you.

Here's his simple recipe for lemon curd. I made a batch and for Valentines Day, I used it as a filling in mini puff pastry tarts, topped with a single fresh raspberry. They were adorable and my friends and co-workers went crazy for them. Enjoy!

Lemon Curd
Recipe from Alton Brown


5 egg yolks
1 cup sugar
4 lemons, zested and juiced
1 stick butter, cut into pats and chilled

Add enough water to a medium saucepan to come about 1-inch up the side. Bring to a simmer over medium-high heat. Meanwhile, combine egg yolks and sugar in a medium size metal bowl and whisk until smooth, about 1 minute. Measure citrus juice and if needed, add enough cold water to reach 1/3 cup. Add juice and zest to egg mixture and whisk smooth. Once water reaches a simmer, reduce heat to low and place bowl on top of saucepan. (Bowl should be large enough to fit on top of saucepan without touching the water.) Whisk until thickened, approximately 8 minutes, or until mixture is light yellow and coats the back of a spoon. Remove promptly from heat and stir in butter a piece at a time, allowing each addition to melt before adding the next. Remove to a clean container and cover by laying a layer of plastic wrap directly on the surface of the curd. Refrigerate for up to 2 weeks.