Showing posts with label recipe. Show all posts

Monday, February 18, 2013

The Best New York Cheesecake


 New York Cheesecake

 Confession: I'm not much of a cheesecake fan. It always seemed too dense, too rich, liable to sit in my stomach like a brick for about a day. When a Cheesecake Factory opened up locally, I tried a slice once or twice, but overall, remained unimpressed. 

Then, recently, I stumbled upon a recipe for New York Cheesecake from Ruth Reichl, and my interest was piqued. As a big fan of the food writer and former editor of Gourmet magazine, I knew if anybody could share a good recipe for cheesecake, it was this long-time New Yorker. 

I was not disappointed. Cream cheese made without gum was expensive, so I only did 1 part of that to 2 parts of traditional cream cheese. Someday I'll splurge and make the whole thing with that creamy, crumbly, heavenly substance, but even a little natural, gum-free cream cheese made a huge difference.

I served my cheesecake at a New York-themed book club party and everyone voted it the best cheesecake ever, from the crispy-sweet crust to the creamy, smooth, double-layered filling. We devoured it happily and quickly. Thanks, Ruth! I knew you wouldn't let me down!


New York Cheesecake
Recipe by Ruth Reichl
Serves 12-16

For the crust
1½ cups chocolate wafer or graham cracker crumbs (about 6 ounces)
½ cup melted butter
¼ cup sugar
pinch salt

For the filling
1½ pounds cream cheese, preferably without gum, at room temperature
1 cup sugar
4 eggs
1½ teaspoons vanilla extract or vanilla paste

For the topping
2 cups sour cream
2 tablespoons sugar
1 teaspoon vanilla extract or vanilla paste

Bake the crust: Preheat oven to 350 degrees. Mix the cookie crumbs with the sugar and the melted butter and press into bottom and sides of a 9-inch springform pan. Put into the freezer for 15 minutes (it will keep here, covered, for a couple of months). Bake for 10 minutes, just to crisp the crust. Turn the oven down to 325 degrees, and set the springform pan in a larger pan to catch any drips.

Make and bake the filling: Beat the cream cheese, sugar, eggs, and vanilla until smooth. Pour into crust and bake 50 minutes, or until the cheese is set on the edges, but still a bit wobbly in the middle. (Depending on your oven, this can take up to an hour or more; just be patient and check every 5 minutes or so.) Remove from the oven (leave oven on) and cool for about 10 minutes on a wire rack.

Top and bake again: Stir together the sour cream, sugar and vanilla and spread over cooled cake. Return to oven for 12 minutes until glossy. Topping will set as the cake cools.

Chill: Cool completely, cover, and chill in the refrigerator at least 8 hours.

Thursday, April 12, 2012

Mexican Tortilla Casserole


I made this Mexican Tortilla Casserole last night, thanks to my weekly recipe e-mail from The Splendid Table. It was easy to make, flexible, delicious, filling, good enough for company and simple enough for a Monday night supper. What made me love it even more was the fact that it was extremely economical and meatless to boot. When you find a recipe that has it all, it's only nice to share.


I didn't find the dish to be a typical casserole; it reminded me more of enchiladas, with the layers of tortilla, cheese, veggies, beans and tomato sauce. I made mine in a springform pan. I served wedges of this "Mexican Pie" ( a better name, I thought) with tomato salsa and sour cream, and the three males for whom I was cooking absolutely loved it. Their hearty appetites wiped away any hope of leftovers I may have had while preparing this dish, but I felt grateful that they enjoyed it so much, and complimented by the empty dish.

Mexican Tortilla CasseroleFrom The Mom 100 Cookbook: 100 Recipes Every Mom Needs in Her Back Pocket by Katie Workman; Serves 4 to 6

"Essentially a lasagna with tortillas standing in for noodles, this is one of those dishes that can miraculously be on the table in short order, made from things you most likely have in your pantry and fridge. If you don't like, or you don't have, one of the ingredients, skip it. Or, if you have something else that you think might be appealing all layered in (like slivered bell peppers to sauté with the onions, kale, chopped, cooked broccoli -- whatever the people in your home will eat), then fling it on in."

Nonstick cooking spray
1 tablespoon olive, vegetable, or canola oil
1 onion, chopped
1 teaspoon ground cumin
1-1/2 teaspoons chili powder
1 teaspoon minced garlic
1 can (14 ounces) chopped tomatoes, drained, with 1/3 cup juice reserved
1/4 cup tomato paste
2 cans (15.5 ounces each) white, black, or kidney beans (or a mixture of any two), rinsed and drained
Kosher or coarse salt and freshly ground black pepper
1 can (15 ounces) sweet corn kernels, drained, or 1-1/2 cups frozen corn, thawed
3 cups coarsely chopped spinach
4 medium-size (8-inch) flour tortillas
2 cups (8 ounces) shredded Monterey Jack or cheddar cheese
Chopped fresh cilantro (optional), for garnish
Sour cream (optional), for serving
Salsa (optional), for serving

1. Preheat the oven to 400F. Spray a 9-inch round cake pan, springform pan, or baking dish with nonstick cooking spray.

2. Heat the oil in a large skillet over medium heat. Add the onion, cumin, chili powder, and garlic and cook until you can smell the spices and the onion is softened, about 3 minutes. Stir in the tomatoes with the 1/3 cup of reserved juice and the tomato paste, then stir in the beans. Season with salt and pepper to taste. Let the bean mixture simmer until everything is hot, about 3 minutes. Add the corn and spinach and stir until the spinach has wilted and everything is well blended and hot, about 3 minutes. Taste for seasoning, adding more salt and/or pepper as necessary.

3. Place 1 tortilla in the prepared cake pan. Spread one fourth of the bean and vegetable mixture evenly over the tortilla, then sprinkle 1/2 cup of the shredded cheese evenly over the top. Repeat with 3 more layers, ending with the last quarter of the bean mixture and then the last 1/2 cup of shredded cheese.

4. Bake the tortilla casserole until it is hot throughout and the top is lightly browned, about 20 minutes. Let the casserole sit for about 5 minutes, then cut it into wedges using a sharp knife and serve it with a spatula or better yet a pie server. Sprinkle the top with cilantro, if desired, and serve with sour cream and/or salsa on the side, if you like.

Cooking Tip: You can make the tortilla casserole a day ahead of time, cover it with plastic wrap or aluminum foil, and put it in the fridge overnight; just take it out and let it sit at room temperature for about 20 minutes while the oven preheats to 400F. Bake the casserole uncovered. You can also reheat the cooked casserole at 350F for 15 to 20 minutes, until warm.

Wednesday, April 4, 2012

How To: Granola


A while back, I bought some gourmet granola for a friend. It looked wonderful: chia seeds, dried cherries, and sunflower seeds. Yogurt and granola make a fabulous breakfast, both delicious and healthy, but that store-bought granola set me back $8. Yeah... That's not an item I could afford to purchase on a regular basis. So I set about learning the basics of granola-making at home.

I started with a basic recipe from Sugar Sweet Bean, coming up with a bare bones template that could be altered for endless variation. I have enjoyed many variations on this granola theme in the past several months, and all have been lovely. (Except that one where I added the dried fruit before baking and they turned into burnt pieces of ash.)

And I have to say, it so, so easy. I will probably never buy granola again now that I know how simple it is to make at home. I basically just toss together whatever combination of nuts, seeds, dried fruit and spices I have in the pantry (bought cheaply in the bulk section of the grocery store). Bake it for 30 minutes and I have a new stash of wonderful homemade granola. Here's to a future of wholesome, exciting breakfasts!

Basic Granola Formula

3 c. old-fashioned oats
1 c. nuts (almonds, walnuts, pecans, pistachios, etc.)
1/2 c. mixed seeds (sesame seeds, sunflower seeds, pumpkin seeds, poppyseeds, flaxseeds, etc.)
3/4 c. coconut (optional)
2 tsp. ground cinnamon
1-2 pinches of coarse salt
5 T. liquid sweetener (pure maple syrup, honey, agave syrup, etc)
4 T. neutral oil (canola, olive oil, vegetable oil, etc.)

1 1/2 c. dried fruit of your choice (cranberries, blueberries, cherries, apricots, dates, etc.)

Combine all dry ingredients in a large bowl (do not add the dried fruit yet!). Stir in the sweetener and oil of your choice. If you want it sweeter, add more sweetener; feel it needs more oil, then add more. Line a bake sheet with aluminum foil, and spread the granola evenly. In a preheated 350 degree oven, bake for 15 minutes, then stir around, and bake another 12-15 minutes longer. Remove from oven and let cool for a bit before adding the dried cranberries. Cool completely and store in an airtight container.

Saturday, March 31, 2012

Filhos (Portuguese Doughnuts)


When I was a child, our family took a trip every year to the coast where we would relax in a beach house for a week. This 4 hour car ride was always preceded by a breakfast of store-bought orange juice (Sunny D - blech) and doughnuts. Since I always got motion sickness on the drive, it turned me off of doughnuts for my entire childhood- not a bad thing, health-wise, but quirky.

There was one kind of doughnut that I still loved, however, that tasted nothing like store-bought doughnuts to my young palate - my mom's homemade Portuguese doughnuts, called filhos. Apparently they are a traditional Christmas treat in Portugal, but my mom made them for us whenever the inclination took her, but usually on a lazy Saturday morning.

We made some this weekend and I was amazed all over again at just how many I can stuff down my throat without feeling heavy or weighted down like I do with just one store-bought American doughnut. We make our filhos round by using a cookie dough scooper, and roll them in cinnamon-sugar after frying, but plain white sugar is more traditional I suppose. I understand some versions use pumpkin; ours do not. The only hard part is waiting for them to rise, but we have cheated on that part too and still enjoyed the results. So good, people! So good.

Filhos

6 cups flour
6 tsp. yeast (I know right? It's a lot, but it's right.)
1/2 c. sugar
8 eggs, beaten, at room temperature
2 c. milk, warmed
1/2 c. butter, melted
1/2 tsp. salt

1. Mix all ingredients together with hands for 5 minutes until dough is smooth.

2. Let rise for 1 hour.

3. Pull off various size pieces and fry in hot oil (we use canola).

4. Drain on paper towels and roll in sugar. Enjoy!

Tuesday, March 20, 2012

The Flavors of Asia Cooking Class

Mai Pham with her cooking assistant, shown
behind her cookbook and signature sauces


I joined the Sacramento Natural Foods Co-op this year, after admiring from afar for a long time and even taking a few outstanding classes there in the past. (Like this one on Pie Making, and another on Raised Bed Gardening.)

This week I got to attend a cooking class on the Flavors of Asia taught by Mai Pham, an expert in Vietnamese and Thai cuisine. Mai teaches at the Culinary Institute of America in Napa, owns many restaurants all over the country, has published a cookbook, makes her own line of sauces, and is a bit of a local celebrity. She has been on Martha Stewart and kicked off her class by showing us a segment she did on the Food Network to give us a feel for the cuisine of Southeast Asia.

Mai was very professional and pleasant, and even brought her 86-year-old, very spry-looking father to the class with her. Her grandmother, she confided, lived to be 105 years old and credited her longevity to a vegetarian diet and lots of coconut milk, which the Vietnamese associate with high immunity levels.

Mai also stressed the importance of moderation in all things, confessing that she has to work hard to keep balanced. For example, if she wants to eat ice cream for dessert, her family will eat a simple, light dinner such as stir-fried vegetables and brown rice before indulging.

Mai demonstrated and let us sample several dishes during the course of the class, as well as teaching some basic techniques like assembling and rolling salad rolls, and cutting herbs and vegetables gently to avoid bruising. She showed us how to make:

* Salad Rolls with Shrimp and Pork, with a Peanut Hoisin Sauce

* Yellow Curry with Tofu and Eggplant

* Singapore Noodles Topped with Stir-Fried Asian Greens

* Caramel Pork with Egg and Daikon
My favorite dishes were the Yellow Curry and Singapore Noodles, but I enjoyed them all. Before heading home, I hopped around the corner to the Co-Op to pick up a jar of Lemongrass Kitchen brand Yellow Curry Sauce, a concentrated base which makes 3-4 batches of curry. I can't wait to try my hand at this at home!

Here is Mai Pham's recipe for the Yellow Curry with Tofu and Eggplant. It's crazy good; I've never liked a vegetarian curry so much! It also taught me one thing I've done wrong in the past - adding raw vegetables to my curry has added too much water and diluted the flavor, so that I never felt that my curries at home matched up with the restaurant versions. Blanching the vegetables ahead of time solves this problem. Also, she explained that frying the tofu ahead of time so that it gets a "skin" allows it to absorb sauces better. This recipe would be perfect for summertime, when eggplant, tomatoes, green beans and zucchini are all in season.

1/4 c. Lemongrass Kitchen Thai Yellow Curry Sauce
1.5 c. coconut milk
1/2 lb. firm tofu, pan-seared or lightly fried, cut into 2/3x2"x1/12" pieces
2 c. eggplant, Japanese preferably, halved lengthwise then cut into 1/2 " half moon pieces
3 Roma tomatoes, cut into 8 wedges
1/2 c. green beans, 1" lengths, blanched
1/2 c. zucchini, bite sized pieces, blanched
2 tsp. Thai chilies, cut on the diagonal into thin slices (optional)
1/2 c. frozen peas
10 Thai basil leaves (optional)

1. In a saucepan, combine LGK Thai Curry Sauce Concentrate with coconut milk and cook over medium heat until mixture comes to a low boil.
2. Add tofu, eggplant and tomatoes and cook for 5 minutes.
3. Add remaining ingredients and simmer until all vegetables start to soften, another 2-3 minutes.

Monday, January 30, 2012

Between Dreams and Reality


I just came back from a stress-free weekend visiting family in Southern California. It was sunny and 75 degrees outside. I wore a skirt and sandals to the beach. There were strawberries in the farmer's market - both local and seasonal. Is it any wonder my entire being was screaming "No!" at the idea of coming back to the reality of work and several months before spring?

These whole wheat chocolate chip cookies helped ease me back into real life, without slapping me in the face too harshly. They are comforting enough to harken to that dreamy land of suspended reality, yet they have enough nutrients to fit into the real world where calories count and fiber is a necessary part of life.

They taste great, a little nutty from the whole grains, a little bitter, a little salty, and just enough sweetness to keep you reaching for one more. Chocolate Chip Cookies that are 100% whole grain? It's a perfect balance of escapism and what your body really needs. (Need pictures? Check out these.)

Whole-Wheat Chocolate Chip Cookies
Based on a recipe from Kim Boyce's Good to the Grain

3 cups whole wheat flour (I used whole wheat pastry flour)
1 ½ tsp. baking powder
1 tsp. baking soda
1 tsp. kosher salt
2 sticks (8 oz.) unsalted butter, softened
1 cup lightly packed dark brown sugar
1 cup sugar
2 large eggs
1 tsp. vanilla extract
8 oz. bittersweet chocolate, roughly chopped into ¼- and ½-inch pieces, or bittersweet chips (I used Scharffen Berger bittersweet chocolate chunks - perfect!)

Position racks in the upper and lower thirds of the oven, and preheat to 350°F. Line two baking sheets with parchment. (If you have no parchment, you can butter the sheets.)

Combine the flour, baking powder, baking soda, and salt in a medium bowl, and whisk to blend.
Put the butter and sugars in the bowl of a stand mixer fitted with the paddle attachment. With the mixer on low speed, mix just until the butter and sugars are blended, about 2 minutes.

Scrape down the sides of the bowl with a spatula. Add the eggs one at a time, beating well after each addition. Beat in the vanilla. Add the flour mixture to the bowl, and blend on low speed until the flour is just incorporated. Scrape down the sides and bottom of the bowl. Add the chocolate, stirring in with a wooden spoon. Refrigerate the dough until cold, about 30 minutes.

Scoop mounds of dough about 3 tablespoons in size onto the baking sheets, leaving about 3 inches between each cookie. (I made smaller cookies; about 1 inch balls of dough.)

Bake the cookies for 16 to 20 minutes (check after 12 minutes). Transfer the cookies, still on parchment, to a rack to cool. Repeat with remaining dough.

Yield: about 20 big cookies or 36 smaller cookies

Saturday, January 7, 2012

Pumpkin Muffins with Everything Good


Happily, this week I discovered that the pumpkin I have been storing on my front porch since our harvest in October was still in good eating condition! I started off the slaughter of the pumpkin with Dorie Greenspan's recipe for Pumpkin Stuffed with Everything Good. Bread, cheese, cream, bacon and chives... How could you go wrong? Just a wedge for dinner and we were full.

Then came this morning. I always feel like Saturday morning calls for a real breakfast, since I don't necessarily get one during the work week. What could be more appropriate than pumpkin muffins? I have a great recipe to share - it's even relatively healthy, with half whole wheat flour. Olive oil, dried cranberries, apples and walnuts made it hearty enough to fill you up for a while. (Two muffins at 11:00am and I was good till dinner! True story.) In a tribute to Dorie, the grand dame of French cookery, I'll call these Pumpkin Muffins with Everything Good.

Pumpkin Muffins with Everything Good

1 1/4 c. whole wheat flour
1 1/4 c. all-purpose flour
1 c. sugar
1 tsp. cinnamon
1/4 tsp. cardamom
Dash of: ginger, cloves, and nutmeg
1/2 tsp. salt
1 tsp. baking soda
2 eggs
1/2 c. olive oil
1 c. pumpkin puree
1 tsp. vanilla extract
1 c. chopped apple
1/2 c. chopped walnuts
1/2 c. dried cranberries

Preheat oven to 350f. Grease a 12-muffin tin.

In a bowl, combine all dry ingredients and whisk together. In another bowl, combine the wet ingredients and whisk together. Stir the wet ingredients into the dry ingredients, then stir in the apples, walnuts, and cranberries.

Bake for 35-40 minutes or until golden brown. Cool for 5 minutes before removing from pan to wire rack to finish cooling.

Tuesday, December 6, 2011

Vegetable Korma


I follow the Meatless Monday campaign on Facebook, and this week they posted a question that got me thinking. "What's your favorite meatless comfort food?" My first thought was homemade macaroni and cheese... and then I couldn't think of another one!

Later, it struck me that a good Indian vegetable curry is right up there for me. The whole experience is pleasurable, from the sizzling onion/ginger/garlic triumvirate at the start, then roasting the spices until they reach the peak of their fragrance, and at last sitting down to a steaming bowl of creamy, spicy sauced vegetables over basmati rice.

I altered this great recipe for Vegetable Korma (originally from allrecipes.com) by adding chickpeas, substituting half-and-half for the cream, and omitting the ground cashews. (Where am I going to get ground cashews? I don't have a spice grinder or food processor, so I can't really grind them myself. ) Also, I'm a big fan of blooming the spices before adding the liquid ingredients; I think it really brings out those flavors.

So here it is, my meatless comfort food for these cold nights we're having. Who says food can't be comforting and good for you at the same time?

Vegetable Korma
Adapted from Allrecipes.com

1 T. olive oil
1 small onion, diced
1 tsp. minced fresh ginger
4 cloves garlic
minced2 potatoes, cut into small cubes
4 carrots, cubed
1/4 tsp. red pepper flakes
1 (8 oz) can tomato sauce
1 1/2 tsp. salt
1 1/2 T. curry powder
1 c. frozen green peas
1 can chickpeas, rinsed and drained
1/2 red AND green bell pepper, cubed
1 c. half-and-half
1 bunch fresh cilantro, chopped

Heat the oil in a skillet over medium heat. Stir in the onion and cook until tender. Add the ginger, garlic, curry powder and salt, and cook about 1 minute. Now add your potatoes, carrots, red pepper flakes and tomato sauce. Cook and stir for 10 minutes, or until potatoes are tender.
Stir in your frozen peas, chickpeas, bell peppers, half and half, and a handful of chopped cilantro. Reduce heat to low, cover, and simmer for 10-20 minutes, or until all vegetables are tender. Garnish with more cilantro and serve over brown basmati rice. Makes 6-8 servings.

Tuesday, November 22, 2011

Perfect Pie Crust


My mom and I have a tradition that every Thanksgiving Eve, we bake pies together for the next day. How fortunate that just last month, I found a recipe for perfect pie crust while making a chicken pot pie. This dough was beautiful: pliant, easy to work with, and with all the best qualities of both butter (rich flavor) and shortening (flakiness and holding its shape). This makes 2 pie crusts.

Happy Thanksgiving!

Perfect Pie Crust

1/2 c. vegetable shortening
1/2 c. cold unsalted butter
3 c. all-purpose flour
1 tsp. kosher salt
1 c. ice water

Mix the shortening, butter and salt into the flour with a pastry blender until very crumbly. Add water until the dough comes together into a ball. Cover dough in plastic wrap and refrigerate at least 1 hour, or as long as 24 hours.

When ready to make pie, roll the dough out on a floured surface until it fits your pie pan. Fold in half, then in half again, and transfer to the pie pan. Now unfold it. Do the same with the top crust, tucking the extra dough under and crimping the edges. Bake as indicated in your pie recipe.

Wednesday, October 19, 2011

Pumpkin Lasagna


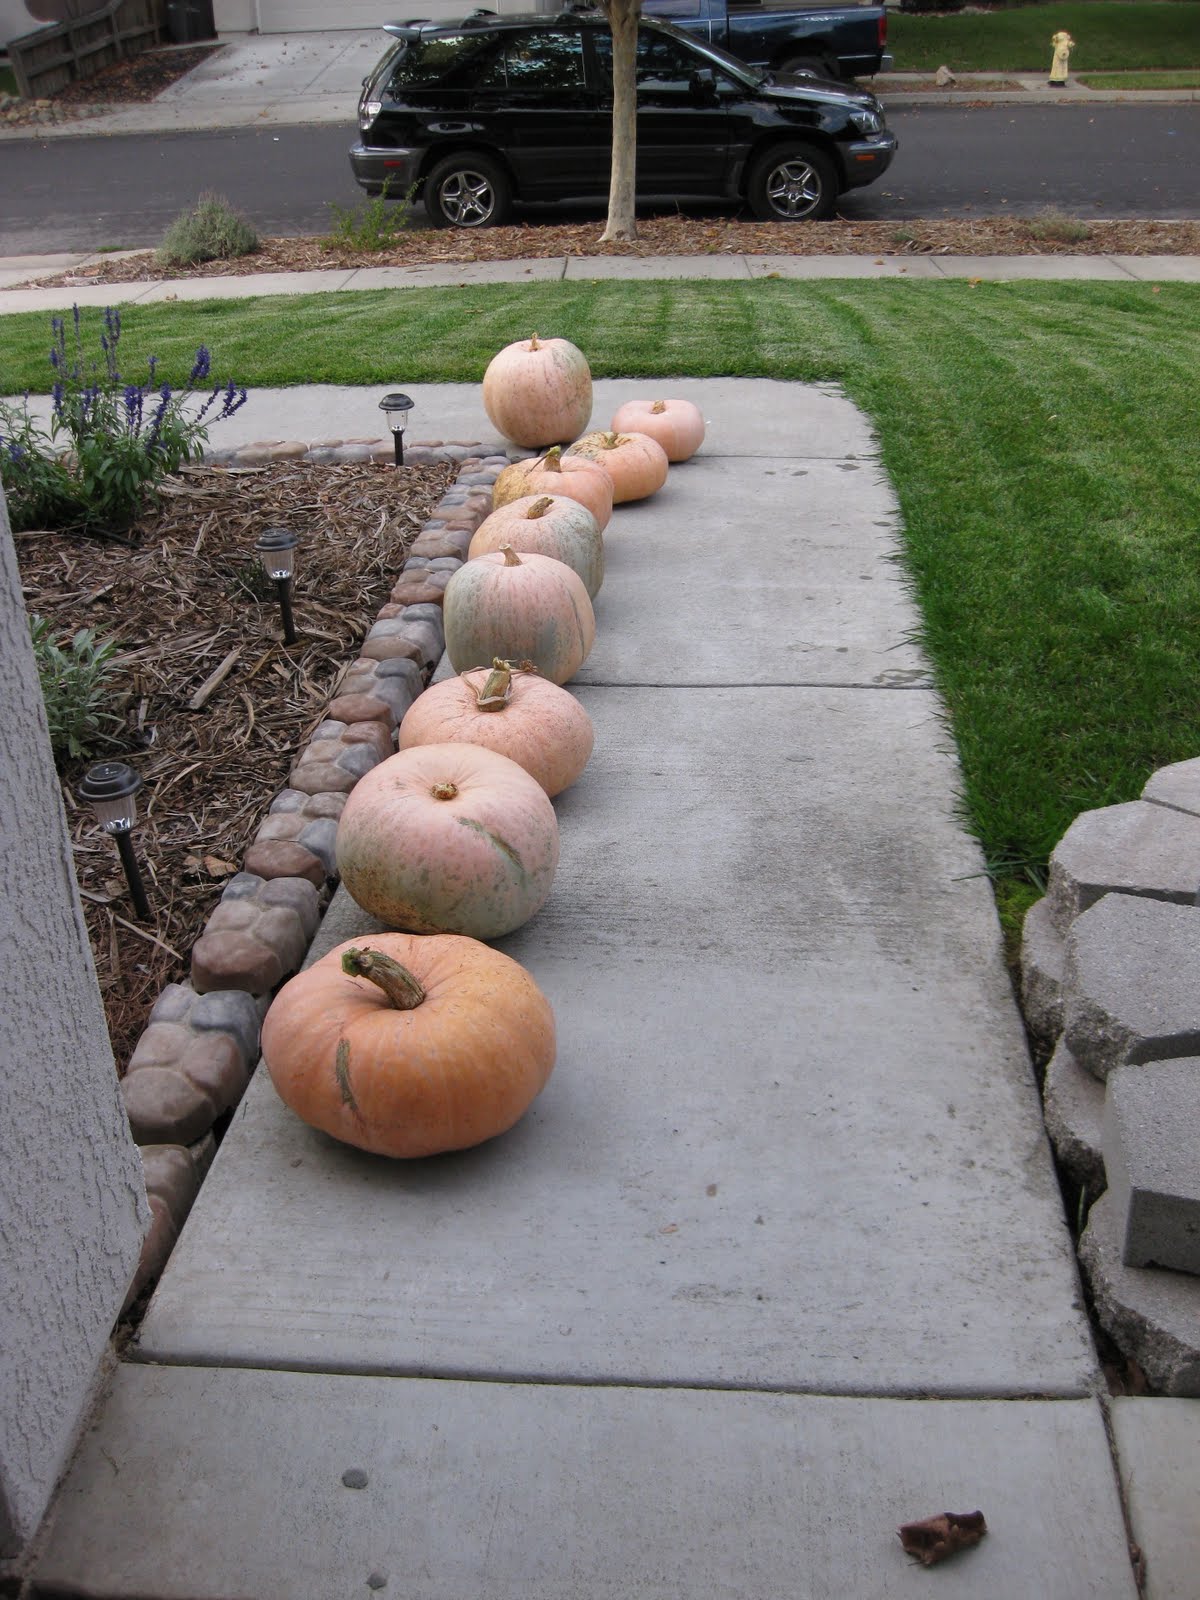
The garden yielded us a total of 13 pumpkins. I'm pretty sure the packet of seeds we planted said New England pie pumpkins, but these guys are way bigger than we expected them to be! We are going to have plenty of pumpkin for Thanksgiving next month and more than enough to share with friends.

Now I'm on the hunt for pumpkin recipes, especially those that take pumpkin beyond pie status to the dinner plate. I have read that any recipe calling for butternut squash can use pumpkin instead, so I have lots of room to experiment with that hypothesis. Here is my version of a recipe that I tried this week for Pumpkin Lasagna.

I was a little trepidatious when I first envisions a pumpkin lasagna, thinking of cutting into a square and finding a thick layer of pumpkin filling, but it wasn't how I imagined it - it was much prettier and tastier. The pumpkin puree is blended with soft ricotta and other cheeses for a creamy golden layer that sits besides your traditional layers of pasta sauce, noodles, meat and vegetables. I love the versatility of lasagna as a season dish that you can throw zucchini and eggplant into in summer, then pumpkin in the fall. This is definitely a recipe I would make again.

Pumpkin Lasagna

1 medium onion, chopped
4 to 6 garlic chopped
1 tablespoon olive oil
1 pound lean ground beef or Italian sausage, casings removed
4 handfuls baby spinach
2 jars of prepared pasta sauce
Kosher salt, freshly ground black pepper and spices, to taste
1 pound low-fat ricotta cheese
1 cup shredded mozzarella cheese + extra for topping
1 cup shredded parmesan cheese
2 eggs
1 1/2 cups pumpkin puree
1 pound no-boil lasagna noodles

In a large heavy skillet, over medium heat, saute onion and garlic in the olive oil until translucent. Add meat and cook until brown, breaking it up with a wooden spoon as it cooks. Add spinach and cook for 5 more minutes. Set aside.

In a large bowl mixing together the ricotta, mozzarella and parmesan cheeses. Add eggs, pumpkin puree and salt and pepper, to taste. Mix very well.

Preheat oven to 350 degrees F.

Build your lasagna in a large (9 by 12-inch) starting with a layer of sauce, a layer of pasta, a layer of half the sausage and a layer of half the filling. Add another layer of pasta, sauce, the remaining sausage and the filling. Finish with a layer of pasta and a layer of sauce. Sprinkle some mozzarella cheese on top and bake for 25 minutes. Let cool for 15 minutes before serving.

Saturday, October 15, 2011

Health Food at the Dollar Store?


A while back, I went to the Dollar Store in search of "real" food. I generally think of the food sold there as horrible both in quality and nutrition - you know, Banquet pot pies and generic soda pop. Then my co-worker told me he sometimes finds actual healthy food there, randomly. Their selection isn't consistent, but will sometimes offer unexpected pleasant surprises. He advised me to go with an open mind and see what I could find.

I took his advice and the next time I went to the Dollar Store, I wandered the food aisles. I was pleased to find a bag of whole fax seeds, an fantastic source of Omega 3 fatty acids. But what to do with them? I added some to a fruit smoothie once, but today I may have found the best use ever: multi-seed bread.

This bread had an excellent flavor and texture. I loved the subtle little crunchy bits of seeds
tucked inside the slightly sweet, freshly baked bread. I have a feeling that my whole flax seeds are going to find their way into many more loaves of bread. And the best part is, they only set me back a dollar.

Seed Bread


2 cups of warm water
¼ c. honey
2 ¼ tsp (1 package) active dry yeast
¼ c. olive oil
1 tsp. kosher salt
2 ½ c. whole wheat flour
2 ½ c. bread flour
½ c. sunflower seeds
½ c. flax seeds

Dissolve honey in warm water in a large bowl, then sprinkle 2 1/4 tsp of yeast over the top and let proof for 10 minutes. Then add oil and salt. Next, stir in all flours and seeds with a wooden spoon until flour is dissolved. Turn onto a clean surface and knead until the dough is smooth. Place dough in an oiled bowl and let rise for 1 hour. Divide dough into 2 loaves and place in 2 oiled bread pans, then let rise again for 45 min. Bake at 375 for 30 minutes.

Thursday, October 13, 2011

Jam Filled Oatmeal Bars

I am never without extra jam on hand. My pantry is currently stocked with strawberry raspberry, strawberry rhubarb, fig strawberry, apricot vanilla, and sugar plum jam, not to mention way too much orange marmalade that I really need to start using up... But that's an idea for another day's blog post.

Tonight I brought these utterly simple bars to a church activity and they were a big hit. With whole wheat flour and rolled oats, they aren't overly sweet, but pleasantly satisfying, chewy and moist. One could almost justify these bars as an acceptable breakfast food on the go. And they are an excellent way to use that extra jam you might have in the fridge or pantry. Enjoy!


Jam-Filled Oatmeal Bars

½ cup all-purpose flour

½ cup whole wheat

1 cup rolled oats

1/2 cup butter, softened

1/3 cup brown sugar firmly packed

1/4 t baking powder

1/8 t salt

3/4 cup jam (I used strawberry rhubarb)

Preheat oven 375 degrees, and in a large bowl mix everything together but the jam.

Measure two cups of the mixture and press into the bottom of an 8 inch square baking dish coated with cooking spray. Using a large spoon, distribute jam evenly over the mixture in the dish.

Take remaining mixture and sprinkle on top of the jam and press down lightly.

Bake 25 minutes. Remove from oven and allow to cool in dish for at least 20 minutes before serving.

Thursday, August 18, 2011

My First Slow Food Book Club Meeting

How do you feel about the idea of doing something that scares you in order to promote personal growth? I kind of hate that concept... But sometimes I'm glad I did the scary thing afterwards. This week, I did something that was scary to me, or at least intimidating. Pushing aside memories of being painfully shy and introverted and inarticulate, I went to a Slow Food Book Club meeting.

This was my first time ever going to a Slow Food event, or participating in a book club. The meeting was held in a 101-year-old home in downtown Sacramento, where our host for the evening lives. She owns 3000+ cookbooks and was incredibly gracious and knowledgeable about all things culinary.

This meeting was a potluck, and the food was something to behold. With all the foodies in attendance, perhaps this was to be expected, but it surpassed my expectations. Quinoa and Caprese salads, pizza with homegrown tomatoes, a fantastic cheese platter with chutney and crackers, and a Smitten Kitchen recipe for blondies were some of the dreamy offerings.


The book we discussed (which is being held up in the picture above) was written by local Davis dweller Spring Warren, who pledges to grow her own food for a year and make her diet 75% homegrown. The title is Quarter Acre Farm: How I Kept the Patio, Lost the Lawn, and Fed My Family For a Year, and it was a highly enjoyable read: funny, entertaining, informative, and never condescending to the rest of us humble folk who only dabble in gardening. There are also plenty of tasty sounding recipes.

Before going to the book club, I was afraid that others might show up with home-cured wild boar sausage and scoff at me for buying my orzo pasta at a grocery store instead of making it from scratch. In truth, all of the Slow Food friends I met were very down to earth, incredibly generous, and delightfully passionate about good food and restoring our connection to the food chain. And that's something I can absolutely get behind.

Here's the recipe for the dish I made, pictured in the bottom left corner of the photo above. It's a unique, easy-to-make alternative to a pasta salad, and perfect for bringing to a potluck or picnic. I used green onions from the garden, cut out the capers (it's plenty salty already with the kalamata olives), and used sun-dried tomato feta. Here's to doing something scary and being pleasantly surprised.

Orzo Salad with Feta, Olives and Bell Peppers
From Epicurious

12 ounces orzo (rice-shaped pasta)
2 tablespoons plus 1/2 cup olive oil
1 1/2 cups crumbled seasoned feta cheese (such as basil and tomato; about 6 ounces)
1 cup chopped red bell pepper
1 cup chopped yellow bell pepper
3/4 cup pitted Kalamata olives
4 green onions, chopped

3 tablespoons fresh lemon juice
1 tablespoon white wine vinegar
1 tablespoon minced garlic
1 1/2 teaspoons dried oregano
1 teaspoon Dijon mustard
1 teaspoon ground cumin
3 tablespoons pine nuts, toasted

Cook orzo in large pot of boiling salted water until tender but still firm to bite. Drain. Rinse with cold water; drain well. Transfer to large bowl. Toss with 2 tablespoons olive oil. Add crumbled feta cheese, chopped bell peppers, Kalamata olives, green onions and capers.

Combine lemon juice, vinegar, garlic, oregano, mustard and cumin in small bowl. Gradually whisk in remaining 1/2 cup olive oil. Season dressing to taste with salt and pepper.

Add dressing to orzo mixture and toss to blend. Season to taste with salt and pepper. (Can be prepared 6 hours ahead. Cover and refrigerate.)

Garnish salad with pine nuts; serve.

Sunday, August 7, 2011

Sourdough Panzanella with Chicken


While walking through Lowe's for the 29th time this week (shopping for house stuff, of course), my eyes fell upon a magazine called Fine Cooking. I purchased this publication due to the fact that I wanted to eat nearly everything I saw in it. The first recipe I tried did not disappoint - Sourdough Panzanella with Chicken.

This simple summer meal is the perfect excuse to use fresh tomatoes, cucumbers and herbs from the garden, the farmer's market, your CSA box, or wherever you go for the best produce summer has to offer. And it doesn't even require you to turn on an oven. Score!

The only problem now is - what do I do with the rest of the package of anchovies that I opened to make this recipe? I'm new to the anchovy game. I may need to do some research for ideas.

Sourdough Panzanella with Chicken
From Fine Cooking

1/2 cup olive oil; more for the grill
4 3/4 inch-thick slices sourdough bread
1 tsp. finely chopped fresh oregano
1/2 tsp. smoked sweet paprika
Kosher salt and freshly ground black pepper
1 lb. boneless, skinless chicken breast halves, trimmed
3 Tbs. red wine vinegar
1 anchovy fillet, rinsed
1 small clove garlic
4 medium tomatoes, cut into 3/4 inch pieces (3 cups)
1 medium cucumber, peeled, halved lengthwise, seeded, and cut into 3/4 inch pieces (1-1/2 cups)
1/2 small red onion, chopped (1/2 cup)
1/4 cup chopped fresh mixed herbs, such as basil, parsley, cilantro, or mint

Prepare a medium-high charcoal or gas grill fire. Clean and oil the grill grate.

Brush the bread on both sides with 2 Tbs. of the olive oil. Grill the bread until well marked, about 1 minute per side. Transfer to a cutting board, cut into 3/4-inch cubes, and set aside.

In a small bowl, mix the oregano, smoked paprika, 1/2 tsp. salt, and 1/2 tsp. pepper. Sprinkle evenly over the chicken breasts. Grill, turning once, until an instant-read thermometer inserted into the thickest part of each breast registers 165°F, 10 to 12 minutes total. Transfer to a cutting board, let rest for 5 minutes, and then cut into 3/4-inch cubes.

In a large bowl, whisk the remaining 6 Tbs. olive oil and the vinegar. Press the anchovy fillet and garlic clove through a garlic press into the bowl (or mince by hand). Add the bread, chicken, tomatoes, cucumber, red onion, and herbs, and toss well. Season to taste with salt and pepper and serve.

Thursday, August 4, 2011

Oven-Baked Ratatouille


I remember one particular meal when I was living in France. The elderly lady with whom we did our home stay prepared a simple meal of baked fish with a wonderfully flavorful sauce of some kind. I had never tasted it in America and begged her for the recipe. Like many Parisians, my host knew a shortcut or two, and after some coaxing, she revealed the - gasp - jar her sauce had come from. It was nothing more than store-bought ratatouille, which I now know to be a famous Provencal vegetable stew and a great way to use up summer garden produce.

The version I made at home this week in an effort to recreate that moment comes from the popular Chocolate and Zucchini blog, the author of which lives in Montmartre, one of my favorite parts of Paris. It was a great use not only for our homegrown herbs, tomatoes, zucchini and farmer's market eggplant, but a fantastic excuse to use my Le Creuset. We served it over couscous for a light, flavorful dinner.
Ratatouille Confite au Four
- 2 onions
- 2 cloves garlic
- 1 eggplant (if you want to make the traditional ratatouille from Nice, hold the eggplant)
- 1 zucchini
- 2 green peppers
- 8 small tomatoes
- 2 sprigs fresh rosemary
- 3 sprigs fresh thyme
-1 T. chopped basil
- olive oil
- salt, pepper
Preheat the oven to 350°F.
Peel and slice the onion and garlic. Rinse the remaining vegetables, trim and slice them. Rinse the herbs. Combine everything in an oven-proof dish. Season with salt and pepper, and drizzle with olive oil (about two tablespoons). Toss a little more to ensure even coating.
Cover the dish with foil and bake for 45 minutes. At this point the vegetables should be cooked but not colored, and there should be cooking juices at the bottom of the pan.
Remove the foil and bake for another 30 to 45 minutes, keeping an eye on the progress, until the cooking juices have evaporated and the vegetables have taken on a nice roasted aspect.
Remove the sprigs of herb, and serve immediately, or at room temperature, or cold. It gets even better the next day and the day after that.

Thursday, July 21, 2011

Caribbean Spiced Slow Cooker Ribs


I have this problem with ribs. It seems like all I have to do is see a picture of them and all of a sudden: instant craving. And it isn't like ice cream or some other craving where I can go to the store and buy fall-off-the-bone tender ribs slathered in BBQ sauce.

I know there are plenty of grilling experts out there who loving apply homemade rubs, place their ribs in smokers, ovens, on grills, tenderly dab sauce on them... This could take hours. Problem #2 is that I don't have that kind of patience for meat, especially in the summertime when the cooler I can stay, the better.

Solution: My trusty slow cooker. On a hot summer day, this recipe is a god send. It involves applying a simple rub to your ribs, slow cooking them all day, adding some BBQ sauce at the end, and before you know it, you've got tender, gooey ribs - all without turning on your oven once. Thank you to my homegirl Betty Crocker, and my friend Donna for the recipe.

Caribbean Spiced Ribs

From Betty Crocker’s Cookbook

3 pound pork loin back ribs

2 Tbsp instant minced onion

1 tsp ground mustard

1 tsp crushed red pepper flakes

½ tsp ground allspice

½ tsp ground cinnamon

½ tsp garlic powder

1 medium onion, sliced

½ cup water

1 ½ cups barbecue sauce

In a small bowl mix instant minced onion, mustard, red pepper flakes, allspice, cinnamon and garlic powder. Rub mixture into ribs. Cut ribs into 4-inch pieces if they have bones. Layer ribs and sliced onion in slow cooker. Pour water over ribs. Cover and cook on Low heat for 8-9 hours. Remove ribs from cooker and drain and discard liquid from cooker. Pour barbecue sauce into shallow bowl and dip ribs into sauce. Place ribs in cooker and pour remaining sauce over ribs. Cover and cook on Low for 1 hour. Revel in carnivorous delight. Serves 6.

Monday, July 18, 2011

Tortellini with Italian Sausage, Fennel and Mushrooms


With homegrown fennel and Swiss chard on hand, I found out this recipe, switched the spring spinach for summer chard, and it was a delicious one-pot meal.

Tortellini with Italian Sausage, Fennel and Mushrooms
Adapted from Bon Appetit

1 tablespoon olive oil
1 large fennel bulb, trimmed, halved through core, thinly sliced lengthwise (about 3 cups), fronds chopped
1 pound spicy Italian sausages, casings removed, sausage coarsely crumbled
1 8-ounce package sliced fresh crimini (baby bella) mushrooms
4 large garlic cloves, pressed
1/2 cup heavy whipping cream
1 cup (or more) low-salt chicken broth
1 16-ounce package fresh tortellini with 3-cheese filling
1 c. Swiss chard, sliced into ribbons
1/2 cup finely grated Parmesan cheese plus additional (for serving)

Preparation

Heat oil in large nonstick skillet over medium-high heat. Add sliced fennel bulb, sausage, and mushrooms; sauté until sausage is brown and cooked through and fennel is almost tender, 12 to 15 minutes. Add garlic; stir 1 minute. Stir in cream, then 1 cup broth; boil until liquid is reduced and very slightly thickened, 2 to 3 minutes.

Meanwhile, cook tortellini in large pot of boiling salted water until just tender but still firm to bite, stirring occasionally. Drain tortellini; return to same pot.

Add sausage mixture to tortellini in pot. Toss over medium heat until blended. Add chard; toss gently until chard wilts. Stir in 1/2 cup cheese; add more broth by 1/4 cupfuls to moisten if dry. Season with salt and pepper, sprinkle with chopped fennel fronds, and serve, passing additional cheese.

Thursday, July 14, 2011

Chez Panisse's Nectarine Blackberry Galette


I would love to eat at Chez Panisse in Berkeley someday; it is one of my life goals. I read a book several years ago called "Alice Waters and Chez Panisse" by Thomas McNamee, a delightful recollection of the rollicking 70's Berkeley atmosphere and how Chez Panisse was created at that time. The book also chronicles how the restaurant has evolved over time under the guidance of Alice Waters, the perfectionist/artist/pioneer of California cuisine.

Sprinkled throughout the book are recipes for dishes served at Chez Panisse, and there is one page I have turned to over and over again. It's a simple, flexible recipe for a fruit galette by pastry chef Lindsey Shere.

This galette is phenomenal with almost any kind of stone fruit. I have used peaches, nectarines, plums, even apples in winter; you can also use some berries in a combination with other fruit, although you may find it too juicy if you were to use all berries. This week, I used nectarines from the farmer's market and plump wild blackberries I picked.

The crust for the galette is ideal - flaky, buttery, both crisp and soft, flecked with coarse sugar and filled with meltingly soft, sweet fruit. Baking it on a pizza stone does make a difference, so I recommend buying one if you don't already have one in your kitchen. Here's the recipe, which is very casual and more of a tutorial in Lindsey's own words:

Lindsey's Fruit Galette

Peaches, nectarines, and plums are great for this. It's easily translated to apples and pears, too. One of the great things about a galette is you can make it any size you want. If you want something for two people, you can make a little one.

You start with a pate brisee, of whatever size you need for what you're making. The one I use, for 6-8 servings, is a cup of flour, six tablespoons of butter, a quarter teaspoon of salt, and a quarter cup of cold water. You just put it together like pie crust, very quickly. I usually chill it then for a little while to let the flour relax a bit.

I roll it out really thin, as thin as possible, into a big circle. I usually bake it on a pizza pan, but it could be on a flat cookie sheet. If you've got a pizza stone, putting the pan on that would be an ideal way to bake it, because you want to get heat to the bottom of it very quickly.

So you roll out a big circle and lay it on the pan. then I usually make a mixture of equal parts of sugar and flour. For this size I'd use about 2 tablespoons of each and spread that over the bottom of the galette, out to about 2 inches from the edge. It's there to sit under the fruit and thicken the juices. Sometimes I add macaroon crumbs, or even a thin layer of almond paste.

If I were using peaches or plums or nectarines of pluots, I would use about a quart of sliced fruit. You can either arrange the fruit in a fancy design on the dough or just scrumble it about. Peaches I peel usually, but not plums or nectarines.

Now this is the part where you have to make a judgement. i sprinkle the top with sugar - more if it's something like peaches. You can sprinkle it reasonably heavily, because those things because much more tart when you cook them.

When you've sprinkled the fruit with sugar, fold the edges of the dough up over the fruit. You can pleat them in or father them in. Then I brush those folded-over edges of dough with water , pretty heavily, and then I sprinkle just the edges really heavily with coarse sugar, so there's a thorough coating on it.

It goes into the oven to bake at 400 degrees for 45-50 minutes. The thing you want to be sure of ts that the fruit is thoroughly cooked, and that it's boiling in the center of the galette, because that will cook the flour on the bottom.

When it's done, immediately slide it onto a rack to cool, so that the bottom doesn't get soggy. In the first 5 minutes or so, while the juices are still bubbling, I use a pastry brush to pick up those juices and glaze any of the fruit that looks dry. After that, the juices disappear into the flour, so you've got to be quick. And that's it.

Dead Simple Dill Pickles

I have been dreaming of old-fashioned, homemade pickles since last winter, when I picked out some pickling cucumber heirloom seeds to plant this year. The weather delayed the harvest, so when pickling cucumbers began popping up in the farmer's market last week, and my own crop had just begun to produce, I was too anxious to wait!

I have never made pickles before, and it strikes me as a wonderfully old-fashioned way to preserve produce. I decided I would first tackle the most basic thing possible: A simple dill pickle.

I found a recipe that sounded easy enough, but later when the jars were already sealed and stored, I began to worry. Most of the other pickle recipes I was seeing online included a lot of seasonings like mustard seeds, special ingredients to preserve the crunch factor, and so on... I became so worried about my humble pickles that it took me a week to crack open a jar and timidly do a taste test.

Fantastic! They are crunchier and crisper than anything I've had from the store or from a restaurant, and with a good balance of flavors between the dill and vinegar. If you're looking for an easy recipe for beginners and want to try your hand at homemade pickles, this is a great place to start. And you probably already have most of the ingredients in your pantry!

NOTE: After washing your cukes, sort them into piles by size. This uniformity of size will help your jars look nicer and the cukes will fit better into the jars.

Dead Simple Dill Pickles

7 wide-mouth quart jars, lids and rings
1 bunch fresh dill
25-30 pickling cucumbers, washed and scrubbed and halved or quartered, it's up to you!
7 garlic cloves (or more)

Brine:

8 1/2 c. water
2 1/4 c. white vinegar
1/2 c. kosher salt

GET ALL OF THIS GOING BEFORE FILLING THE JARS
1. Wash the jars in hot, soapy water (or dishwasher); rinse and fill with hot water. Set aside.
2. Fill canning kettle half-full with hottest tap water; set on burner over high heat.
3. In a medium saucepan, fit lids and rings together, cover with water, bring to a simmer.
5. In a large saucepan, bring water, vinegar and salt to boil; turn off the heat; set aside.
6. FILL JARS: place a layer of dill and one garlic clove at the bottom of each jar. Then tightly load the cukes into the jar to the NECK of the jar. Squeeze cukes into the jar tightly. Uniform size helps; add a few spriglets of dill at the top, too. You can add another garlic clove if you like (optional).
7. Once jars are loaded, pour in the bring leaving half-inch head space in each jar.
8. Add lid and ring to each jar, tightening evenly.
9. Place jars into canned with water JUST to the necks of the jars.
10. Bring water ALMOST to a boil (about 15 min, depending on how fast it heats up).
11. Remove jars, set on a dish towel on the kitchen counter, cover with another dish towel, and let cool.
12. Check for seal, label jars, and store in a cool dark place.

Tuesday, July 12, 2011

Apricot Vanilla Bean Jam


We had a pretty good crop of apricots this year. I have eaten many whole; also, I froze a big bag of them, roasted them and topped them with honey marscapone, and made an apricot crisp. This week found me with a bag left, many of which were on their last leg, and many of which the birds had already begun nibbling. In other words, not the prettiest specimens, but still perfectly good for making jam.

Sheepishly, I must admit that this is the first time I have ever bought "vanilla bean" - or, more accurately, a vanilla pod with innumerable sticky seeds inside. All I can say in my defense is - $11 for one! One jar! One pod! Eleven dollars! Ouch!

My discomfort over the price melted away once the jam began simmering and the two independently delicious smells of vanilla and apricot began to intertwine and waft through my kitchen. And it was all but forgotten when I took my first bite of the finished product... Then licked the spoon, the pan, and spooned the leftovers over yogurt for dessert. This jam would be supremely divine over ice cream as well.

Sorry, but the amounts are approximate here, as I was mostly improvising and trying to use up what I had.

Apricot Vanilla Bean Jam

10 cups apricots, roughly chopped (approximate)
3 c. white sugar
1 vanilla bean, halved and sliced down the middle
juice of 1 lemon

Combine all ingredients in a large pot, bring to a boil. Reduce heat to a simmer and cook for about 1 hour, stirring regularly with a wooden spoon, until jam reaches the gel stage. Ladle into sterilized jars and process the cans.