Showing posts with label pie. Show all posts

Monday, March 24, 2014

Milk Tart, or Snickerdoodle Pie


 My brother lived in South Africa for two years and came back raving about a South African dessert he ate there called Milk Tart. I kept meaning to make it for his birthday, but this year I finally made it happen. I served him up his birthday slice and waited for a verdict. He took a bite and declared it as good as the versions he ate over there (whew!).

My brother wasn't he only one who approved of the Milk Tart. My family quickly dubbed it Snickerdoodle Pie, due to the flavor's similarity to that glorious cinnamon-flavored cookie. They liked it so much, I have made it twice for family events in the past month. The first time, I forgot to take a picture and it quickly disappeared. The second time, I forgot again until there was only one [slightly flawed] piece left... but you get the idea. Snickerdoodle in pie form: a new family favorite. Enjoy!


Milk Tart, or Snickerdoodle Pie
From Allrecipes.com

Crust:
1/2 cup butter, softened
1 cup white sugar
1 egg
2 cups all-purpose flour
2 teaspoons baking powder
1 pinch salt


Filling:
4 cups milk
1 teaspoon vanilla extract
1 tablespoon butter
2 1/2 tablespoons all-purpose flour
2 1/2 tablespoons cornstarch
1/2 cup white sugar
2 eggs, beaten
1/2 teaspoon ground cinnamon

Preheat oven to 350 degrees F (175 degrees C).

In a medium mixing bowl, cream together 1/2 cup butter or margarine and 1 cup sugar. Add 1 egg and beat until mixture is smooth. In a separate bowl, mix together 2 cups flour, baking powder, and salt. Stir flour mixture into sugar mixture just until ingredients are thoroughly combined. Press mixture into bottom and sides of two 9-inch pie pans. Bake in preheated oven for 10 to 15 minutes, until golden brown.

 In a large saucepan, combine milk, vanilla extract, and 1 tablespoon butter or margarine. Bring to a boil over medium heat, then remove from burner. In a separate bowl, mix together 2 1/2 tablespoons flour, cornstarch, and 1/2 cup sugar. Add beaten eggs to sugar mixture and whisk until smooth. Slowly whisk mixture into milk. Return pan to heat and bring to a boil, stirring constantly. Boil and stir 5 minutes. Pour half of mixture into each pastry shell. Sprinkle with cinnamon. Chill before serving.

Monday, May 13, 2013

Chocolate Oreo Pie


Chocolate? Store-bought cookies? This recipe is clearly not the norm for me, but sometimes you do what you gotta do for your mom on Mother's Day. And frankly, everyone in the family loved this pie, so I need to write down the recipe because it has a high likelihood of being requested again next year!

Note: This pie is a lot like those lazy pudding pies people used to make back in 90's, only in this version, everything is homemade... Except the Oreos, because I'm ambitious, but not THAT ambitious! 

Chocolate Oreo Pie

Crust:
24 Oreo cookies, finely crushed
1/4 c. butter, melted

Crush Oreos in food processor until finely ground. Add melted butter and press into a pie pan.

Filling:
1 1/3 c. sugar
1/2 c. cocoa powder (I used dark)
6 T. cornstarch
1/2 tsp. salt
3 1/3 c. milk
4 T. butter, cut into cubes
2 tsp. vanilla

Combine dry ingredients in a medium-large saucepan and gradually whisk in milk. Bring to a slow boil, and whisk constantly one minute. Remove from heat, and whisk in butter and vanilla until smooth. Pour filling into crust and chill at least 4 hours. When completely cool, top with:

Topping:
1 pint sweetened whipped cream
12 Oreo cookies, crushed but still a little chunky

Spread whipped cream over the top of the pie and sprinkle the chunky Oreo crumbs evenly over the top. Press down lightly on the crumbs to set them, then chill pie until ready to serve.

Thursday, July 5, 2012

Marionberry Pie: From Farm to Plate

This is a story about a pie. It began last month, with a trip to a local berry patch.


I discovered that the berry farm grew a wonderful seedless blackberry called a Marionberry.


And they just happened to be ripe and ready to be picked that week:

And so it was that I drove home with several baskets of Marionberries (and some late raspberries, for good measure).

Yesterday being the Fourth of July, I retrieved my berries from the freezer and got started on a festive holiday pie.

First, I tossed the berries with 1 c. sugar, 1 tsp. lemon zest, 1 tsp. lemon juice, and 1/4 c. tapioca. I simmered the mixture in a pot for about 5 minutes until slightly thickened. This will make a nice filling that won't get the bottom pie crust soggy. After removing from the heat, I spiked the filling with 1 tsp. vanilla (really good stuff I got in a modest, out of the way kitchen shop in New Orleans). Then I let it cool completely.


After pre-heating the oven to 375F, I put my bottom crust in the pie pan and filled it with my berry filling, then laid the top crust over that. I brushed the top crust with egg white and sprinkled it with coarse sugar.


Next, I baked it for 50 minutes, until the top was golden brown and the filling was bubbling.

I let it cool completely (important, to avoid a runny filling, and it takes about 6 hours to do so) before serving it that night....

With a scoop of vanilla ice cream! It was the best summer pie I've made yet.

Monday, May 28, 2012

Sour Cherry Pie


Something exciting happened at my house in the past week: my first harvest from the garden. I got lots of snap peas and English peas, plus buttercrunch lettuce and Nantes carrots (shown above). These are a French heirloom carrot that do well in heavier clay soils because they stay short and compact.

I also made a sour cherry pie, which I haven't made since I took a college cooking class and dubbed this pie the Platonic Ideal of a Cherry Pie. You can make cherry pie with the sweet cherries we find here in California, but it is a very different thing from this pie. You have to find sour cherries, which I found at Whole Foods in the frozen aisle. They don't sell them fresh out here because sour cherry trees grow where the weather gets much colder than in our temperate climate.

But the search for sour cherries, even if frozen, is totally worth the trouble. This pie has that complex sweet/art classic cherry pie flavor, but a homemade pie texture that makes all of those glooey Hostess Cherry Pies I ate as a child hang their heads in shame (or would if pies had heads).

I use tapioca instead of cornstarch because I L-O-V-E the texture of tapioca in pies, but you are welcome to follow the recipe as is. I use the Perfect Pie Crust recipe posted here, brush the lattice top with egg white and sprinkle with coarse sugar before baking. Serve with vanilla ice cream and you'll be in heaven.


Sour Cherry Pie

1 recipe Perfect Pie Crust
3 1/3 c. fresh or frozen sour cherries
1 c. sugar
1/4 c. + 1 T. Thickgel OR cornstarch
1 1/3 c. water or juice from cherries
1/4 tsp. almond extract
1 T. + 1 tsp. fresh lemon juice

Rinse and pit fresh cherries or thaw frozen cherries. Combine sugar and thickening agent in a large pot with water or juice from cherries. If desired, add almond extract. Stir mixture and cook over medium heat until mixture thickens and begins to bubble. Add lemon juice and boil 1 minute, stirring constantly. Fold in cherries. Cool before filling prepared pie crust. Bake at 400 degrees for 20 minutes, then reduce heat to 350 degrees for 30-40 minutes until golden brown on top and the filling is bubbling. Cool on a wire rack before cutting.

Tuesday, November 22, 2011

Perfect Pie Crust


My mom and I have a tradition that every Thanksgiving Eve, we bake pies together for the next day. How fortunate that just last month, I found a recipe for perfect pie crust while making a chicken pot pie. This dough was beautiful: pliant, easy to work with, and with all the best qualities of both butter (rich flavor) and shortening (flakiness and holding its shape). This makes 2 pie crusts.

Happy Thanksgiving!

Perfect Pie Crust

1/2 c. vegetable shortening
1/2 c. cold unsalted butter
3 c. all-purpose flour
1 tsp. kosher salt
1 c. ice water

Mix the shortening, butter and salt into the flour with a pastry blender until very crumbly. Add water until the dough comes together into a ball. Cover dough in plastic wrap and refrigerate at least 1 hour, or as long as 24 hours.

When ready to make pie, roll the dough out on a floured surface until it fits your pie pan. Fold in half, then in half again, and transfer to the pie pan. Now unfold it. Do the same with the top crust, tucking the extra dough under and crimping the edges. Bake as indicated in your pie recipe.

Tuesday, September 20, 2011

Apple Pie Filling

Was it all the late-spring rain we got in Nor Cal this year? Was it the compost and mulch I added to the fruit tree area? Whatever the reason, we got a bumper crop of all our fruits this year. I never did find out what type of apple we are growing, but I did learn a lesson in how to tell when fruit is ripe.

The green apples above were decidedly under-ripe, which I discovered when I tried to bake with them. The only thing they were good for was thickening jam. After this early basket picked in August, I waited until September to pick the rest of the apples, when the fruit began to drop naturally from the tree and the apples had acquired a yellow blush.

Another thing I have learned this year is to plan in summer for what you want to be eating in winter. With so many apples, it seemed like a great plan to make some apple pie filling for our holiday pies. When that time comes around, it will be easy (as pie) to take one out of the freezer, defrost it, and plop it in a homemade pie crust for a delicious contribution to the dessert table.

I divided the following recipe by a third, but I wish I had made more. As we licked the spoon and pan clean, we concluded that it tastes exactly like the McDonald's apple pie filling, that nostalgic childhood taste of cinnamon and nutmeg that you can't help but love. It was so good, I can't wait for November!

Apple Pie Filling

18 cups thinly sliced apples

3 tablespoons lemon juice

4 1/2 cups white sugar

1 cup cornstarch

2 teaspoons ground cinnamon

1 teaspoon salt

1/4 teaspoon ground nutmeg

10 cups water


In a large bowl, toss apples with lemon juice and set aside. Pour water into a Dutch oven over medium heat. Combine sugar, cornstarch, cinnamon, salt and nutmeg. Add to water, stir well, and bring to a boil. Boil for 2 minutes, stirring constantly.


Add apples and return to a boil. Reduce heat, cover and simmer until apples are tender, about 6 to 8 minutes. Cool for 30 minutes.


Ladle into 5 freezer containers, leaving 1/2 inch headspace. Cool at room temperature no longer than 1 1/2 hours.


Seal and freeze. Can be stored for up to 12 months

Sunday, June 5, 2011

A Moroccan Dinner Party


A good friend hosted a fabulous Moroccan-themed dinner party this weekend, and while there was no belly dancing, the menu was to die for. The appetizer was a Bastilla, the sweet and savory chicken pie of Morocco, made with phyllo dough, braised chicken, almonds, and sprinkled with cinnamon and powdered sugar.


This is a dish that everyone should try at least once - and if you’re anything like me, you will crave it ever after. Next, a lamb tagine with kalamata olives and apricots, served with roasted veggies over couscous. (Didn't get a picture as we were fully engaged in stuffing our faces at this point.)

Finally, an orange-cardamom custardy flan for dessert, sitting in a pool of caramelized sugar.


Once again, I am in awe of the power food has to transport us far away from our everyday lives. You must try the Bastilla - it's like chicken pot pie on crack, a delightfully exotic dish to make on a weekend and impress your friends and family.


Moroccan Bastilla


1 chicken (about 3 lbs.)
2 med. onions, chopped
1 lg. can (49 oz.) chicken broth
1 c. chopped parsley
1 cinnamon stick
1 tsp. ginger
1/4 tsp. pepper
6 eggs
8 sheets phyllo dough (keep covered)
4 tbsp. melted butter
1 tsp. sugar
1 tsp. cinnamon
1 c. sliced almonds
Powdered sugar & cinnamon

Cook chicken in broth with onions, parsley, cinnamon stick, ginger, and pepper for about 1 to 1 1/2 hours. Debone and skin; cut meat into bite size pieces. Bring broth to a boil over medium heat. Lightly beat eggs and pour slowly into broth; cook, stirring until curds form, about 1 to 2 minutes. Strain.

Brush melted butter on bottom and sides of a deep 10" pie pan. Overlap 6 phyllo sheets to cover the bottom and extend 8" to 10" over the edge of the pan. Brush with butter and sprinkle with sugar and cinnamon. Top with chicken; spread egg mixture over the top and sprinkle with almonds. Fold edges of phyllo dough over filling and brush top with butter. Fold remaining 2 sheets of phyllo over filling and brush top with butter. Fold remaining 2 sheets of phyllo in half cross wise and place on top. Tuck edges inside pan and brush with butter. Bake at 425 degrees for 20 minutes or until golden brown.

Invert on a cookie sheet and bake until bottom is golden, about 10 minutes. Turn onto a platter and cool 5 minutes. Sift powdered sugar over top. Decorate with criss crossing lines of ground cinnamon. Slice to serve. Makes 8 main dish servings or may be used as an appetizer.

Monday, May 16, 2011

Dorie Greenspan for Dummies

Lately, I have been wondering who this elfin-like Dorie Greenspan is, why she's so skinny despite being a veritable baking goddess, and why everyone is worshiping her these days. Who does she think she is, living in glamorous places like France and New York and tempting us with food like this:

And this:
And heaven help me, this!

Well, I still don't know why she's so skinny, but tonight, I decided to take a stab at her incredibly simple-sounding recipe for No-Bake White Chocolate Pie. One bite, and I declared, "That woman knows what she's doing." The creamy, fluffy pie filling was sweet-tart, with a subtle thin layer of banana and a crunchy (store-bought) Oreo crust. Simple, quick, delicious. It would appear that the cult of Dorie has a new inductee today.


No-Bake White Chocolate Pie
by Dorie Greenspan

4 oz. white chocolate (preferably imported), finely chopped
1/2 lb. cream cheese, at room temperature
1/4 cup sugar
1 tsp vanilla extract
1/3 cup sour cream
1/2 cup heavy cream, chilled
1 banana, thinly sliced
One ready-made graham-cracker crust (9 inches)

1. Warm the chocolate in a bowl set over a pot of lightly simmering water. Remove from heat when only partially melted; stir to melt completely.

2. Beat the cream cheese, sugar, and vanilla until smooth. Beat in the chocolate, then the sour cream. Whip the heavy cream until firm; gently fold into chocolate filling.

3. Put the banana slices on the crust, top with the filling, and chill at least 2 hours. If you’d like, sprinkle with grated dark chocolate before serving.

Sunday, May 1, 2011

Lemon Bar Trifle & Recipe for a Perfect Birthday

Let us consider the ingredients of a perfect birthday celebration for one's spouse.

Step one: If your spouse can't get enough Mexican food, find a fantastic taco stand and take them there for lunch.
Squeeze the lime over the meat, then devour the freshly made tacos with relish.
Step two: Take your spouse somewhere exciting and exotic for dinner. Maybe eat some tapas and the best salad you ever had (dates in my salad? A wonderful idea! Who knew?) and pretend that you are on the streets of Barcelona together.
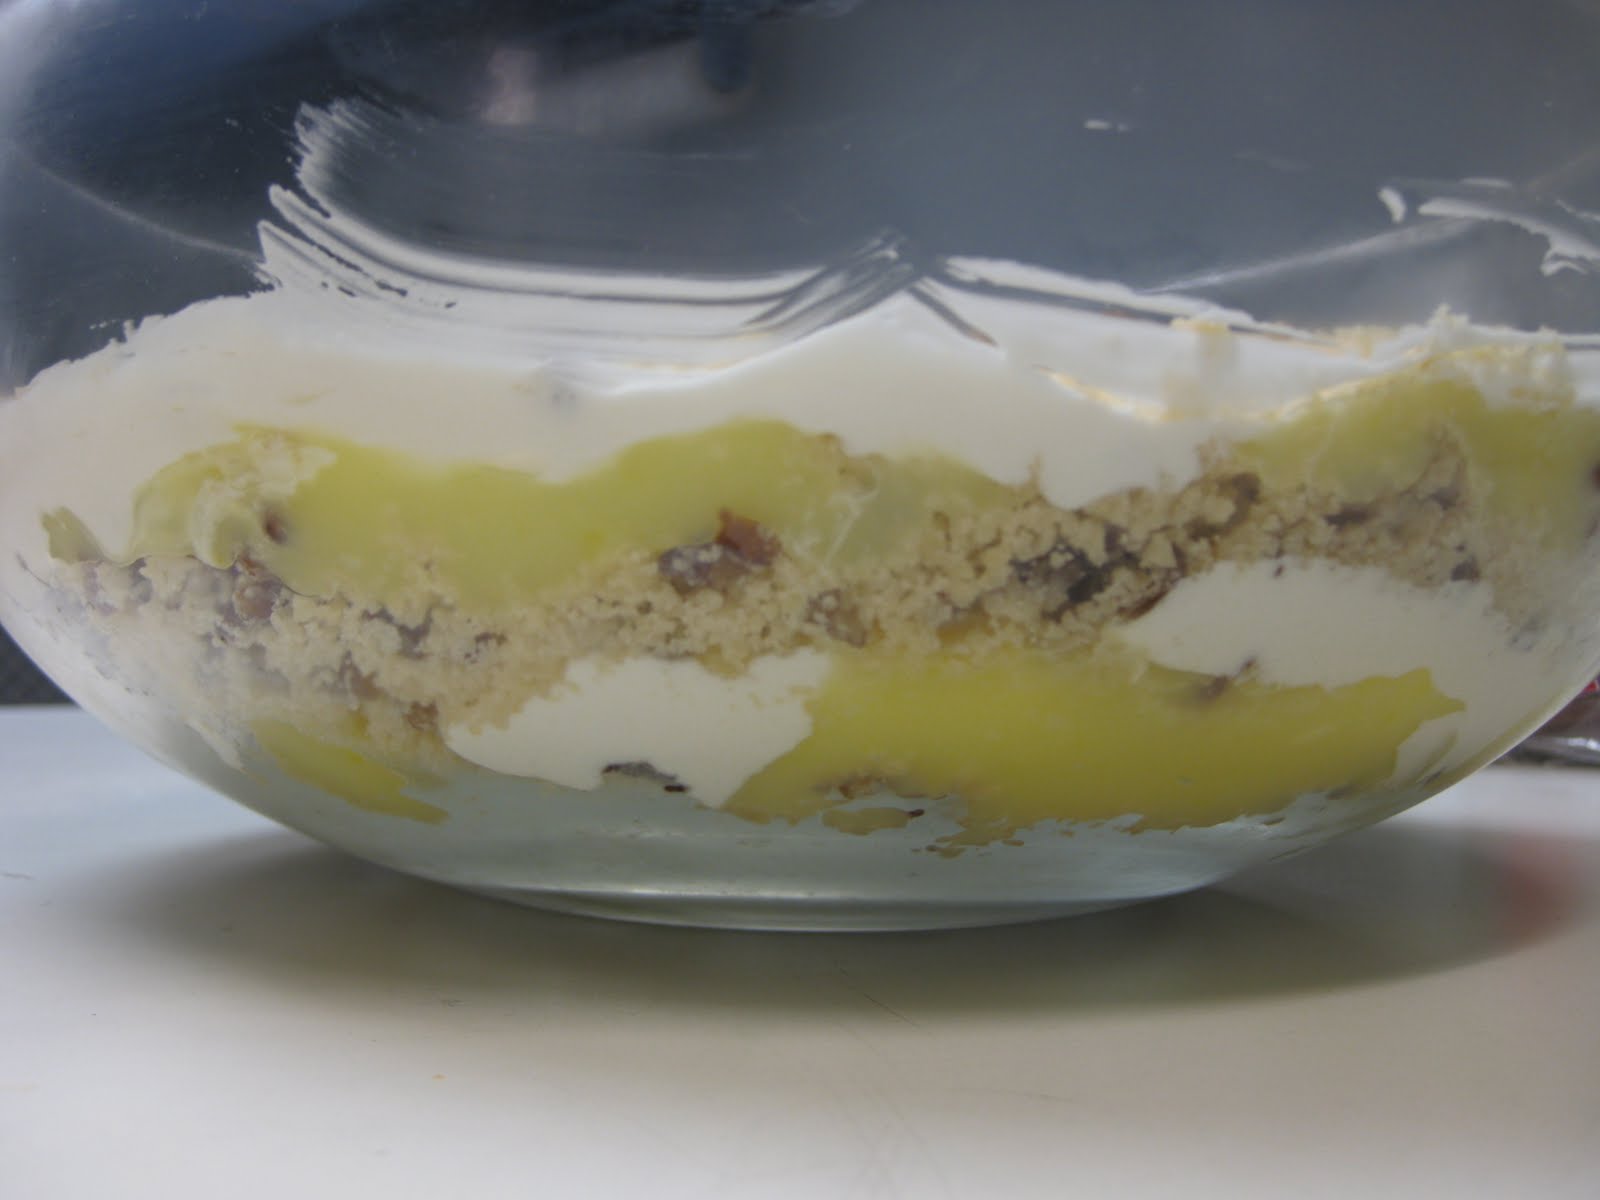
Step three: A wonderful dessert is requisite, and if your spouse loves lemon, how about a Lemon Bar Trifle with fresh lemon curd, pecan shortbread crumbs and white creaminess?

Step 4: When the whole family gets together to celebrate, make sure there are at least 3 kinds of pies to satisfy all appetites. The smile on your spouse's face will be all the reward you need.

There's the recipe I used for a happy birthday this time around. It was a winner. So was the Lemon Bar Trifle recipe, so here it is:


Lemon Bar Trifle


2 c. flour
1 c. pecans, chopped
1 c. butter, melted
1 1/2 c. sugar
1/4 c. cornstarch
1/4 c. flour
1 3/4 c. cold water
3 egg yolks, beaten
2/3 c. lemon juice
2 T. butter
4 tsp. lemon peel, grated
1 8-oz cream cheese, softened
3 C. powdered sugar
1 8-oz. container frozen whipped topping, thawed

In a small bowl, combine flour and pecans; stir in melted butter. Press into an ungreased 9x13 inch baking dish. Bake at 350 for 18-20 minutes or until light golden brown. Cool on a wire rack.

In a small heavy saucepan, combine the sugar, cornstarch, and flour. Stir in water until smooth. cook and stir over medium-high heat until thickened and bubbly. Reduce heat; cook and stir 2 minutes longer. Remove from heat. Stir a small amount of hot mixture into egg yolks; return all egg yolks to the pan, stirring constantly. Bring to a gentle boil; cook and stir 2 minutes longer. Remove from the heat. Gently stir in the lemon juice, butter, and lemon peel. transfer to a large bowl. Cool to room temperature without stirring. Cover surface with waxed paper; refrigerate until chilled.

In a large bowl, beat cream cheese and powdered sugar until smooth. Fold in whipped topping. Crumble the baked pecan mixture; set aside 1/2 c. for topping. Just before serving, in a 3-quart trifle bowl, layer 1 C. each pecan mixture, lemon mixture, and cream cheese mixture. Repeat layers 2 more times. Sprinkle with reserved pecan mixture. Refrigerate leftovers. Makes 9 servings.

Monday, November 15, 2010

Pie Making Class and Quiche!

My husband (also known as The Best Husband Ever) bought me a dream come true for our anniversary: A class on pie-making with local food celebrity Kira O'Donnell of Real Pies. She formerly worked at Chez Panisse in Berkeley and her pies are divine. I couldn't wait to see what she was like in real life and pick up some pointers on how to perfect my own pies. Pie is, after all, my favorite food in the world.

The class was held at a room adjoining the Sacramento Natural Foods Co-op:
While we waited for the class to start, we met new friends and snacked on olives, hummus, baba ganoush and crackers...
And checked out the set up, while trying to figure out which one was Kira herself.
Turns out she's the surprisingly down-to-earth, unpretentious and nice blond. We started by discussing how to make crust, the foundation of any pie.

Kira gave us some simple tips, such as cooking pie on a pre-heated pizza stone to achieve a flaky bottom crust; keeping everything cold, even if you have to dip your own hands in ice water; and letting the dough rest at least 1 hour before working with it, or even overnight. She uses an all-butter pastry herself but was surprisingly not picky about the type of pan, flour, recipe, etc.
Her sample dough was generously dotted with chunks of butter and very sturdy yet pliable.
She made a sample pie with strawberry rhubarb filling she had frozen in July. How gorgeous those colors were,
and then look how cute her stars are!
The best part was sampling 3 varieties of her pies, starting with a vegetarian quiche. I am serious about this quiche. It is deadly good. At first I was like, "Alright, let's get this quiche over with so we can get to the sweet stuff." The quiche turned out to be my favorite.
Apple Blackberry Galette - delicious and warm, flaky and cozy.
Chocolate Cream pie, not too sweet. The crust was made from homemade cookie crumbs. (Overachiever.) :-)
I don't want to give away all of Kira's secrets, but I will share her killer recipe for quiche. I hope you enjoy it as much as I did!

Vegetarian Quiche

Partially pre-baked pie shell (375 for 8-10 minutes until light brown)
1 c. grated cheese of your choice (Swiss, cheddar, Jack)
1/3 c. crumbled goat cheese (opt)
1/2 red bell pepper, julienned and sauteed until soft
1 bunch spinach, washed/chopped and sauteed until soft
1 head broccoli, separated into small clumps and blanched until just tender
1/2 small yellow onion, sauteed until soft
6-7 mushrooms, sliced and sauteed until soft
3 eggs
1 c. low-fat milk or soy milk
2 tsp. Dijon mustard
Pinch salt
Pinch herbs de Provence

Preheat the oven to 350.

Put the partially pre-baked pie shell on a sheet pan. Press grated cheese and goat cheese on bottom of shell. Add all cooked veggies on top of cheese, distributing evenly. In a bowl, whisk together eggs, milk, mustard, and spices. Pour the milk mixture carefully over the veggies, then place the quiche in the oven. Bake until the custard is completely firm. (Jiggle it slightly - if it seems liquidy in the center, it's not done yet!) It may take over an hour. Don't worry if the top browns. It will taste great! Serve 4 hungry people, with an accompaniment such as soup or salad.

Friday, May 14, 2010

I Finally Try the Real Pie Company!

Today was a monumental day. I finally procured a pie from the Real Pie Company of Sacramento. They can only be ordered once a week and must be picked up at the local Corti Brothers store, but I found the effort to be well worth my time and money.

The crusts are made of all butter, and are as flaky as any crust I have ever eaten. The owner, Kira Donnell, uses family farms to procure her fine ingredients, such as the strawberries and rhubarb that filled the pie I bought. This is the next best thing to homemade, and probably better than many of those as well, depending on who is making it. :-)

They aren't easy to get; it took me several weeks to order in time to get one of the pies. However, Kira recently acquired an assistant and says she should be able to take many more orders starting this week. With summer on the way, I can't wait to order my next seasonal pie!

Sunday, April 11, 2010

Thai Dinner Party with Tropical Pie Recipe

This weekend, I finally did something I've wanted to do for some time now: I hosted a dinner party for friends. I broke the cardinal rule of hostessing in doing so, according to all of the articles I obsessively read in preparation. What was my crime? I served a series of recipes that I had never tried before. This is apparently a big no-no, but it was a risk I was willing to take. (After all, am I really going to make a multi-course meal and buy unusual ingredients to serve just my husband and I? Probably not.)

Speaking of my husband, he assisted me as an excellent sous-chef and there was something wonderful about putting together something so cool together. The menu was Thai-themed and some recipes came out better than others, but overall it was a great time with fun people and lots of laughs. I can't wait to host my next one! Here are some pictures of a few of the dishes, and a recipe for the pie, which was probably my favorite of all the new dishes I tried. To my guests, I had a blast, and hope you didn't mind being my guinea pigs!


The table setting


Close up on a table setting, with name cards!

Chicken Satay, grilled in a peanut sauce


Tangy Cucumber Salad


Fresh Pineapple, Coconut and Macadamia Nut Pie


1 refrigerated pie crust (half of 15-oz package), room temperature
3 c. ½ inch pieces of fresh pineapple, well-drained
2/3 c. sugar
¼ c. all purpose flour
1/8 tsp. salt
3 eggs, beaten to blend
¼ c. (1/2 stick) unsalted butter, melted
½ c. sweetened flaked coconut
1/3 c. chopped macadamia nuts

Preheat oven to 325F. Flatten crust on lightly floured surface; press seams together if necessary. Fit into 9-inch diameter glass pie dish; crimp edges.

Arrange pineapple in crust. Combine sugar, flour, and salt in medium bowl. Add eggs and butter and blend well. Pour batter evenly over pineapple. Sprinkle coconut and macadamia nuts over and press lightly into batter. Bake until light brown and center is firm to touch, about 1 hour 15 minutes. Transfer to rack and cool completely. (8 servings)

Friday, January 22, 2010

Reaktion's Edible Series


My friend Rachel recently tipped me off about the Reaktion "Edible" book series - small volumes that chronicle the history of a variety of foods, such as cheese, pizza, hot dogs, spices, hamburgers, pancakes, and yes, my personal favorite, pie.

In a review of "Pie: A Global History", "Publisher's Weekly" writes, "The book's slim page count [40 pages] belies a wealth of information, including the science of flaky crust, recipes from yesteryear, the real-life inspirations for famous pie lovers like Georgie Porgie and Little Jack Horner, and a brief dissertation on why pie is so delicious ("biology makes us do it").

Which volume would you like to read? I personally am an insatiable pie addict and I hope to get my hands on a copy of the pie book at some point!

Wednesday, December 23, 2009

Peach Blackberry Pie


I read an article recently on Mission Pie, a company based in the Bay area. They shared (some of) their pie secrets, some of which surprised me greatly. For instance: They use whole wheat flour for the pastry dough, claiming it imparts a "warm" flavor to fruit pies. Also, they suggested letting the dough chill for 3 days before using it to let the gluten relax.


I decided to use these suggestions when I made my dad’s birthday dessert, a peach blackberry pie using fruit I bought at farmer’s markets in summer and froze. I was afraid to use all whole wheat flour, as I feared this would produce too dense a product. Therefore, I adapted the crust recipe as follows:


Wheat pastry double crust :
1 ½ c. white flour
½ c. whole wheat flour
1 tsp. salt
5 T. chilled butter
7 T. chilled butter-flavored shortening
Ice water


Mix the dry ingredients together in a bowl. Cut the butter and shortening into the dry ingredients. Mix in the ice water, a tablespoon at a time, until the dough clings together. Form into a ball, cover with plastic wrap. Let sit at least 24 hours. Cut dough into 2 equal pieces. Roll each out on a piece of wax paper. Fit one into a 9-inch pie pan, save the other for the top crust.


For the filling, I used:
2 lb. sliced peaches
1 c. blackberries
1/3 c. white sugar
1/3 c. brown sugar
1/4 c. tapioca ( I like the texture of tapioca)
1 tsp. cinnamon
½ tsp. ginger
1/4 tsp. nutmeg


Since I used frozen fruit, I let the mixture sit for about 30 minutes before putting it into the crust, placing the top crust over the filling, cutting 4 slits in the top crust, and brushing the top crust with water and sprinkling with turbinado sugar. I covered the edges with aluminum foil and baked at 375 for 50 minutes, removed the foil, and baked for another 30 minutes.


The top crust was absolutely perfect, the edges were wonderful, the filling was fresh and delicious. Just one problem: the bottom crust came out a bit soggy. I got online and found 2 things I could do next time to prevent this:


A good way to keep pie crust from becoming soggy is to sprinkle it with a mixture of equal parts sugar and flour before adding filling. You can also brush the bottom crust with an egg white before adding the filling.


Live and learn! I shall continue my experimentation.