Sunday, July 22, 2012
Santa Rosa Plum Coffecake
Sour was the word to describe our Santa Rosa plums, which I had been picking too early every year in the past. Naturally tart, this type of plum should have a yellow flesh and dark purple skin when fully ready to eat. I learned this year to be patient and not mind losing a few plums to the birds, rather than picking them too early. We got a lovely haul of ripe plums as a result, enough to share with a friend, and enough to get me scratching my head as to what to make with all of this fruit!
I picked my first batch of plums at night to avoid the terrible heat of the day, so when I got home, the first thing that came to mind was breakfast. So I dusted off my old red-and-white checkered Better Homes and Gardens Cookbook that I've used for years, and turned to my trusty old recipe for fruit coffeecake.
This recipe will work with many kinds of fruit and (I believe) any kind of flour. I prefer to use a mixture of whole grain flours, like whole wheat pastry, oat and spelt flours. No matter what fruit or flour I choose, this basic recipes has always worked well for me over the years. The original recipe calls for a streusel topping, but.... I tend to believe that breakfast should have nutritional value and go easy on the sugar. I just sprinkle the top with a little coarse/turbinado sugar for texture. Leftovers freeze well. Dig in!
Fruit Coffeecake
1.5 c. chopped plums (or any stone fruit, berries, apples, etc.)
1/4 c. water
1/4 c. sugar
2 T. cornstarch
1.5 c. flour of your choice
3/4 c. sugar
1/2 tsp. baking powder
1/4 tsp. baking soda
1/4 c. canola oil (or other neutral oil)
1 beaten egg
1/2 c. buttermilk
1/2 tsp. vanilla
Coarse sugar
In a medium saucepan combine fruit and water. Bring to boiling; reduce heat. Simmer, covered, for 5 minutes or until fruit is tender. Combine the 1/4 c. sugar and cornstarch; stir into fruit. Cook and stir over medium heat till mixture is thickened and bubbly. Cook and stir 2 minutes more; set aside.
In a mixing bowl, combine the flour, remaining sugar, baking powder and baking soda. Set aside.
In another bowl, combine oil, egg, buttermilk, and vanilla. Add egg mixture all at once to dry mixture. stir just until moistened (batter should be lumpy). Spread half of the batter into an ungreased 8x8 baking pan. Spread fruit mixture over batter. Drop remaining batter in small mounds stop filling. Sprinkle with coarse sugar. Bake in a 350 oven for 40-45 minutes or until golden. Serve warm. Makes 9 servings.
Thursday, July 14, 2011
Chez Panisse's Nectarine Blackberry Galette
I would love to eat at Chez Panisse in Berkeley someday; it is one of my life goals. I read a book several years ago called "Alice Waters and Chez Panisse" by Thomas McNamee, a delightful recollection of the rollicking 70's Berkeley atmosphere and how Chez Panisse was created at that time. The book also chronicles how the restaurant has evolved over time under the guidance of Alice Waters, the perfectionist/artist/pioneer of California cuisine.
Sprinkled throughout the book are recipes for dishes served at Chez Panisse, and there is one page I have turned to over and over again. It's a simple, flexible recipe for a fruit galette by pastry chef Lindsey Shere.
This galette is phenomenal with almost any kind of stone fruit. I have used peaches, nectarines, plums, even apples in winter; you can also use some berries in a combination with other fruit, although you may find it too juicy if you were to use all berries. This week, I used nectarines from the farmer's market and plump wild blackberries I picked.
The crust for the galette is ideal - flaky, buttery, both crisp and soft, flecked with coarse sugar and filled with meltingly soft, sweet fruit. Baking it on a pizza stone does make a difference, so I recommend buying one if you don't already have one in your kitchen. Here's the recipe, which is very casual and more of a tutorial in Lindsey's own words:
Lindsey's Fruit Galette
Peaches, nectarines, and plums are great for this. It's easily translated to apples and pears, too. One of the great things about a galette is you can make it any size you want. If you want something for two people, you can make a little one.
You start with a pate brisee, of whatever size you need for what you're making. The one I use, for 6-8 servings, is a cup of flour, six tablespoons of butter, a quarter teaspoon of salt, and a quarter cup of cold water. You just put it together like pie crust, very quickly. I usually chill it then for a little while to let the flour relax a bit.
I roll it out really thin, as thin as possible, into a big circle. I usually bake it on a pizza pan, but it could be on a flat cookie sheet. If you've got a pizza stone, putting the pan on that would be an ideal way to bake it, because you want to get heat to the bottom of it very quickly.
So you roll out a big circle and lay it on the pan. then I usually make a mixture of equal parts of sugar and flour. For this size I'd use about 2 tablespoons of each and spread that over the bottom of the galette, out to about 2 inches from the edge. It's there to sit under the fruit and thicken the juices. Sometimes I add macaroon crumbs, or even a thin layer of almond paste.
If I were using peaches or plums or nectarines of pluots, I would use about a quart of sliced fruit. You can either arrange the fruit in a fancy design on the dough or just scrumble it about. Peaches I peel usually, but not plums or nectarines.
Now this is the part where you have to make a judgement. i sprinkle the top with sugar - more if it's something like peaches. You can sprinkle it reasonably heavily, because those things because much more tart when you cook them.
When you've sprinkled the fruit with sugar, fold the edges of the dough up over the fruit. You can pleat them in or father them in. Then I brush those folded-over edges of dough with water , pretty heavily, and then I sprinkle just the edges really heavily with coarse sugar, so there's a thorough coating on it.
It goes into the oven to bake at 400 degrees for 45-50 minutes. The thing you want to be sure of ts that the fruit is thoroughly cooked, and that it's boiling in the center of the galette, because that will cook the flour on the bottom.
When it's done, immediately slide it onto a rack to cool, so that the bottom doesn't get soggy. In the first 5 minutes or so, while the juices are still bubbling, I use a pastry brush to pick up those juices and glaze any of the fruit that looks dry. After that, the juices disappear into the flour, so you've got to be quick. And that's it.
Sunday, July 10, 2011
A Midsummer Day's Dream
Wednesday, July 6, 2011
Simple Roasted Apricots with Honey Marscapone
This is the best use for fresh apricots I have had! I literally licked my plate when I was done. Thank you to Joy the Baker for this recipe! It was my first time using marscapone, which was incredibly thick and rich with the texture of butter. I recommend using 2 apricots per person.
Simple Roasted Apricots with Honey Marscapone
4 apricots, halved and pits removed
2 tablespoons granulated sugar
1/2 cup marscarpone cheese
1 teaspoon honey
1 teaspoon chopped mint
1 teaspoon chopped lemon balm (optional)
Preheat broiler. Place sugar in a shallow bowl. Dip apricot halves in sugar and place in a oven safe dish (I used a cast iron pan).
Place dish under the broiler and bake for 3 to 4 minutes. Keep an eye on the apricots, and carefully rotate the pan as necessary. Sugar will melt, boil and begin to brown. Remove from the oven and allow to cool slightly.
In a small bowl, mix honey into mascarpone cheese. Place slightly cooled apricots on a plate. Top with a dollop of mascarpone mixture, and a sprinkling of fresh mint and lemon balm. Serve. These apricots are best served just after they’re baked.
Monday, June 27, 2011
Around My French Table: A Dinner Party
For my first Cookbook Club event, I chose Dorie Greenspan's "Around My French Table", one of the most popular and acclaimed cookbooks to be published in quite some time. All of the guests were impressed with how simple and approachable her recipes were. It proved to us that not all French food has to be intimidating or complicated in order to be satisfying.
My friend Tiffany made a French version of Shepherd's Pie (Hachis Parmentier), which was to die for, and that spinach bacon quiche behind it was great - even for an anti-quiche guy like my husband.
There was olive-cheese bread that was moist and savory, plus that squash I grew (just because we needed more vegetables), and I also made a citrus berry terrine. Dorie talks about how the French don't turn up their noses at gelatin like Americans are sometimes prone to do, and this recipe certainly is easy to love. Plain gelatin plus orange juice forms the base, and fresh berries and citrus segments are stirred into the mixture. It's pretty stunning when you turn it out onto a platter.
My only regret? That we didn't have a dessert. I guess that's a good excuse to do it again!
Adapted from Dorie Greenspan's "Around My French Table"
1/3 cup cold water
2 packets unflavored gelatin
2 cups orange or grapefruit juice
1/3 cup sugar
About 3 cups mixed blueberries, raspberries and blackberries (if you want to add strawberries, look for small berries or cut larger ones into bite-sized pieces)
Place a double layer of paper towels on a cutting board and spread the citrus pieces out on the paper. Cover with another double layer of towels and set the pieces aside until you're ready for them. If the paper gets very wet, change it.
Moisten a 9-by-5-inch loaf pan with cold water and shake out the excess. Gently stir the reserved citrus segments and the berries into the lightly thickened gelatin mixture, and scrape everything into the pan. Jiggle the pan a little to settle the gel and chill for at least four hours or up to overnight.
The terrine should be served in thick slices. If you'd like, you can dress each serving with more berries, or pour over a spoonful or two of sweetened pureed raspberries.
Monday, April 18, 2011
A Healthier Strawberry Rhubarb Crisp
Around the same time each year, the little strawberry stand down the street from my parents' house opens for business, proffering their ruby gems that outshine anything found in the grocery stores. I can’t imagine any better welcome to spring than the tart firmness of rhubarb mingled with sweet soft berries in a warm crisp.
The strawberry-rhubarb recipe I have often relied upon, tempting though it was, seemed a little heavy this year. It called for two layers of white flour-based crisp, and the filling called for a mind-boggling amount of white sugar. I have been trying to reduce my sugar and refined carb intake where possible, and was sure that I could come up with a more healthy version that I would still enjoy.
A homey dish like a fruit crisp lends itself well to whole grain flours, and I felt that whole wheat and oat flours worked marvelously for the topping. For the filling, I replaced the white sugar with a little honey, some lemon zest to brighten the flavors, and some vanilla for fragrance. I added a little cornstarch for thickening, but not enough to make the texture gloppy. The resulting crisp was delightful. Instead of masking the natural flavors of the fruit with an excess sweetness, the flavors shone through. If you're a rhubarb lover, I hope you enjoy the season as much as I am right now!
A Healthier Strawberry-Rhubarb Crisp
Topping:
½ cup whole wheat flour
1/3 cup oat flour
2/3 cup packed brown sugar
1/2 cup rolled oats
1/2 teaspoon ground cinnamon
¼ tsp. kosher salt
5 T. unsalted butter
Filling:
4 stalks rhubarb, trimmed and cut into 1/2 inch slices
1 pint strawberries, trimmed and quartered
2 T. honey
1 tablespoons cornstarch
1 teaspoon lemon or orange zest
1 tsp. vanilla extract
1. Preheat the oven to 375°.
2. In a medium bowl, combine the flours, brown sugar, oats, cinnamon and kosher salt. Cut in the 5 tablespoons chilled, diced butter using a pastry blender (or, if you don’t have one, rub the butter in with your fingers). Place the mixture in the refrigerator.
3. Grease a 9×9-inch pan. Set aside.
4. In another medium bowl, combine the rhubarb, strawberries, honey, cornstarch, zest, and vanilla. Spoon the mixture into the buttered dish or dishes. Blanket the strawberry-rhubarb mixture with the chilled topping. Bake for 40 minutes or until bubbling underneath and brown on top.
Wednesday, February 23, 2011
Peach Blackberry Crisp
If you're wondering why I made this seasonally summer recipe in late February, there are two reasons. First, I am eagerly anticipating spring and summer. We're almost to March - soon asparagus and even strawberries will start appearing, and I can hardly wait. In the meantime, I needed something to tide me over. I looked in my freezer and saw that I still had peaches from a CSA box we received last summer, as well as wild blackberries we had picked and frozen. This recipe struck me as a perfect way to use clean out the fridge as we start a new growing season.
Note: You could also use 4 pound of peaches, or substitute nectarines; use raspberries or blueberries instead of blackberries; and so on.
Toss with:
1 T. sugar (if needed)
1 1/2 T. flour
Pile the fruit into a medium baking dish and top with Crisp Topping (recipe below). Bake in a 375 oven for 40-55 minutes (rotate once while cooking for even browning) or until the crisp topping is golden brown and the fruit is bubbling in the dish.
Toast in a 375 oven for 6 minutes:
2/3 c. nuts (walnuts, almonds or pecans)
Let cool, then chop coarse.
Put the chopped nuts in a bowl and add:
1 1/4 cups flour
6 T. brown sugar
1 1/2 T. white sugar
1/4 tsp salt (leave out if using salted butter)
1/4 tsp. cinnamon (optional)
Mix well, then add:
12 T. (1 1/2 stick) butter, cut into small pieces
Work the butter into the flour mixture with a pastry blender or your fingers until the mixture comes together and has a crumbly, but not sandy, texture. Chill until ready to use. Crisp topping can be made ahead and refrigerated a week or so, or frozen for 2 months.
Tuesday, December 7, 2010
The Joys of Foraging

It never ceases to amaze me that even in the cold, rainy midst of winter, nature is capable of providing nourishment. As I walked through my parent’s back yard this weekend, I noticed an unusual-looking fruit lying on the ground under what I had always mistaken for an ornamental bush. After some taste testing and research, I discovered that the fruits are called Feijoa, or Pineapple Guavas (pictured above), and are native to South America. Inside, the soft pulp is citrusy, both tart and sweet and fun to squeeze out, while the protective tough green skin may be discarded.
The very next day, a friend from church learned of my love for persimmons and offered to let me and my husband come and glean the fruit from their persimmon tree, as her family doesn’t care for this fruit. I jumped at this opportunity, and this is how my refrigerator came to be overcrowded with four bulging bags of fruit.
Three of the bags contain the bright orange orbs of Fuyu persimmons. The trouble is, Fuyus are generally eaten raw, unlike Hachiyas where the pulp is often pureed and used in baked goods. I’ve had quite a time figuring out how to preserve the fruit to keep it from going to waste.

I finally decided upon a double batch of both persimmon jam and persimmon chutney (one version, pictured above). So far, the jam came out fairly well, although I probably didn’t add enough sugar. Jam recipes are notoriously scientific and unforgiving of aberration. I like things a little on the mild side anyway, and will still consider my jam something to look forward to on toast. Tonight, I will take a stab at my first ever chutney - a recipe I found posted by a New Zealand blogger chronicling her grandmother’s vintage recipes. It sounded fascinating - whoever first imagined that raisins, onions, garlic, ginger, and fruit would go together?
As tiring as it may be, I love that gleaning and preserving food allows me to feel a connection to nature, as well as to my ancestors, who performed these acts by way of necessity. Today, I choose to do these same acts because it gives me a peaceful feeling to participate in such a timeless act universal to all humanity. Bounty surrounds us if we seek it out.
Wednesday, November 17, 2010
Pear Cranberry Oat Crumble
Tonight's theme: Feeding friends at fall. I put my husband in charge of dinner, and volunteered to make dessert. I so wanted to make something from the lovely, seasonal Rustic Fruit Desserts, but was torn between two recipes. I ended up combining elements of both and coming up with my own creation: Pear Cranberry Oat Crumble.The result is a layer of firm, honey-sweet pear balanced against a tart explosion of cranberry, underneath a crunchy oat-flaked topping. Topped with a scoop of vanilla bean ice cream, it was a grand finale to a wonderful autumn evening.
2 c. rolled oats
1 1/2 c. all-purpose flour
1 1/3 c. packed brown sugar
1/2 tsp. fine sea salt
3/4 c. unsalted butter, melted
Fruit filling:
8 large pears, peeled, cored, and sliced 1/4 inch thick
2 c. cranberries, fresh or frozen
1 1/4 c. granulated sugar
2 T. cornstarch
1 tsp. cinnamon
1 tsp. cardamom
Directions:
Preheat the oven to 375F. Grease a 3-quart baking dish.
To make the topping, mix all the topping ingredients through salt in a bowl. Stir in the butter, then press the topping together with your hands to form small clumps. Put the topping in the freezer while you assemble the filling.
To make the filling, toss the fruit, sugar and spices together in a large bowl. Transfer the filling to the prepared pan and spread it out, pressing the fruit down into the corners.
Press the oat crumble evenly over the fruit, then bake for 60-70 minutes, or until the crumble is lightly golden and the filling is bubbling up in the corners. Cool for 20 minutes or so to temper the heat before serving. Serve with a scoop of vanilla bean ice cream.
Storage: This crumble is best if served the day it is made, but any leftovers can be wrapped in plastic wrap and kept at room temperature for 2-3 days. Reheat in a 300F oven for 10-15 minutes, until warm.
Wednesday, October 20, 2010
Passion for Persimmons
Recently, I read an online list of the nutritional value of a variety of fall produce, and was disappointed that my favorite was missing.
See, I have this thing for persimmons. I remember making persimmon cookies once as a young child, but my love really found root in college. A nice girl who lived in a nearby apartment gave me some persimmons that she had brought back from her family’s farm. I couldn’t get enough of the crisp, fresh taste of the sweet orange orbs. It was this friend who taught me that, unlike almost all other fruits and vegetables, black spots on a persimmon are desirable, a sign of ripeness and sweetness.
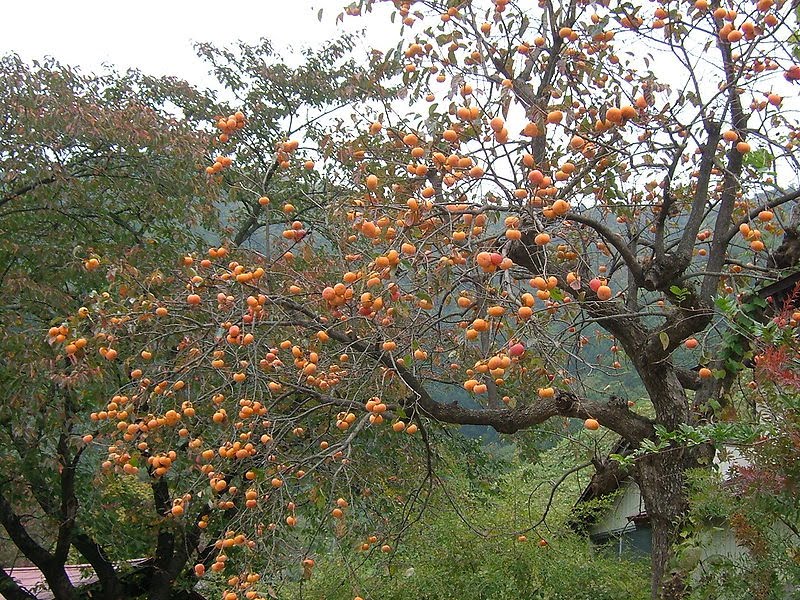
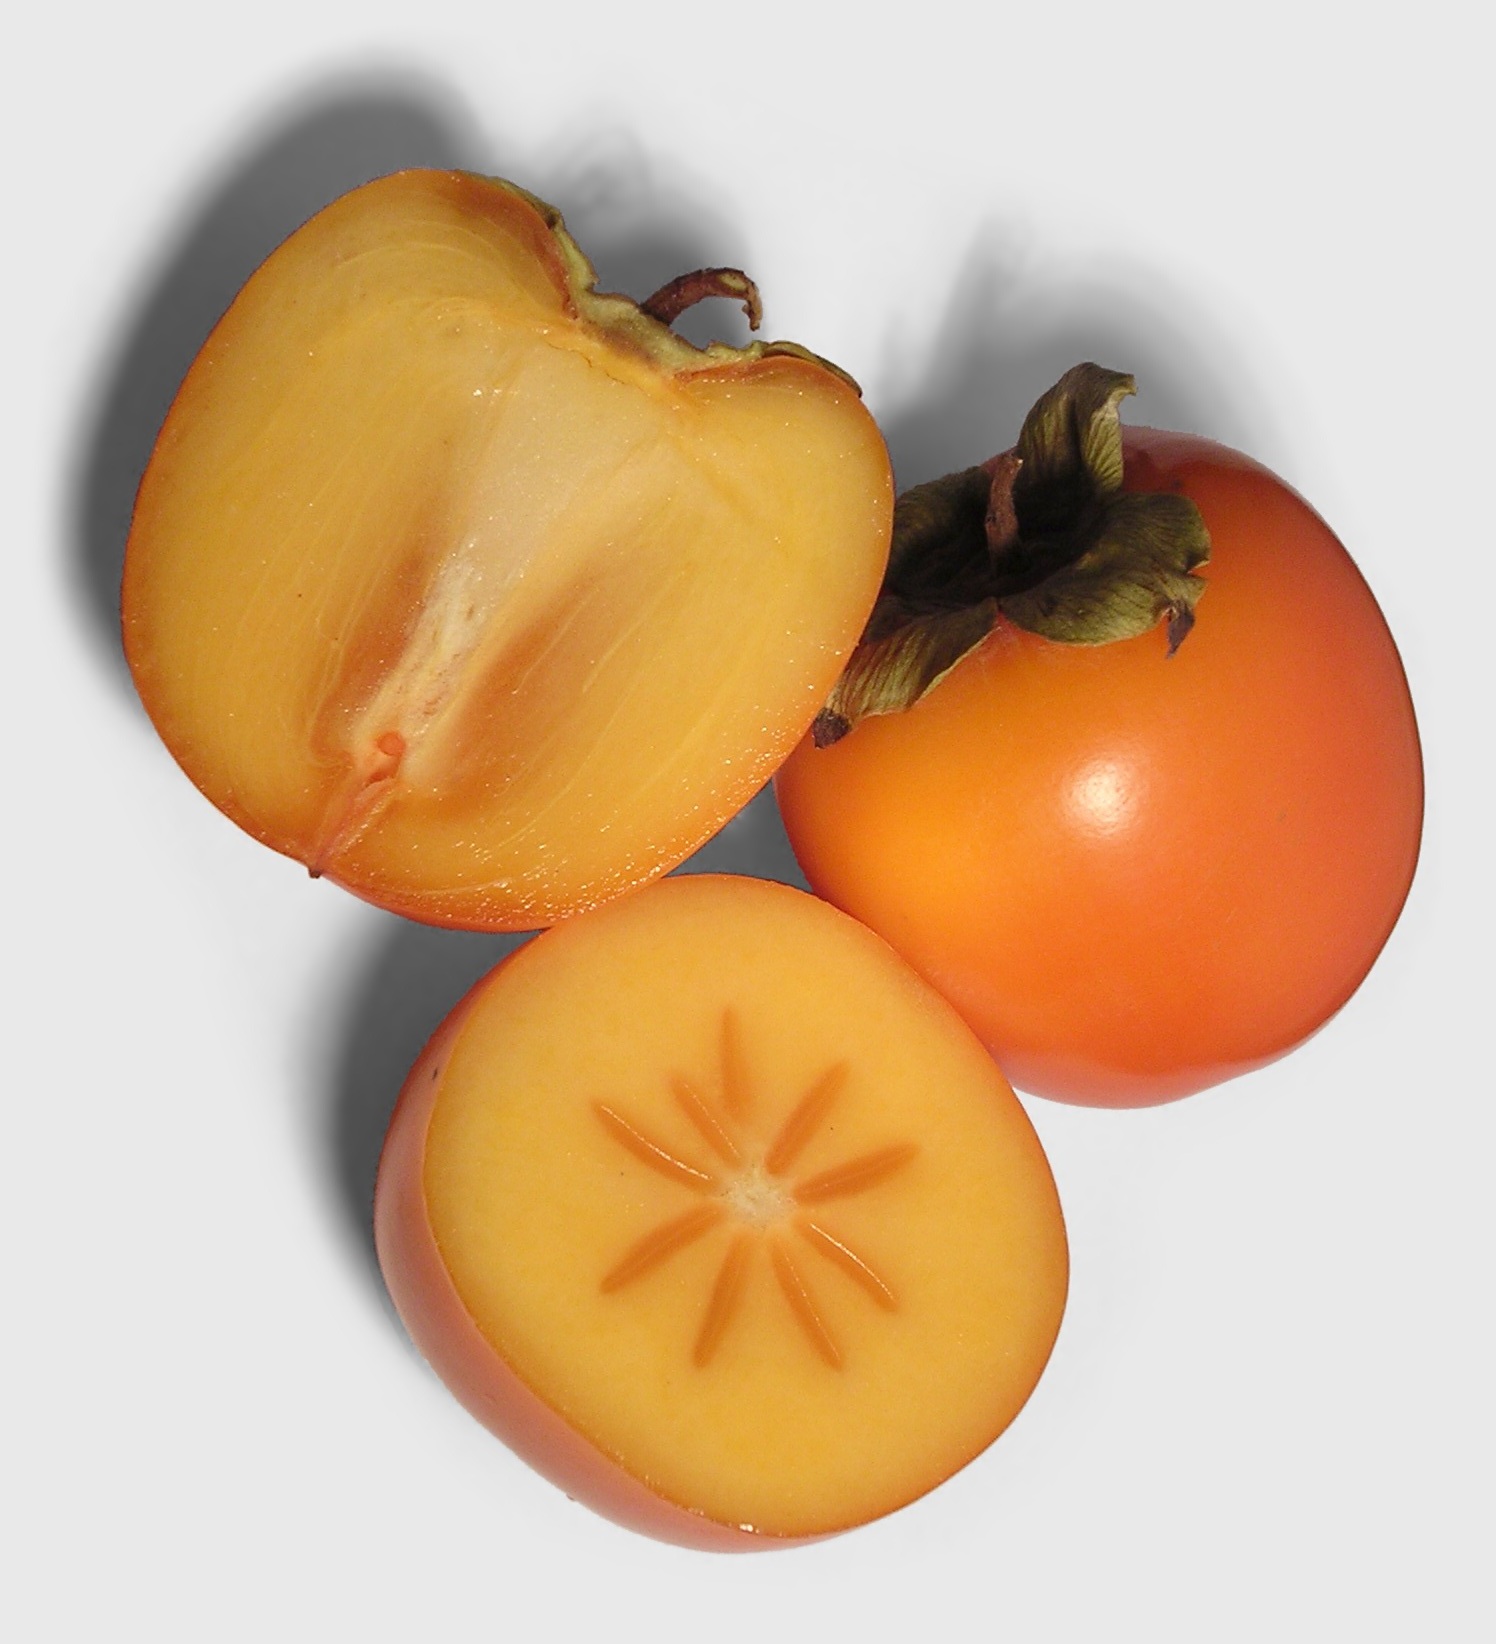
Persimmons are native to the Philippines and China, so when I lived in Hong Kong, I blissfully munched on persimmons all fall and into early winter. As you may know, there are two types of persimmons. I prefer the less bitter Fuyu variety, perfect for eating raw, which looks like this:
There is also the bitter variety rich in tannins known as Hachiya, which is inedible until ripe and even then, best using in cooking/drying:
Hope you get a chance to enjoy persimmons this season as much as I already am! I walked into my local produce market and there they were. Happy Autumn to me!
P.S. Tomorrow we are off to Portland to celebrate our 1 year anniversary! I’ll be back with much to blog about, no doubt!
Wednesday, September 8, 2010
Pear Cake
Peel, core and cut into sixths or eighths
Cream:
1 stick butter
3/4 c. sugar
1 tsp. vanilla
Add:
2 large eggs, one at a time
Combine:
1 c. flour
1 tsp. baking powder
1/2 tsp salt
Add to butter mixture
Spray an 8" springform pan with Pam. Spread the batter in it. Now, in a pinwheel pattern, press the slices of pear, peeled side up, into the batter. Cream in as many as you can. The more pears, the moister the cake will be.
Bake at 350 degrees until a skewer comes our clean, 45-60 minutes. (With this cake, it's better to underbake than overbake.)
Thursday, September 2, 2010
Pears - the Most Symbolic Fruit?

I was convinced that I could still make use of some of the pears. I was amazed by how many of the fruits yielded a creamy white, beautifully ripe interior when I sliced them open. My battered pears yielded a huge pot of warmly spiced pear/apple sauce, and a lovely simple pear tart, with firm pear slices pinwheeled through a crunchy golden crumb.
I suppose many people we meet every day are like my pears- the life-battered surface level fails to reveal the pure goodness that often lies within. These pears reminded me that you cannot always judge a fruit by its appearance, much less a person.
Monday, August 9, 2010
Wednesday, August 4, 2010
Zucchini Bread with Pineapple

Here is a new recipe that I found for a slightly different version than the ordinary bread I made growing up. (Thank, Simplyrecipes!) Studded with raisins, nuts and crushed pineapple, and laced with aromatic spices, I loved this bread. It also uses olive oil instead of vegetable oil. In fact, with fruit, vegetable, nuts, good fats, antioxidant-rich spices- this is pretty much a health food. :-) So feel free to grow as much zucchini as you can next year.
1 cup olive oil
2 cups sugar
2 teaspoons vanilla
2 cups coarsely grated zucchini
1 can (8oz) crushed pineapple, drained
3 cups all purpose flour
2 teaspoons baking soda
1 teaspoon salt
1/2 teaspoon baking powder
1 1/2 teaspoon cinnamon
3/4 teaspoon nutmeg
1 cup chopped walnuts
1 cup raisins
Method
1 Preheat oven to 350°F. In a mixer, beat eggs. Add oil, sugar, and vanilla; continue beating mixture until thick and foamy. With a spoon, stir in the zucchini and pineapple.2 In a separate bowl, combine flour, baking soda, salt, baking powder, cinnamon, and nutmeg. A third at a time, add dry ingredients into wet and gently stir (by hand) after each addition. Add the walnuts and raisins, blend gently.
3 Divide the batter equally between 2 greased and flour-dusted 5 by 9 inch loaf pans. Bake for 1 hour or until a wooden pick inserted in to the center comes out clean. Cool in pans for 10 minutes. Turn out onto wire racks to cool thoroughly.
Makes 2 loaves.
Sunday, July 18, 2010
Plum Compote
I did a little research and came up with a good use for the fruit, based on something I remember my grandma making from the plums she picked from the tree in her backyard: plum compote! You cook the fruit down with spices, citrus and sugar to your taste. This sauce is a nice balance of sweet and sour and can be served over dessert (ice cream) and also meat (such as pork chops) equally well.
3 pounds red plums, quartered
1 1/3 cups (about) sugar
2 cinnamon sticks
1 orange - rind grated and juice
Water (I filled the pan to half the height of the plums. You may add more or less liquid, depending on how thick you want it)
Combine all ingredients in large saucepan. Stir over low heat until plums are very tender and compote thickens, stirring often, for about 45 minutes. Remove from heat. Cool completely. Transfer compote to bowl, discarding cinnamon sticks.
Tuesday, July 13, 2010
How to Pick a Ripe Melon

When I lived in Hong Kong, I had a good friend who taught me her method of picking the ripest, best-tasting melons. She came from Thailand, land of many fruits, and she taught me to rap all of the melons in the pile and listen for the deepest tone.
While there may be some validity to this method, I recently read an article that indicated that the key thing to look for is a creamy spot on one side. This spot indicates that the melon was allowed to rest in one spot in the field over a long period of time, allowing ample time to gain natural sugars and water content, making for the best flavor!
As for shape, avoid asymmetrical melons, because this indicates that the melon may have been water starved at some point and grew in irregular spurts.
Another interesting suggestion was to avoid refrigerating the melon, as this will alter it’s true flavor. One farmer even puts his watermelon in the hot sun and slices them up hot, claiming that the heat brings out all of the fruit’s exotic, subtle nuances in flavor, describing it as "mango-like". Now that I have to try!
Thursday, June 3, 2010
How China Changed My Diet
Rambutan- spiky on the outside, smooth and slick on the inside
Mangosteen - Very tart, sort insides, eggplant colored on the outside

Dragonfruit - Sweet, cooling flesh with creamy texture.
Love the contrasting colors of red against black-speckled white!
Wednesday, May 12, 2010
Strawberry Rhubarb Crisp

I am a total sucker for rhubarb. I adore the sharp tang I get when I bite into it, and I look forward to the classic combo of rhubarb and strawberries every year. For Mother’s Day last Sunday, I used a recipe I found in Barbara Kingsolver’s book Animal, Vegetable, Miracle. (The author includes multiple recipes for dishes she prepared using the food she and her family grew themselves for a year-long locavore experiment.)
Strawberry Rhubarb Crisp
Adapted from Barbara Kingsolver’s Animal, Vegetable, Miracle
3 cups halved strawberries (cut large berries into thirds)
3 cups rhubarb, chopped
1/2 cup honey
1/2 cup flour
1/2 cup rolled oats
1/2 cup light brown sugar
1/2 teaspoon cinnamon
1/4 teaspoon allspice or nutmeg
1 cube unsalted butter, softened (NOT melted)
1) Preheat oven to 375ºF.
2) In a medium bowl, combine strawberries, rhubarb, and honey. Stir to coat. Pour mixture into the bottom of a 9x9-inch baking pan.
3) In a separate bowl, combine flour, oats, brown sugar, cinnamon, and allspice. Whisk together. Cut butter into smaller pieces. Add butter to flour mixture. Using a fork or pastry blender, mash butter and flour mixture until medium-sized crumbs are formed. Sprinkle crumbs evenly on top of the baking dish.
4) Bake about 45 minutes, or until rhubarb can be easily pierced with a knife. Topping should be browned and mixture should be bubbly. Remove from oven and let cool a few minutes. Serve with vanilla bean ice cream.
Wednesday, April 7, 2010
On Apricots, Foraging, Bartering, and Canning

For an American who had long grown accustomed to my weekly drive to the grocery store fulfilling my dietary needs, I often thought (and still think) of food in terms of dollars and cents. Last summer, however, taught me that nature has the capacity of generously providing for our needs in the most palatable way imaginable, if we will invest the time and effort to harvest and preserve this food.
I am also fascinated by the in vogue concept of foraging and bartering for food. One example of this trend are the many websites that encourage those with a surplus of fruit or veggies to share with those in need, or link up with those from the community who will are willing to share their own surplus. I love the idea of preventing waste, and providing fresh, seasonal food to as many people as possible, while promoting community unity.
Maybe I’m drawn to these ideas because they represent a romantic return to a simpler life based on agriculture, nature and tradition. Whatever the draw, I say: Let’s celebrate nature’s bounty this year, in whatever capacity we can. Also - anybody wanna trade me for some apricots?
Wednesday, February 3, 2010
Pear Walnut Crisp
3 large pears, peeled and sliced and peeled
1/2 c. old-fashioned rolled oats
1/2 c. whole wheat flour
1/4 c. brown sugar
2 T. white sugar
1/4 tsp. salt
1/8 cinnamon
6 t. butter, melted
2 T. chopped walnuts
Place pears in a small dish, or 2 small dishes. Combine other ingredients, mix and sprinkle on top of the pears. Bake at 350F for 50 minutes until pears are tender and topping is brown. Serves 4.