Saturday, August 25, 2012

Brewing Comfrey Tea

Have you heard of Alys Fowler? To me, this young, pretty, hip British television star is to gardening what Jamie Oliver is to cooking in the UK. She makes it fun, fashionable and interesting with her shows and books set in picturesque, lovely locales. 


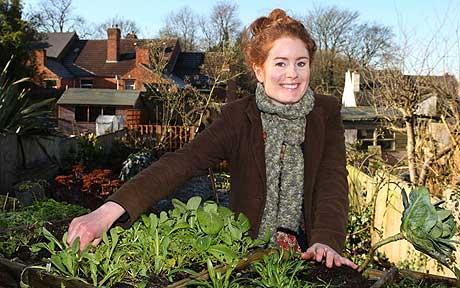
Watch her show "The Edible Garden" here - I'm in love with the way she makes her urban Victorian backyard both beautiful and delicious! A few years ago, I happened to purchase her book Garden Anywhere, and was captivated by her description of comfrey tea, a liquid fertilizer you can make at home from the leaves of the comfrey plant.

Alys writes, "Once [comfrey] is established, you may never need to buy commercially made plant food... Comfrey is a deep-rooted, hardy perennial... Its leaves are high in potash, a source of potassium important for cell division, and also have good levels of nitrogen and phosphate".

Due to her glowing description, comfrey was the first plant I chose for my backyard when we landscaped, and it has done extremely well. Though I have trimmed it down several times, it is still huge and overshadows the rhubarb and chives it borders.

Large-leafed and hardy, comfrey has pretty purple blossoms when it flowers, though they have dried up at the moment, here in August.

The leaves are supposed to "kick start" compost bins, so I had added them to ours, but hadn't yet attempted to ferment the tea. She recommended putting the leaves in a plastic bucket, covering it, and allowing them to decompose for 10 days at least, then using the liquid to fertilize. Alys notes that the comfrey tea smelled bad. I have smelled some bad smells in my time (like a bad composting attempt when the smell of dead bodies permeated our apartment), so I was curious what level of "stink" I'd be dealing with after the 10-day mark.

The finished compost tea was a murky brownish liquid, which I ladled with a bowl over all the plants in my backyard. The scent was like a baby diaper left to sit for several days- unpleasant to be sure, but not unbearable. My plants look healthy and strong, with some new blooms on some of my vegetables when I thought they were finishing up.  It's a project I would do again.

Note: It's important to keep the bucket covered to avoid attracting flies, as the moment the lid was off, they were all over that bucket. Also, Alys doesn't recommend using the comfrey tea on houseplants due to the smell.

Thursday, August 9, 2012

The Best Black Bean Tacos

Summer is starting to reward us with wonderful things. Like a variety of tomatoes:


And melons, yes, melons! Tiger and Charentais, to be exact:


And finally, a wonderful recipe that I got from the book The Family Dinner: Great Ways to Connect with your Kids One Meal at a Time. While I don't have kids myself yet, I love the idea of meals as a form of community. This book had lots of environmentally-friendly, fuss-free recipe ideas as well.

Always on the lookout for new ways to go meatless, I knew I needed to make "Gary's T-Night Tacos", a dish one dad makes every Tuesday for his family. (I am also kind of fascinated by the idea of always eating the same meal on a certain night of the week. It wasn't a tradition in my own family, but it sounds like it could be a lifesaver for busy moms.)

I just LOVED the straight-forward black bean filling, which was quick to make, slightly sweet, but savory at the same time. I couldn't get enough for it, and counted down the minutes till lunch the next day when I could re-heat the leftovers and enjoy them all over again. Bless you Gary, whoever and wherever you are!

Gary’s T-Night Tacos
From The Family Night Dinner

For the Tacos:
Canola oil
2 medium onions, coarsely chopped
2 15-ounce cans of black beans, lightly drained (or 4 1/2 cups home-cooked beans)
2 tablespoons chili powder
2 tablespoons cumin
1 tablespoon tamari soy sauce
2 tablespoons maple syrup
12 corn tortillas

For the Toppings:
1 1/2 cups cheese
1 cup sour cream or Greek yogurt
Chopped avocado
Chopped tomatoes
Chopped lettuce
Salsa

TO MAKE 12 TACOS
Heat a large nonstick pan over medium-high heat and drizzle the bottom with canola oil. Sauté the onions until they start to soften, then add the beans, spices, tamari, and maple syrup. Reduce the heat to medium low and let everything gently cook for 10 minutes.

Meanwhile, wrap the tortillas in foil and warm for 10 minutes in a 250-degree oven.

Serve the tortillas with bowls of beans and toppings on the side.

Monday, August 6, 2012

Last Summer Trip to San Francisco

One thing I adore about San Francisco: Every trip there is unique, with new discoveries... and usually a few beloved things to which I'm irresistibly attached. Case in point: Primavera's Chilaquiles for breakfast at the Ferry Building Farmer's Market:

Summer is a glorious time to walk the market. There is so much beauty and color and flavor bursting from every corner and each stand. The sight of these vibrant peppers, for example, made me swoon and convinced me that life would not be complete without a basket of sweet Italian peppers for roasting.

Golden Gate Park was our next destination, the Botanical Garden specifically. We were amazed how the air could feel so still and quiet in the middle of a huge bustling city. Also stunning were the hundreds of varieties of trees, plants, and flowers. Towering redwoods like these, for example, always make me feel small- but in a good way. A humbling way. A comforting way.


The fact that poppies were in bloom simply made my day. Poppies are my favorite flower, red ones in particular, which I fell in love with last year in Vancouver.


Just a short walk from the Botanical Garden, we ate the best Chinese food I have ever had at San Tung. I've lived in China and eaten tons of Chinese food in my time, and I can honestly say that this place was legit. At 2pm in the afternoon, it was still jam-packed with Chinese families, which I usually take as a good omen for the food to come.

Despite the loud level and the distinct impression that they want to get you in and out of your seat ASAP, how can you argue with green beans so good you'd swear they're laced with illicit goodness of some kind? We literally could not stop eating these:


And if they can can make vegetables taste good, try their "dry-fried chicken". Best chicken ever. I can say no more. You have been informed.


Thursday, July 26, 2012

"Apple" Zucchini Crisp

Ah, the eternal summer battle: Man vs. Zucchini. A friend let us come harvest their community garden with them this week, and we left with bags of produce, including lots of zucchini. And then I started wondering if it was really possible (as I had heard) to use a little kitchen alchemy to transform zucchini into filling for an  apple pie or apple crisp. It just didn't seem possible, but I still wanted to take a stab at it. Pie seems fussy at the moment, so I went the way of the apple crisp.

I wanted my zucchini to look as much like apples as possible, so I peeled mine and cut the seeds out of the middle. Later, I would realize the importance of this step (which wasn't mentioned in the recipe).


Add lemon juice and simmer the mixture to soften up the zucchini. Next, you add spices like you would with apple pie filling.


Cover the filling with your crisp topping ...


and bake until browned on top, bubbly underneath.


Well, it looks pretty darn convincing, don't you think? But don't eat it when it's hot - the flavors haven't fully melded and it is still easily recognizable as zucchini at this point. Neither my husband nor I cared for it hot.


My advice is to wait until it's cool and top it with vanilla ice cream. It isn't exactly a dead ringer for apples, but...it's still pretty good, considering the fact that it's a vegetable. And at this time of year, you could do worse with your leftover zucchini.

Personal Notes: I used whole wheat flour and halved the recipe, baking it in an 8x8 square pan.

"Apple" Zucchini Crisp

8 cups cubed peeled zucchini
3/4 cup lemon juice
1/2 to 3/4 cup sugar
2 teaspoons ground cinnamon
1 teaspoon ground nutmeg

TOPPING:
1-1/3 cups packed brown sugar
1 cup old-fashioned oats
1 cup all-purpose flour
2/3 cup cold butter, cubed

In a bowl, combine the zucchini, lemon juice, sugar, cinnamon and nutmeg; mix well. Pour into a greased 13-in. x 9-in. baking dish.

For topping, combine brown sugar, oats and flour in a bowl; cut in butter until crumbly. Sprinkle over the zucchini mixture. Bake at 375 for 45-50 minutes or until bubbly and the zucchini is tender. Yield: 12-15 servings.

Sunday, July 22, 2012

Santa Rosa Plum Coffecake

I am wading through plums, and I am starting to feel more and more like a fool.  Like many novice fruit pickers, I struggle with the eternal question: Is this fruit ripe yet? Last year I made several blunders, picking apples, plums, and Asian pears too early, then wondering why the texture was off, or the taste was sooooo sour.

Sour was the word to describe our Santa Rosa plums, which I had been picking too early every year in the past. Naturally tart, this type of plum should have a yellow flesh and dark purple skin when fully ready to eat. I learned this year to be patient and not mind losing a few plums to the birds, rather than picking them too early.  We got a lovely haul of ripe plums as a result, enough to share with a friend, and enough to get me scratching my head as to what to make with all of this fruit!

I picked my first batch of plums at night to avoid the terrible heat of the day, so when I got home, the first thing that came to mind was breakfast. So I dusted off my old red-and-white checkered Better Homes and Gardens Cookbook that I've used for years, and turned to my trusty old recipe for fruit coffeecake.

This recipe will work with many kinds of fruit and (I believe) any kind of flour. I prefer to use a mixture of whole grain flours, like whole wheat pastry, oat and spelt flours. No matter what fruit or flour I choose, this basic recipes has always worked well for me over the years. The original recipe calls for a streusel topping, but.... I tend to believe that breakfast should have nutritional value and go easy on the sugar. I just sprinkle the top with a little coarse/turbinado sugar for texture. Leftovers freeze well. Dig in!


Fruit Coffeecake

1.5 c. chopped plums (or any stone fruit, berries, apples, etc.)
1/4 c. water
1/4 c. sugar
2 T. cornstarch
1.5 c. flour of your choice
3/4 c. sugar
1/2 tsp. baking powder
1/4 tsp. baking soda
1/4 c. canola oil (or other neutral oil)
1 beaten egg
1/2 c. buttermilk
1/2 tsp. vanilla
Coarse sugar

In a medium saucepan combine fruit and water. Bring to boiling; reduce heat. Simmer, covered, for 5 minutes or until fruit is tender. Combine the 1/4 c. sugar and cornstarch; stir into fruit. Cook and stir over medium heat till mixture is thickened and bubbly. Cook and stir 2 minutes more; set aside.

In a mixing bowl, combine the flour, remaining sugar, baking powder and baking soda. Set aside.

In another bowl, combine oil, egg, buttermilk, and vanilla. Add egg mixture all at once to dry mixture. stir just until moistened (batter should be lumpy). Spread half of the batter into an ungreased 8x8 baking pan. Spread fruit mixture over batter. Drop remaining batter in small mounds stop filling. Sprinkle with coarse sugar. Bake in a 350 oven for 40-45 minutes or until golden. Serve warm. Makes 9 servings.

Friday, July 13, 2012

Savory Apricot Dressing

Last year in a little bookshop in Ashland, Oregon, I bought this calendar for 2012:

Obviously, this calendar and I were perfect for each other. Every month spotlights a different food, how to grow it, and offers several recipes using that food. This month, July, focuses on the first stone fruit to ripen each summer: apricots.

The author shared several great sounding ideas for using apricots, including one for a Savory Apricot Dressing. Usually I stick with my trusty and reliable vinaigrette dressing, but lately I've been a little burnt out on that standby. I even bought some store-bought dressing in a fit of boredom one day. Expanding my salad dressing repertoire struck me as an excellent idea.

And what a dressing it was! A golden color with specks of basil from my garden, the surprisingly creamy dressing had a great balance of sweet/tangy/savory and I happily used it on salads for several days in a row. It is the kind of condiment so tasty that you use it as an excuse to eat more vegetables- always a good thing as far as I'm concerned.

Savory Apricot Dressing

1/2 c. fruity olive oil
1/4 c. rice or cider vinegar
1/2 c. chopped ripe apricots
1/4 c. shredded basil
1 clove garlic, chopped
2 tsp. maple syrup or honey
1 tsp nutritional yeast (optional)
1/2 tsp. sea salt
1/4 tsp. smoked paprika

In a blender or food processor, combine all ingredients and puree until fairly smooth. Makes about 1 1/4 cups. Refrigerate leftovers in a tightly sealed jar for up to 3 days.

Thursday, July 5, 2012

Marionberry Pie: From Farm to Plate

This is a story about a pie. It began last month, with a trip to a local berry patch.


I discovered that the berry farm grew a wonderful seedless blackberry called a Marionberry.


And they just happened to be ripe and ready to be picked that week:

And so it was that I drove home with several baskets of Marionberries (and some late raspberries, for good measure).

Yesterday being the Fourth of July, I retrieved my berries from the freezer and got started on a festive holiday pie.

First, I tossed the berries with 1 c. sugar, 1 tsp. lemon zest, 1 tsp. lemon juice, and 1/4 c. tapioca. I simmered the mixture in a pot for about 5 minutes until slightly thickened. This will make a nice filling that won't get the bottom pie crust soggy. After removing from the heat, I spiked the filling with 1 tsp. vanilla (really good stuff I got in a modest, out of the way kitchen shop in New Orleans). Then I let it cool completely.


After pre-heating the oven to 375F, I put my bottom crust in the pie pan and filled it with my berry filling, then laid the top crust over that. I brushed the top crust with egg white and sprinkled it with coarse sugar.


Next, I baked it for 50 minutes, until the top was golden brown and the filling was bubbling.

I let it cool completely (important, to avoid a runny filling, and it takes about 6 hours to do so) before serving it that night....

With a scoop of vanilla ice cream! It was the best summer pie I've made yet.